Workspace Settings and Translation
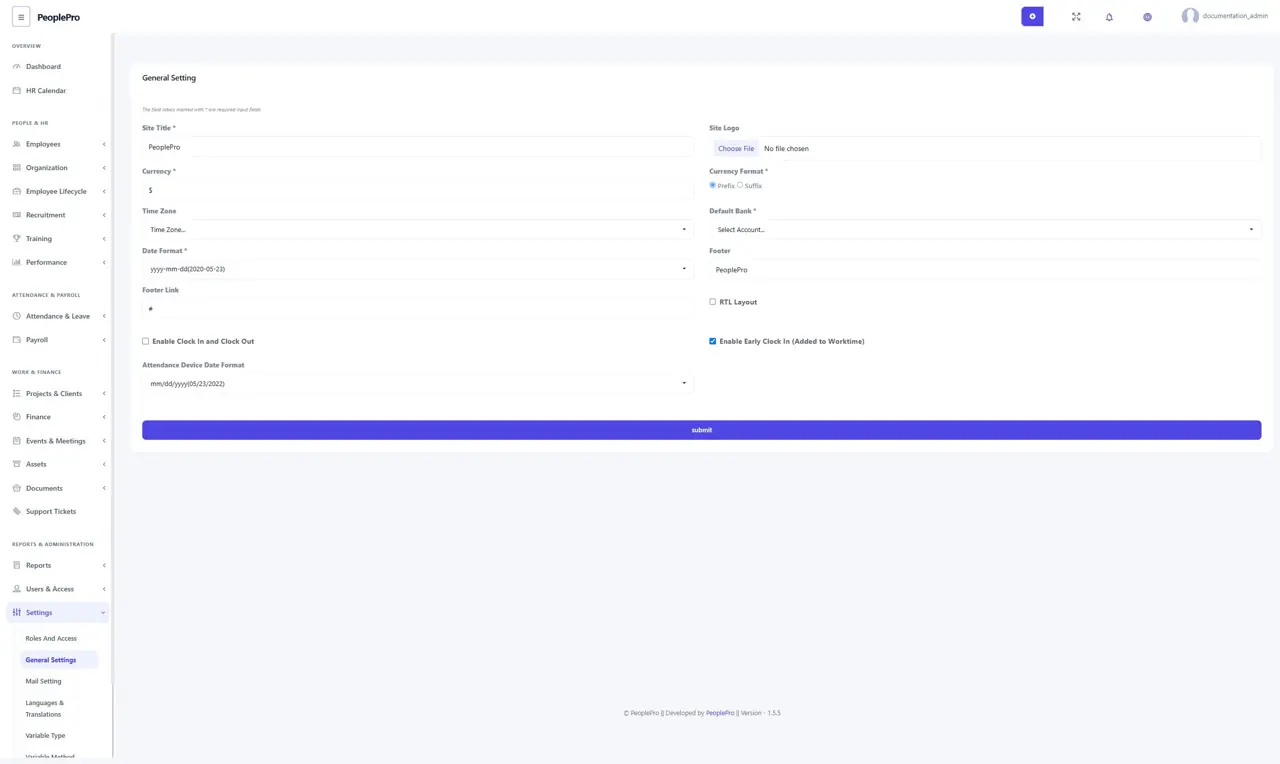
Open Settings > General Settings to maintain the site title and logo, currency and prefix or suffix format, time zone, default bank account, date format and footer.
Last updated: 16 November 2026 · Product version: not specified in the supplied guide
General settings
Open Settings > General Settings to maintain the site title and logo, currency and prefix or suffix format, time zone, default bank account, date format and footer. Review these choices before entering regular records. Set the time zone to match your business location and choose a date format your team will use consistently. Save the form and check the affected screens.
Attendance and layout preferences
General Settings also includes RTL Layout, Enable Clock In and Clock Out, Enable Early Clock In and Attendance Device Date Format. Turn on right-to-left layout when it suits your working language. Decide whether early clock-in time should contribute to work time according to your policy. The attendance device format must match device import files; it is separate from choosing a language.
Outgoing mail settings
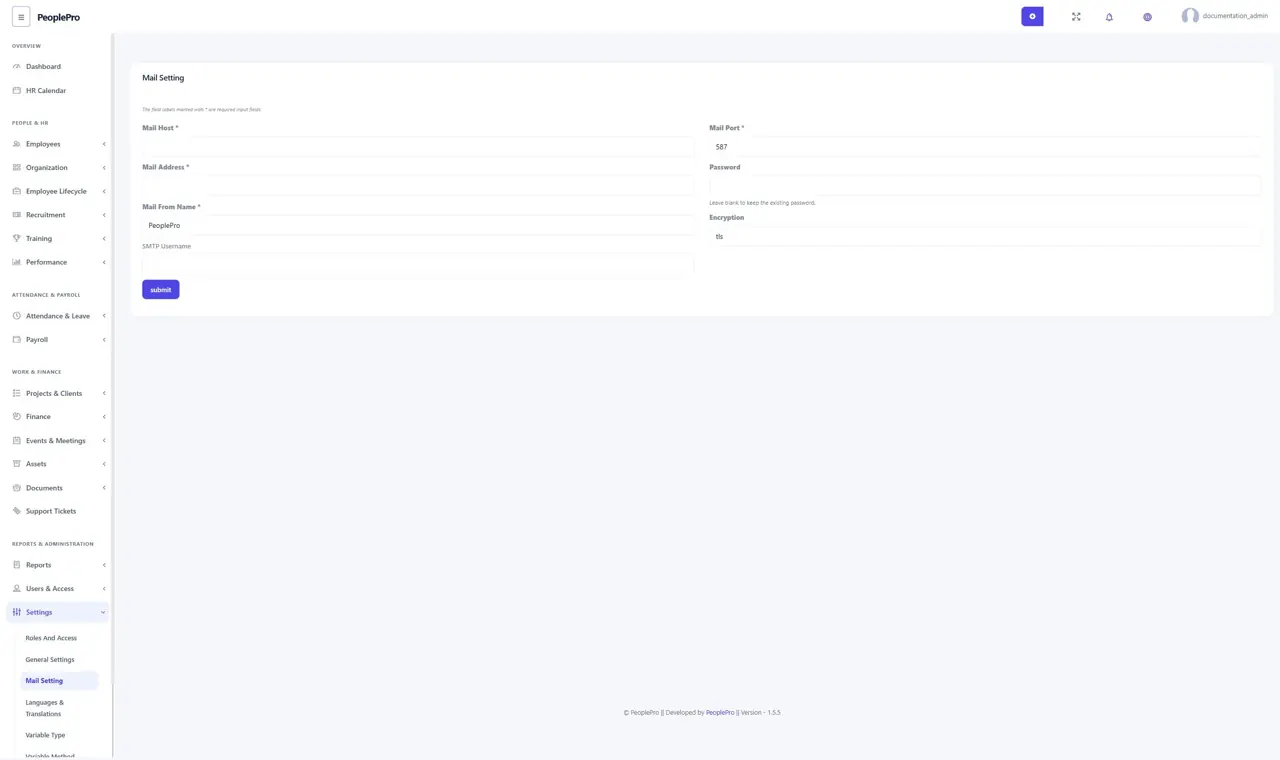
Open Settings > Mail Setting and enter the SMTP details supplied by your mail provider. Mail Host is the outgoing server, Mail Port and Encryption must match the provider, and SMTP Username and Password identify the sending account. Mail Address and Mail From Name control the sender shown to recipients. Leave the password blank when you want to keep the saved password. Save, then verify a normal application email before relying on outgoing notifications.
Languages and translation overview
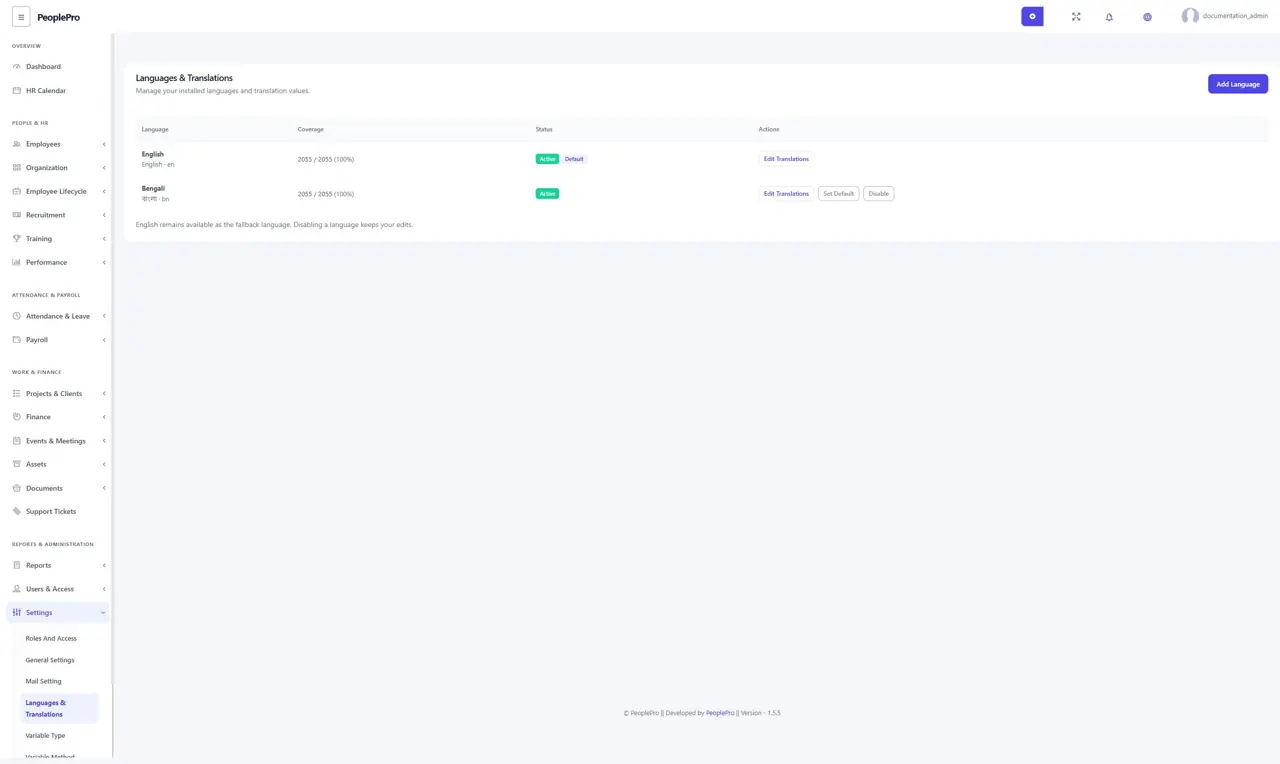
Open Settings > Languages & Translations to manage installed languages. A fresh installation starts with English. The list shows coverage, active status and the default language. English stays available as the fallback. Additional languages come from the supplied language catalog; users choose from that catalog rather than creating arbitrary new language packs.
Add a supplied language
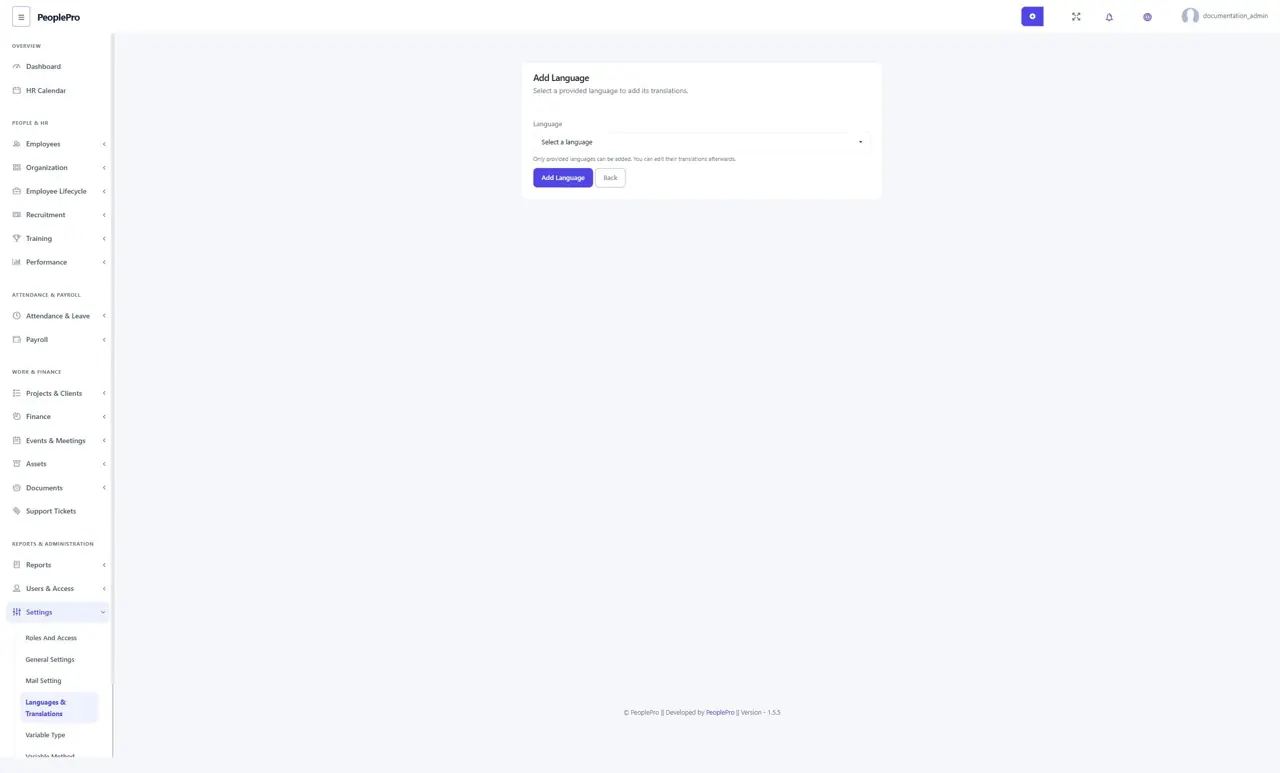
Select Add Language, choose a language from the provided dropdown and submit the form. PeoplePro adds that pack's translation values to the workspace database. Return to the language list to review its coverage and actions. A language already installed is managed from the list instead of being installed again.
Edit translation values with instant search
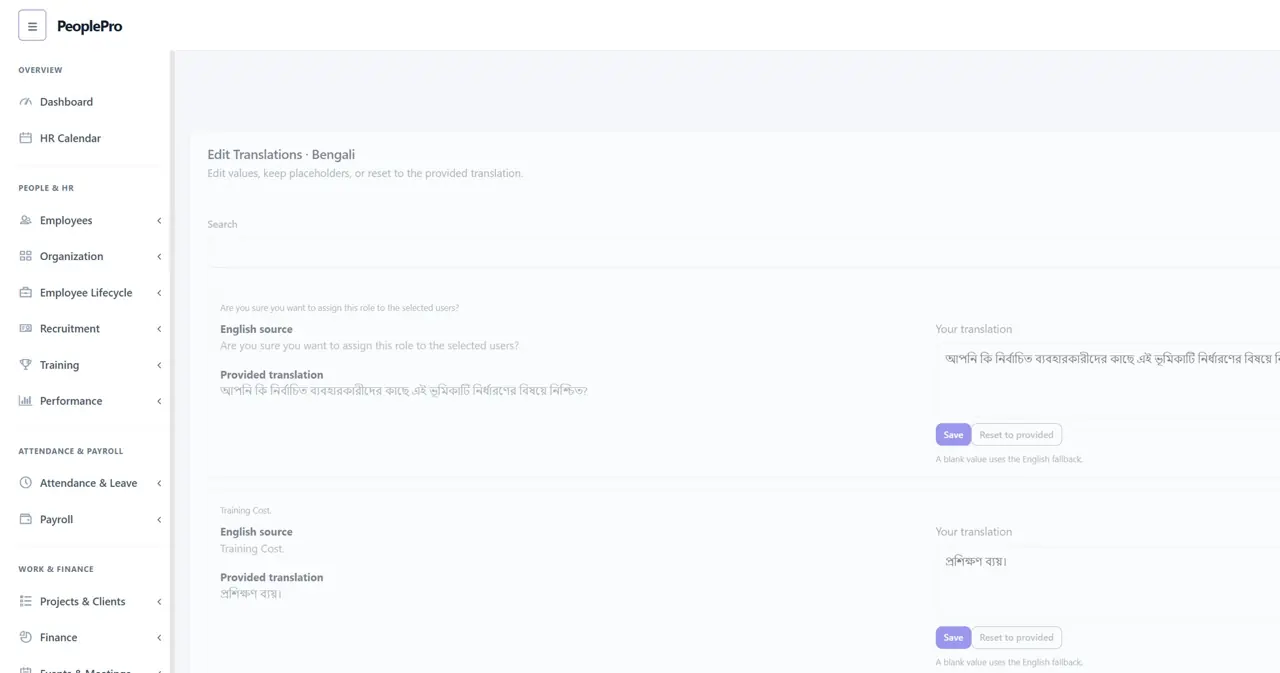
Select Edit Translations beside an installed language. Type a word or phrase in Search to narrow the results as you type, without a separate search submission. Edit the translation value for the intended entry and use the save control offered by the form. Preserve placeholders such as :name or :count exactly when they appear. Test the affected screen after saving an important phrase.
Default language and individual language switching
Set Default chooses the workspace language used when no individual language choice applies. Users can switch among active installed languages from the top-bar language menu. Switching the interface language does not translate employee names, policy text or other content entered by users. Disable hides a language from normal selection while keeping its saved edits; English remains available for missing translations.
Variable types
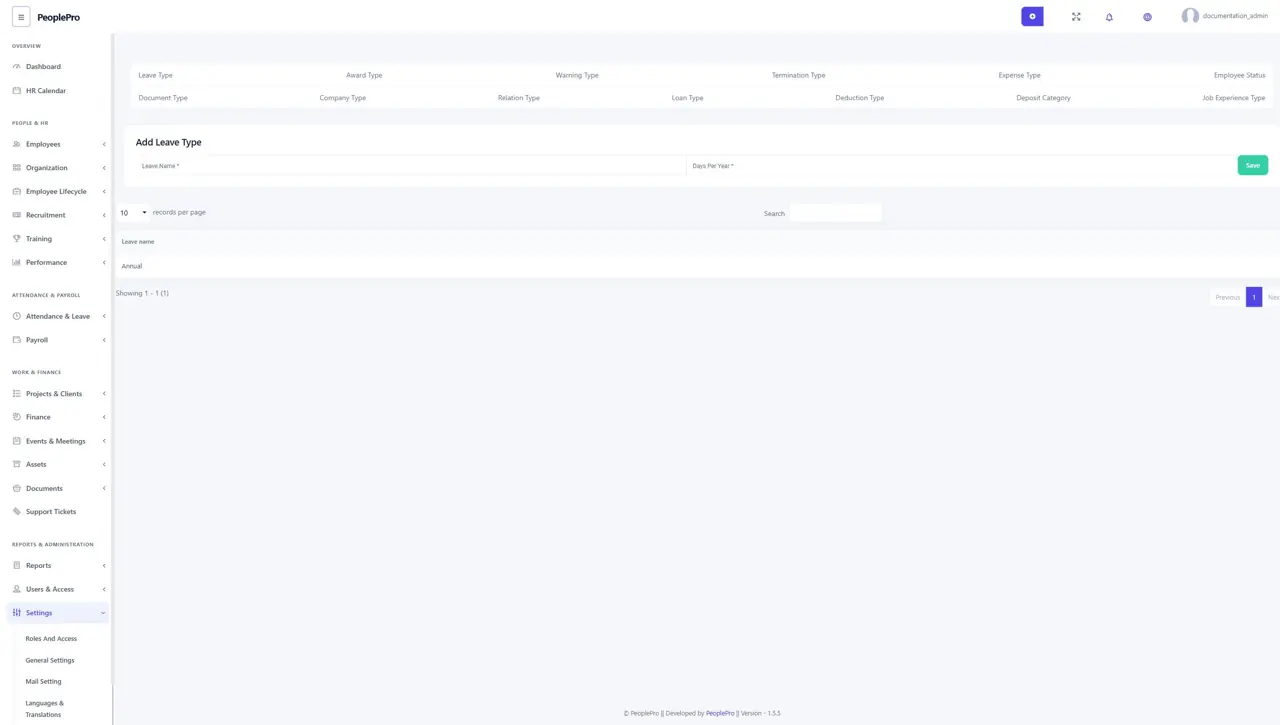
Open Settings > Variable Type to maintain reusable choices for leave, awards, warnings, terminations, expenses, employee status, document types, company types, relationships, loans, deductions, deposit categories and job experience. Select the relevant tab, add or edit its values, and save. These values populate related forms, so use consistent names and avoid removing a value still needed by existing records.
Variable methods
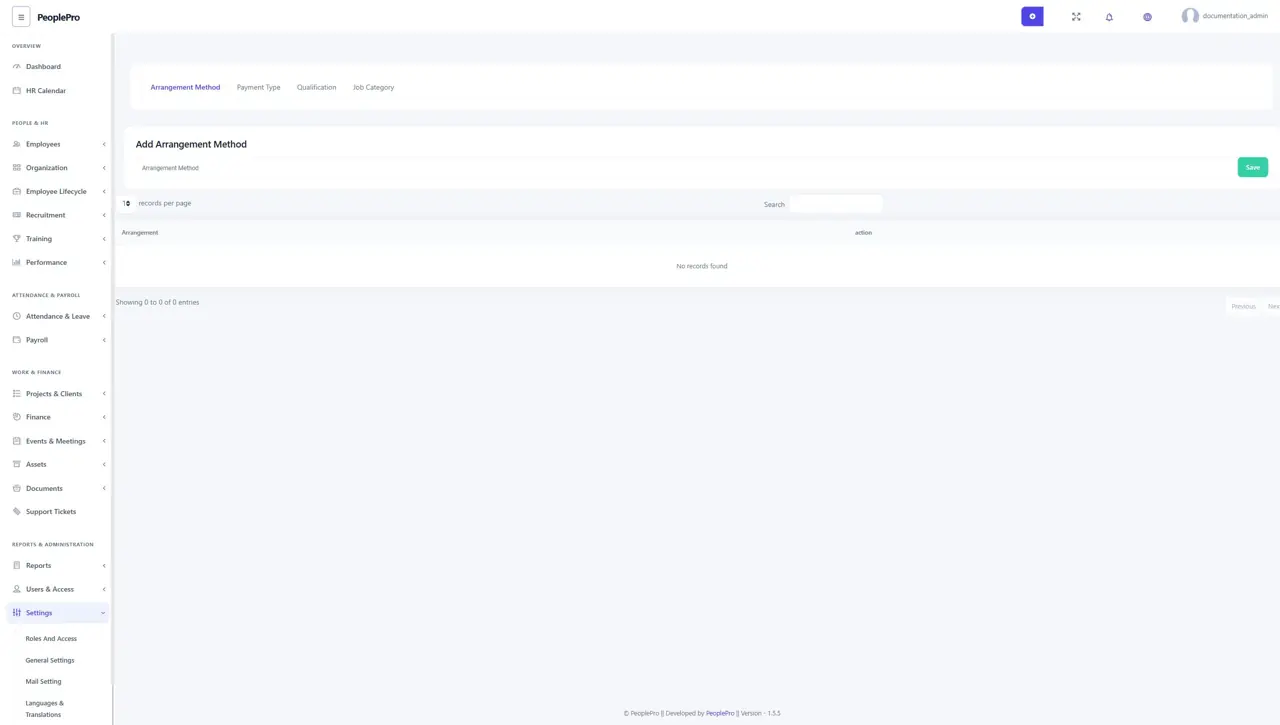
Open Settings > Variable Method to maintain the arrangement methods, payment types, qualifications and job categories used by related forms. Choose the relevant tab and add or maintain its entries. Define these choices before creating records that depend on them, especially before an employee or recruitment import.
IP settings for attendance
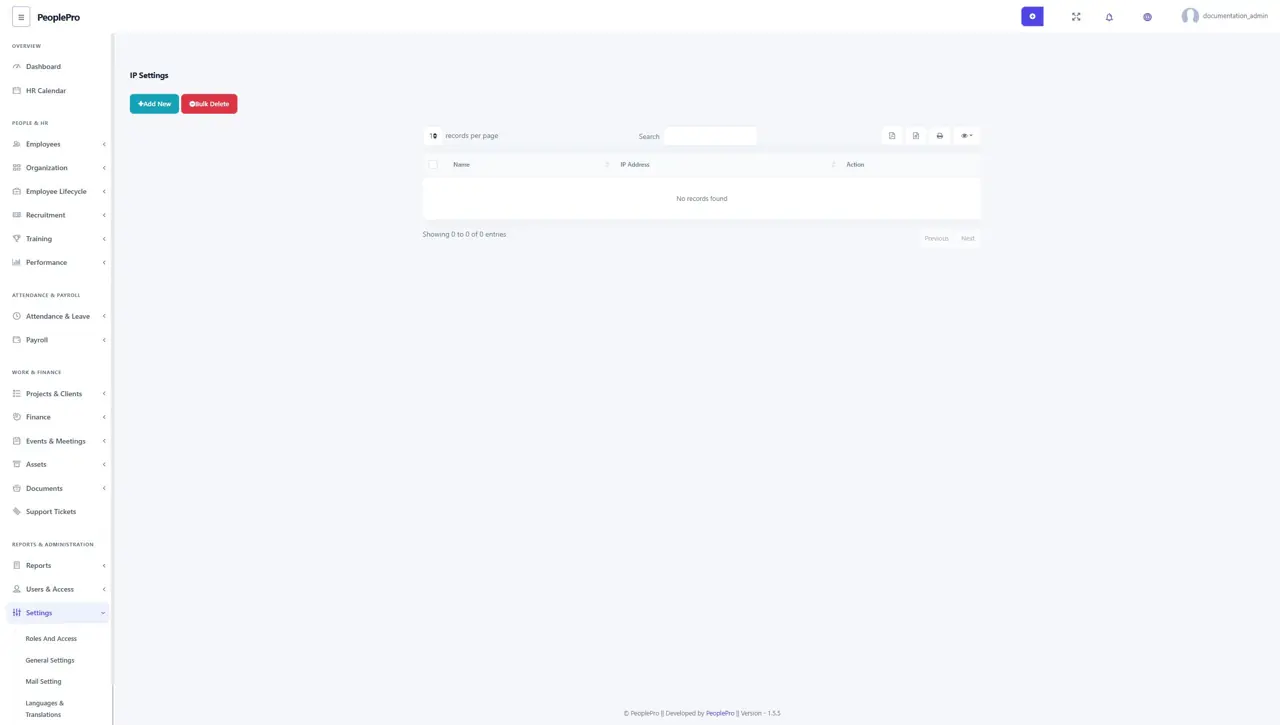
Open Settings > IP Settings to maintain the office public IP addresses used for IP Based attendance. Add a recognizable name and the permitted address, then save. Select IP Based as the employee's attendance type when this restriction should apply. If the office internet provider changes the public IP, update the permitted address before employees try to record attendance.
Find and select role permissions
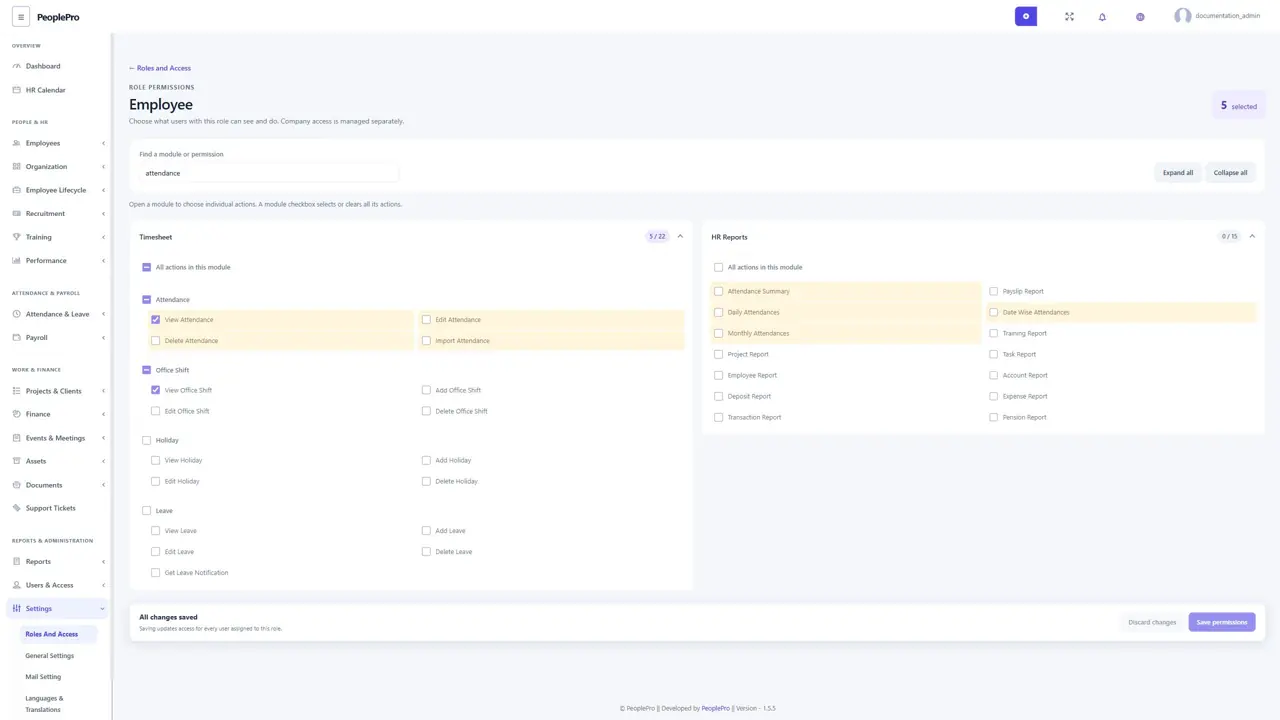
Open Settings > Roles and Access and choose Permission beside the role you want to manage. Each module appears in its own expandable section. Type a module or action name in Find a module or permission; matching modules open automatically and matching actions are highlighted. For example, searching for attendance brings Timesheet and the relevant HR Reports into view. Clear the search to return to the full list. Open a module heading to choose individual actions such as View Attendance or Import Attendance. A module checkbox selects or clears all its available actions, including actions that do not match the search. A dash in a checkbox means that only part of the group is selected. Numbers beside each module show its selected permissions and total permissions. Use Expand all or Collapse all when reviewing several modules.
Save or discard permission changes
The bar at the bottom stays within reach while you review permissions. Unsaved changes tells you that your current selections have not been applied. Choose Save permissions to apply them to everyone assigned to this role, then check the success message. Save is available only after you change a selection. Choose Discard changes to return to the last saved selection. Leaving with unsaved changes prompts you to review them. Company access separately controls which company records a user can work with. The built-in administrator retains full access; changing its stored selections does not restrict the administrator. In a SaaS tenant, actions excluded by the subscription package are marked Not included in your package and cannot be enabled here.
General Settings: Site Title and Site Logo
Open Settings > General Settings. Use Site Title for the workspace name displayed by PeoplePro. Use Site Logo to select the image that represents your organization. Keep the title recognizable and choose a clear logo. Save the form, then check the login page and application header to see how the branding appears.
General Settings: Currency and Currency Format
Open Settings > General Settings. Enter the currency symbol or label used by your organization and choose Prefix or Suffix. Prefix places the currency before an amount, while Suffix places it afterwards. This controls display formatting; it does not convert existing amounts between currencies. Review payroll, invoices and finance screens after changing it.
General Settings: Time Zone and Date Format
Open Settings > General Settings. Choose the time zone matching your operating location and a date format your team can recognize consistently. Attendance, working dates and reports depend on using the intended time zone. Import files must follow the required date format. The separate Attendance Device Date Format controls how device export dates are read.
General Settings: Default Bank
Open Settings > General Settings. Select the organization finance account that should be the default bank account. Create the account in Finance > Accounts List first if the intended choice is missing. Review the account on individual payroll or finance forms rather than assuming the default is correct for every payment.
General Settings: Footer and Footer Link
Open Settings > General Settings. Footer supplies the text displayed at the bottom of application pages. Footer Link supplies the destination associated with that text. Use your intended organization name and a valid web address, then save and check the bottom of a page. These settings are separate from recruitment Home, About and Contact content.
General Settings: RTL Layout
Open Settings > General Settings. Enable RTL Layout when a right-to-left layout suits your working language. Save and review the navigation and forms. This changes the page direction; install and select the desired language separately from Languages & Translations. Language translation values and the layout setting are different controls.
General Settings: Clock controls, early clock-in and device dates
Open Settings > General Settings. Enable Clock In and Clock Out to make the employee attendance controls available. Enable Early Clock In determines whether time before the scheduled shift start contributes to work time. Choose this according to company policy. Attendance Device Date Format must match the date pattern in device punch files before importing them.
Variable Type: Leave Type
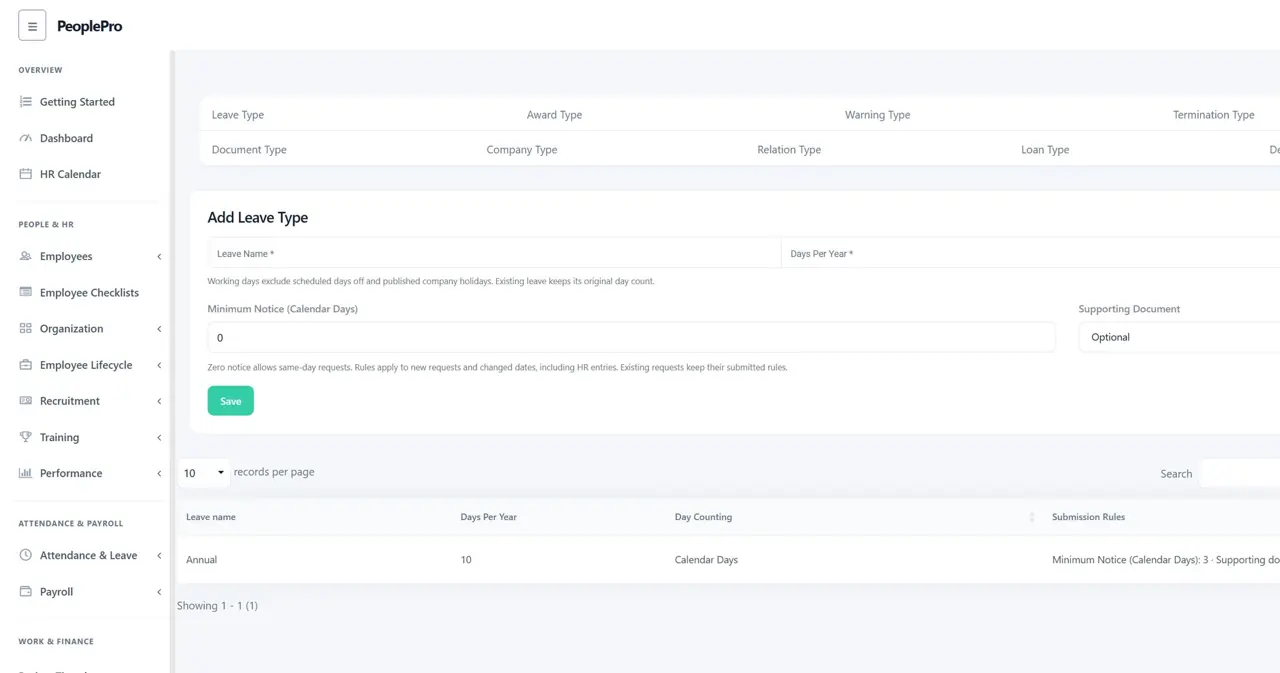
Open Settings > Variable Type > Leave Type. Enter the leave name and Days Per Year, then select Save. These choices are used for leave requests and the allowance shown in employee leave records. Define allowances according to company policy before employees begin applying. Use the list's Edit action to update an existing entry; review whether records already use a value before removing it.
Variable Type: Award Type
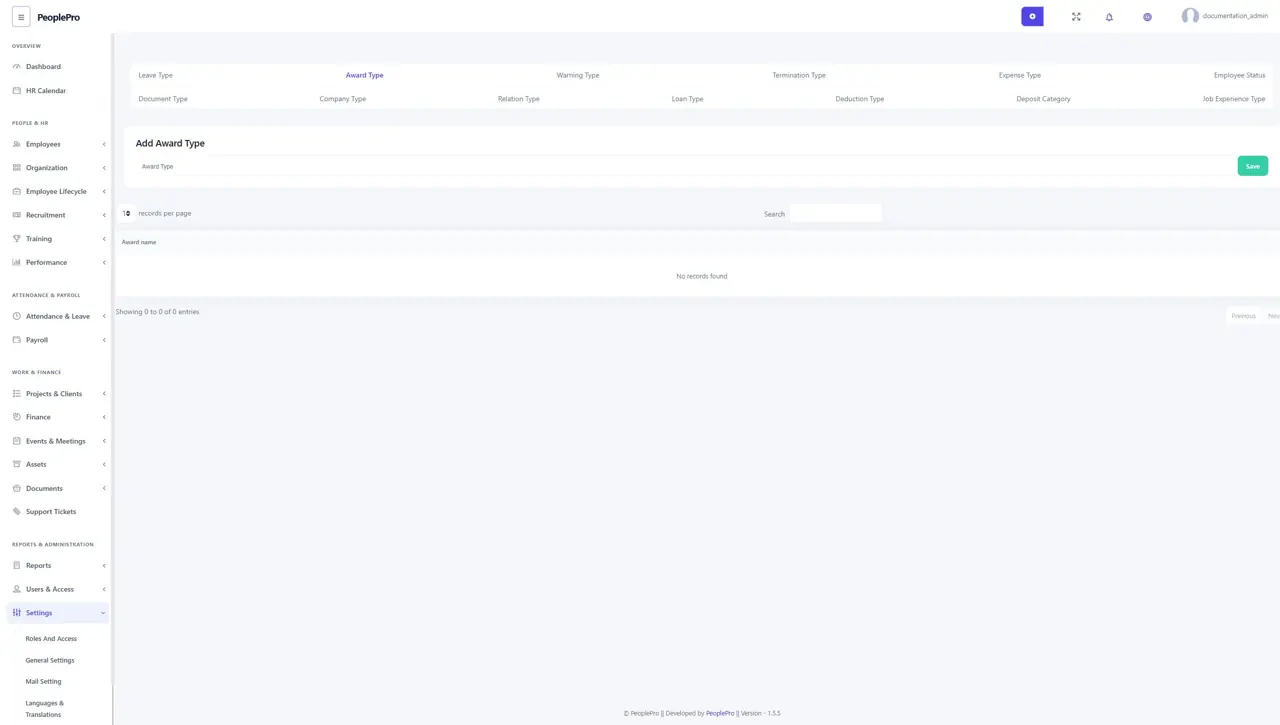
Open Settings > Variable Type > Award Type. Enter a reusable award name, such as Employee of the Month, and save. Choose that type when recording an award in Employee Lifecycle. The type names the recognition category; the employee, date and any amount belong to the award record. Use the list's Edit action to update an existing entry; review whether records already use a value before removing it.
Variable Type: Warning Type
Open Settings > Variable Type > Warning Type. Enter the warning category name and save. HR selects it when creating a warning record. Use clear categories that match your organization's process; do not put an individual employee's warning description into the category name. Use the list's Edit action to update an existing entry; review whether records already use a value before removing it.
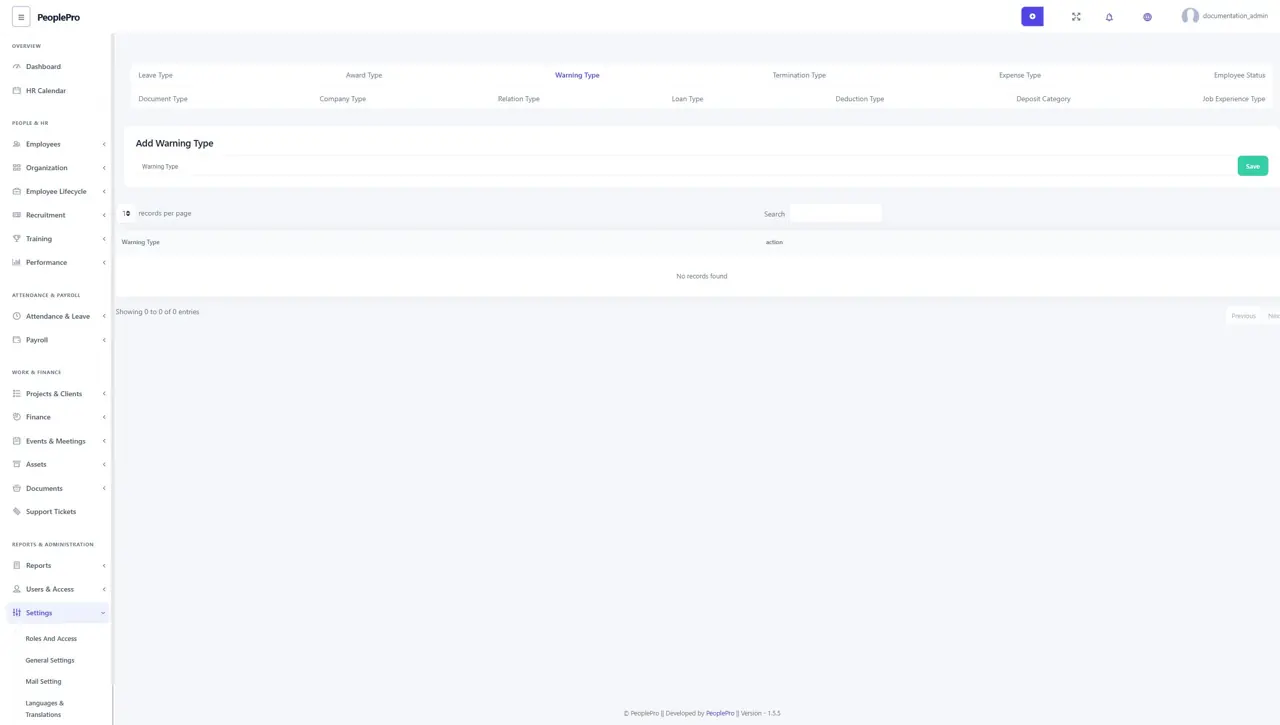
Variable Type: Termination Type
Open Settings > Variable Type > Termination Type. Enter the termination category used by your organization and save. Choose that type when recording a termination. The employee, effective dates and circumstances are entered on the termination record rather than in this reusable setting. Use the list's Edit action to update an existing entry; review whether records already use a value before removing it.
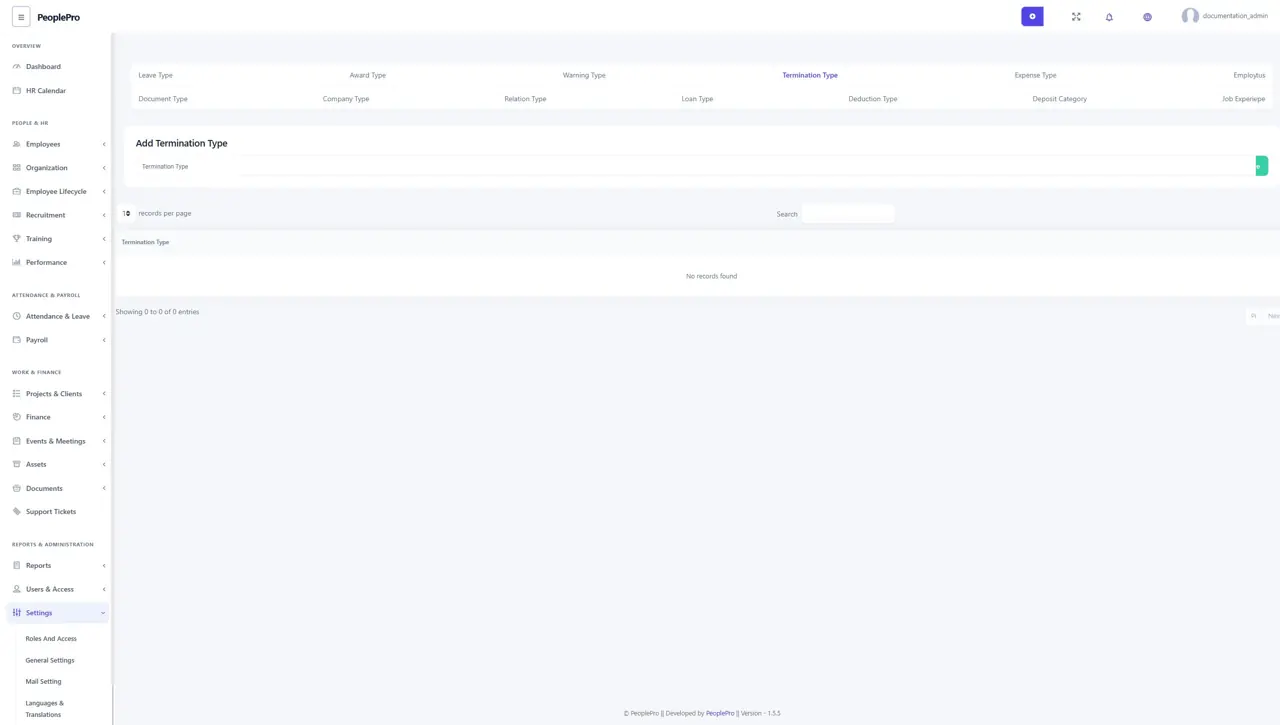
Variable Type: Expense Type
Open Settings > Variable Type > Expense Type. Choose the relevant company and enter the expense type, then save. These categories organize finance expenses and the Expense Report. Use distinct, consistent names such as Office Supplies or Travel Costs, and check the company assignment before saving. Use the list's Edit action to update an existing entry; review whether records already use a value before removing it.
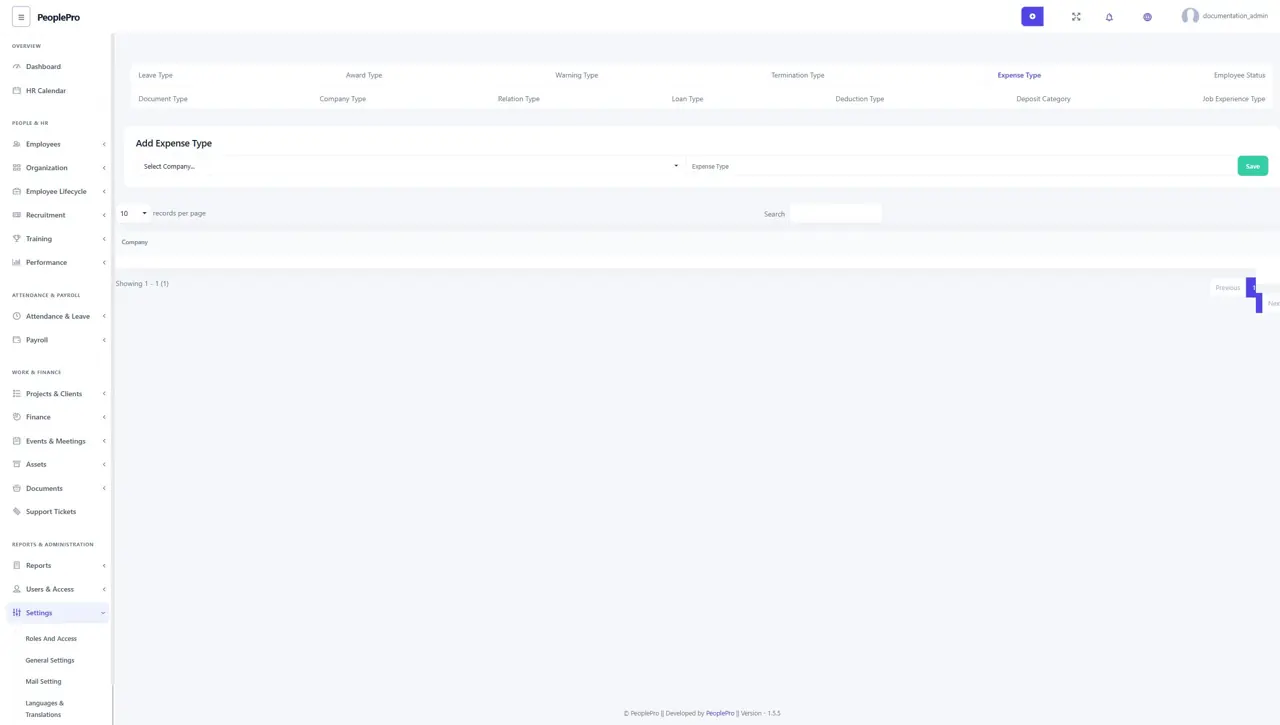
Variable Type: Employee Status
Open Settings > Variable Type > Employee Status. Add the employee status names your organization uses. Select the appropriate status in employee information when maintaining a person's employment record. An employment status label is separate from a user account's active setting and permission role. Use the list's Edit action to update an existing entry; review whether records already use a value before removing it.
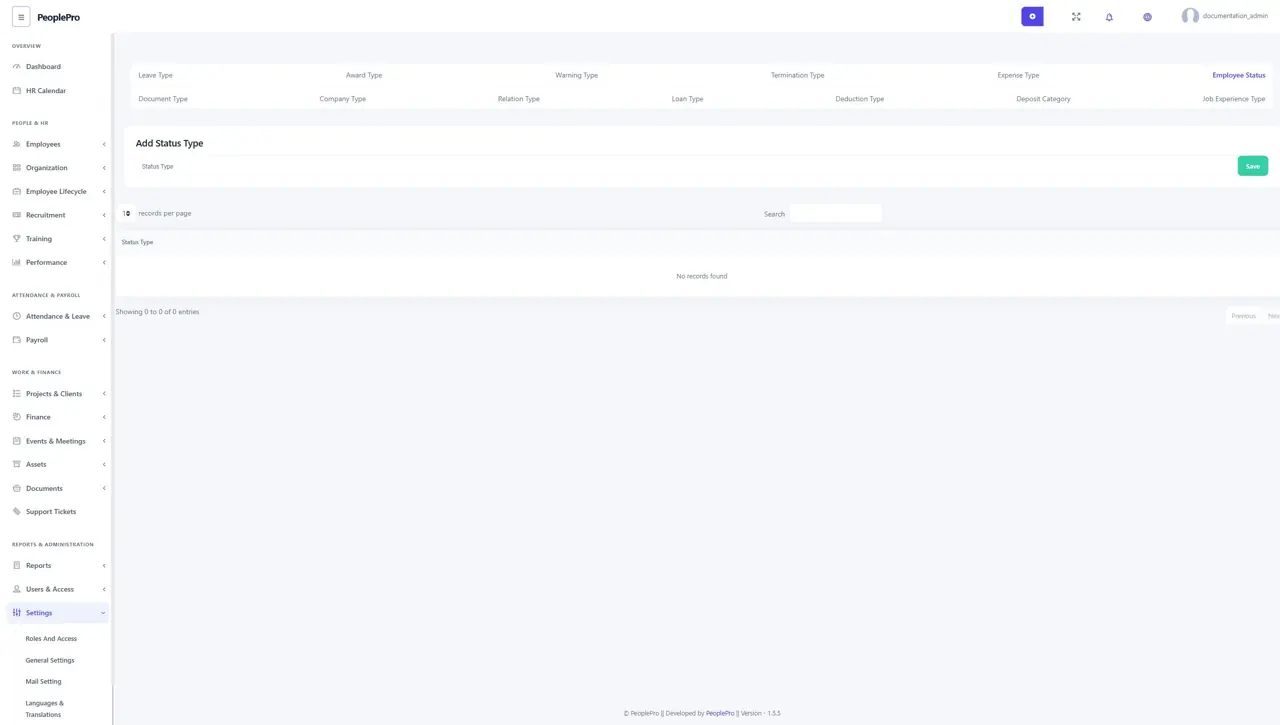
Variable Type: Document Type
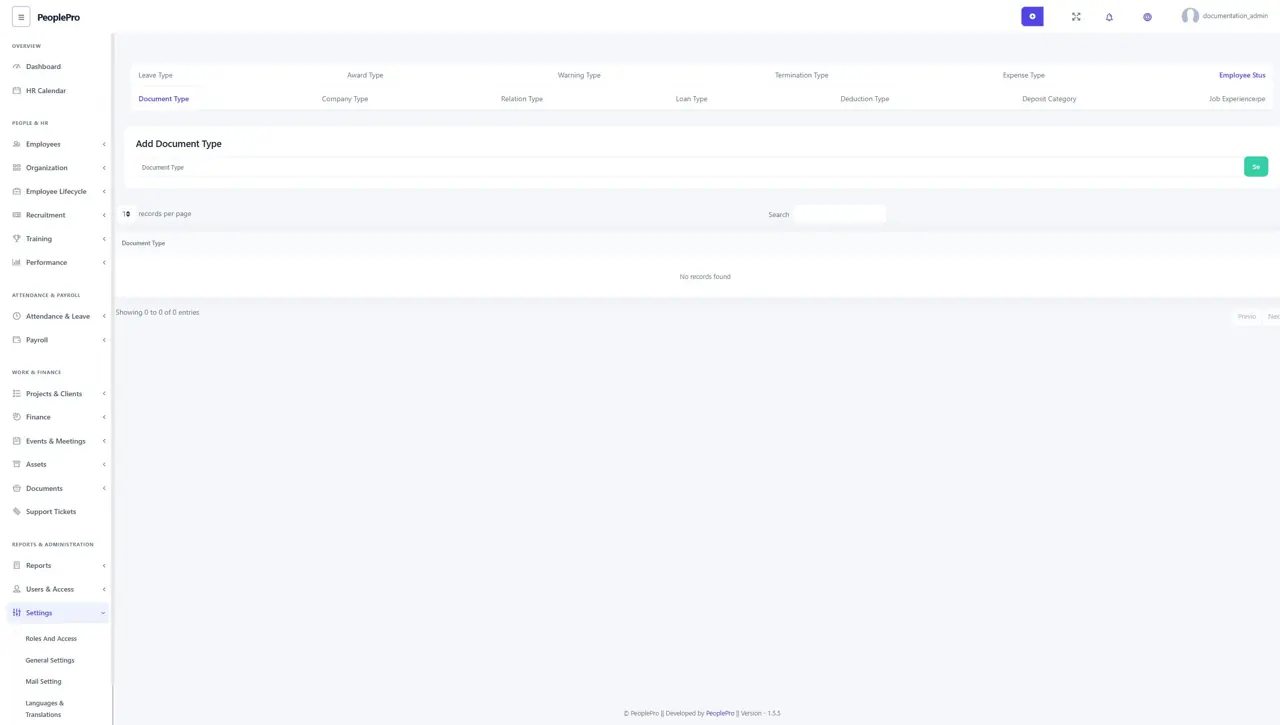
Open Settings > Variable Type > Document Type. Add the names of document categories needed for employee records. A clear type helps HR distinguish a contract, certificate or identity document when entering an employee document. This list defines labels; upload the actual file in the employee document form. Use the list's Edit action to update an existing entry; review whether records already use a value before removing it.
Variable Type: Company Type
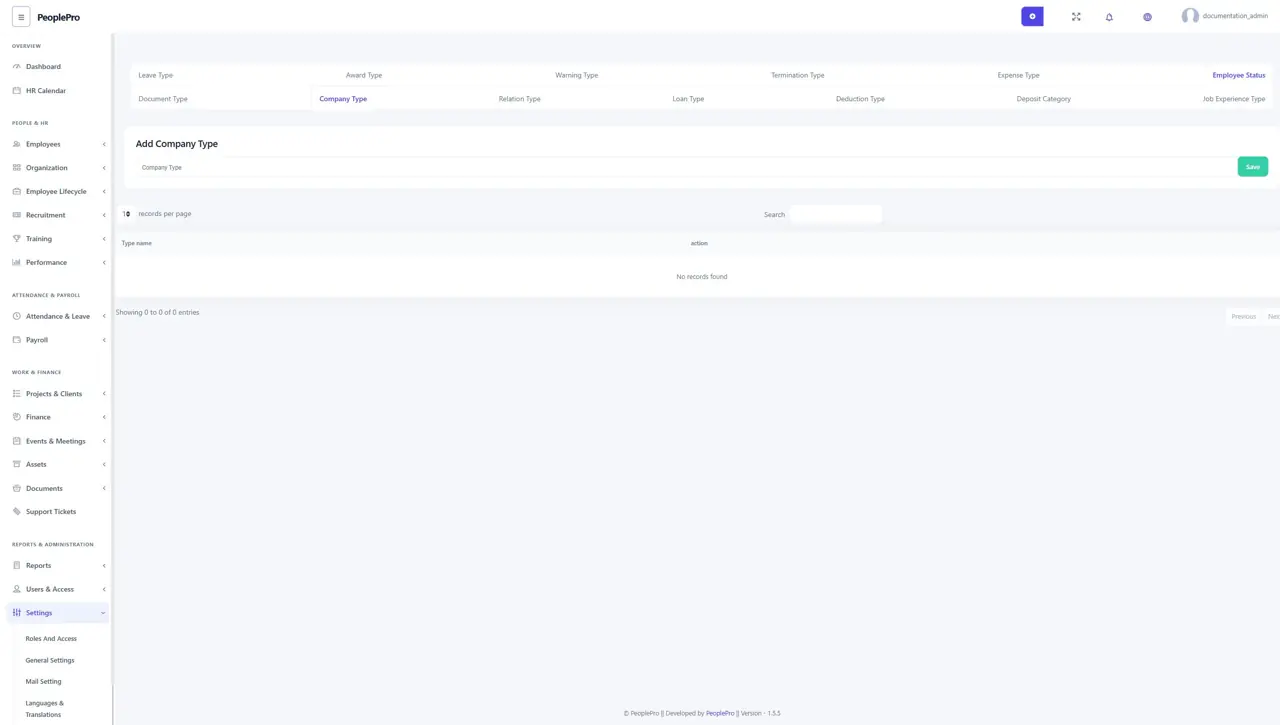
Open Settings > Variable Type > Company Type. Add the company classification names required by your organization, then save. These values support company classification in the relevant forms. Keep the names consistent rather than creating slightly different labels for the same kind of company. Use the list's Edit action to update an existing entry; review whether records already use a value before removing it.
Variable Type: Relation Type
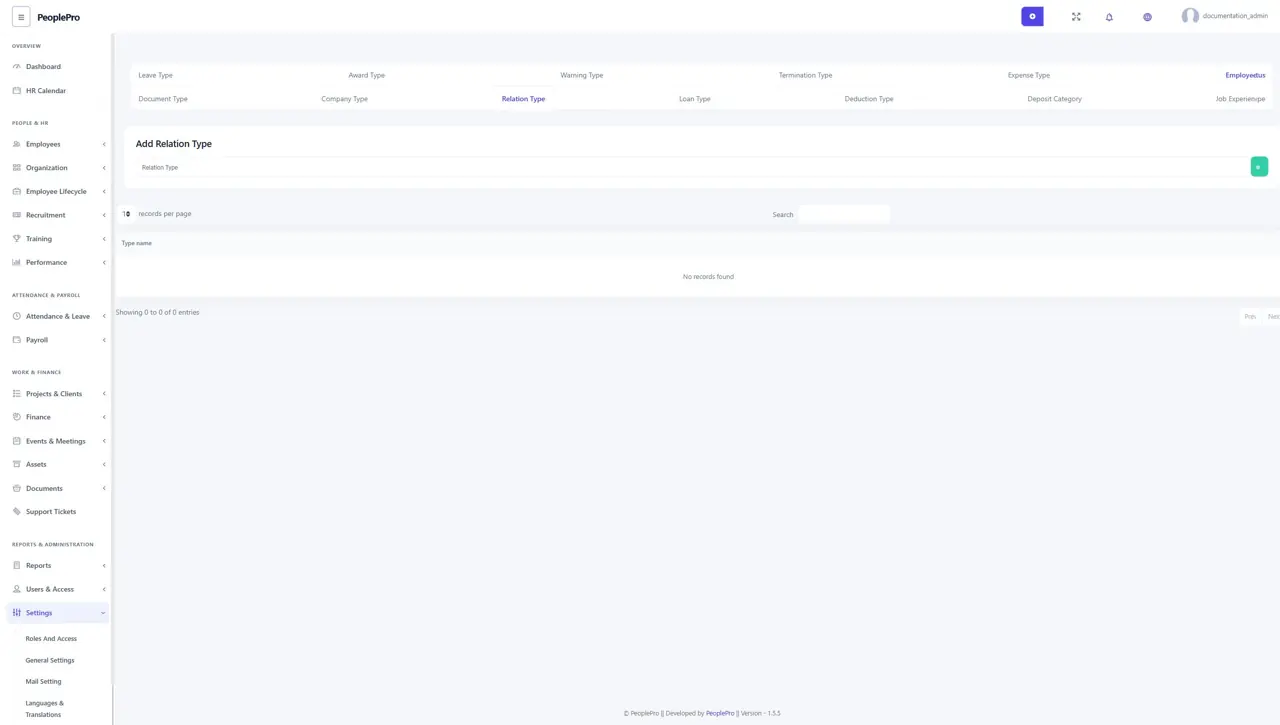
Open Settings > Variable Type > Relation Type. Add relationship labels needed for personal records, such as Spouse or Parent. Select the relevant relationship when completing the associated contact form. This setting defines the relationship name; the person's name and telephone number belong to the contact record. Use the list's Edit action to update an existing entry; review whether records already use a value before removing it.
Variable Type: Loan Type
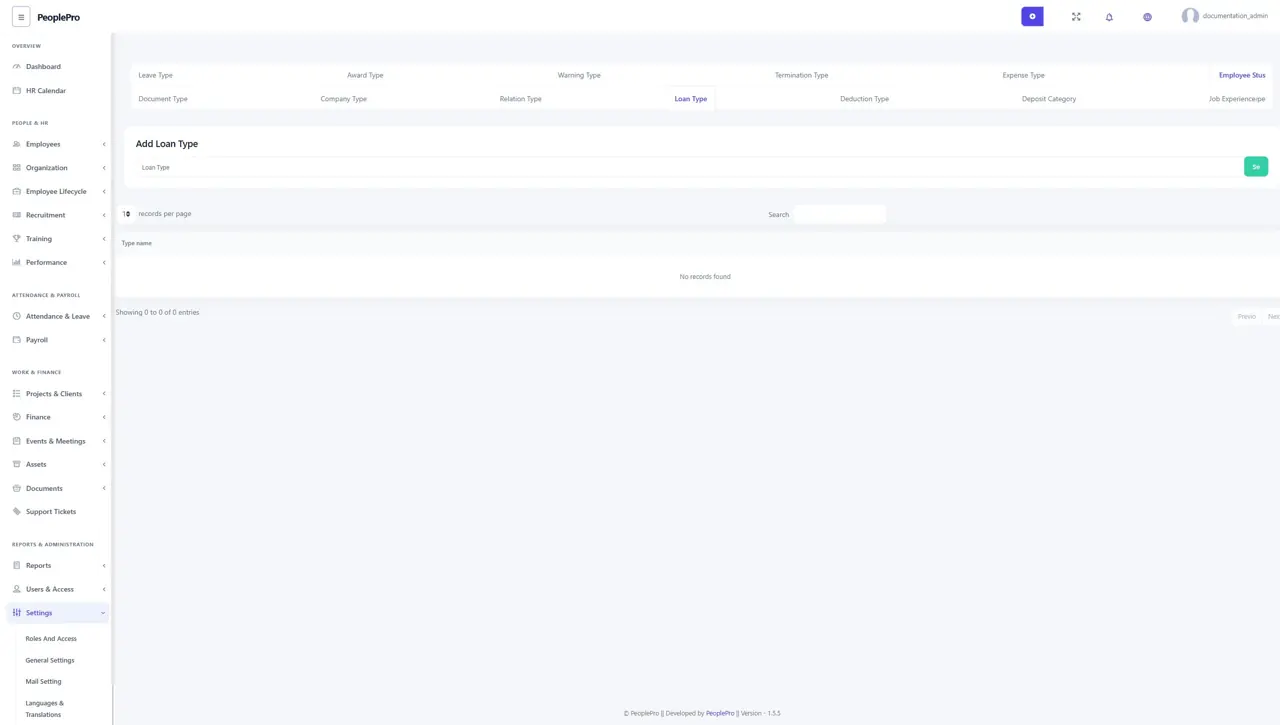
Open Settings > Variable Type > Loan Type. Add the loan category names used for salary-related loans. Select the type when recording an employee loan. The loan amount and applicable repayment details belong to the salary loan record, so a type should be reusable across employees. Use the list's Edit action to update an existing entry; review whether records already use a value before removing it.
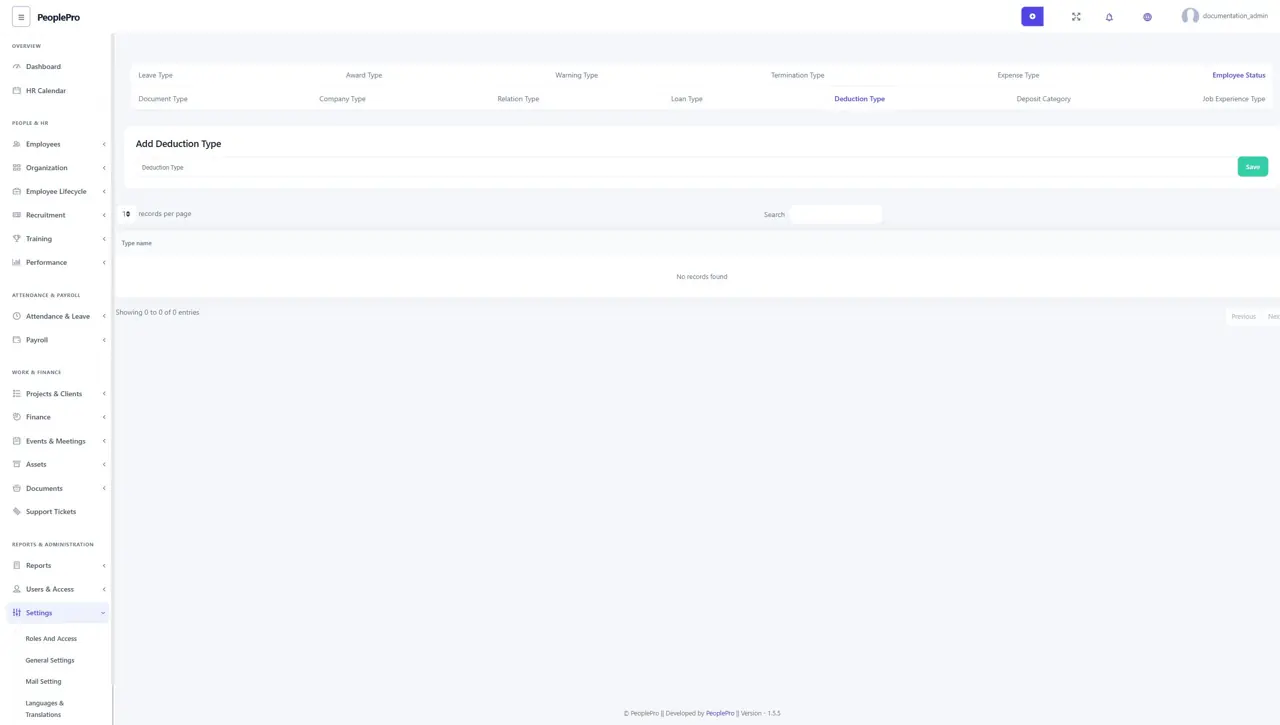
Variable Type: Deduction Type
Open Settings > Variable Type > Deduction Type. Add the deduction category names required for salary deductions. Use the appropriate type when entering the employee's deduction record. Review the actual amount and salary period separately before preparing payroll. Use the list's Edit action to update an existing entry; review whether records already use a value before removing it.
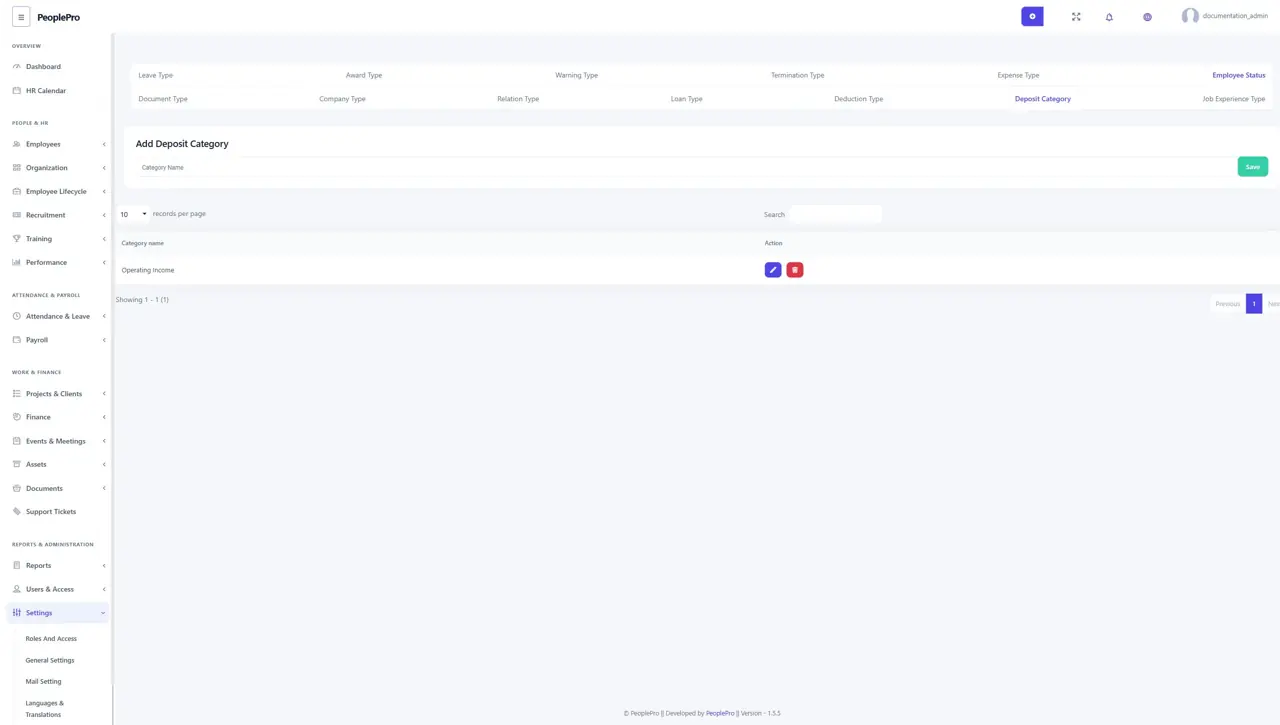
Variable Type: Deposit Category
Open Settings > Variable Type > Deposit Category. Add categories for incoming money, such as Operating Income. Select the relevant category when entering a finance deposit. Deposit Report can filter by category, so use consistent names that make income reporting useful. Use the list's Edit action to update an existing entry; review whether records already use a value before removing it.
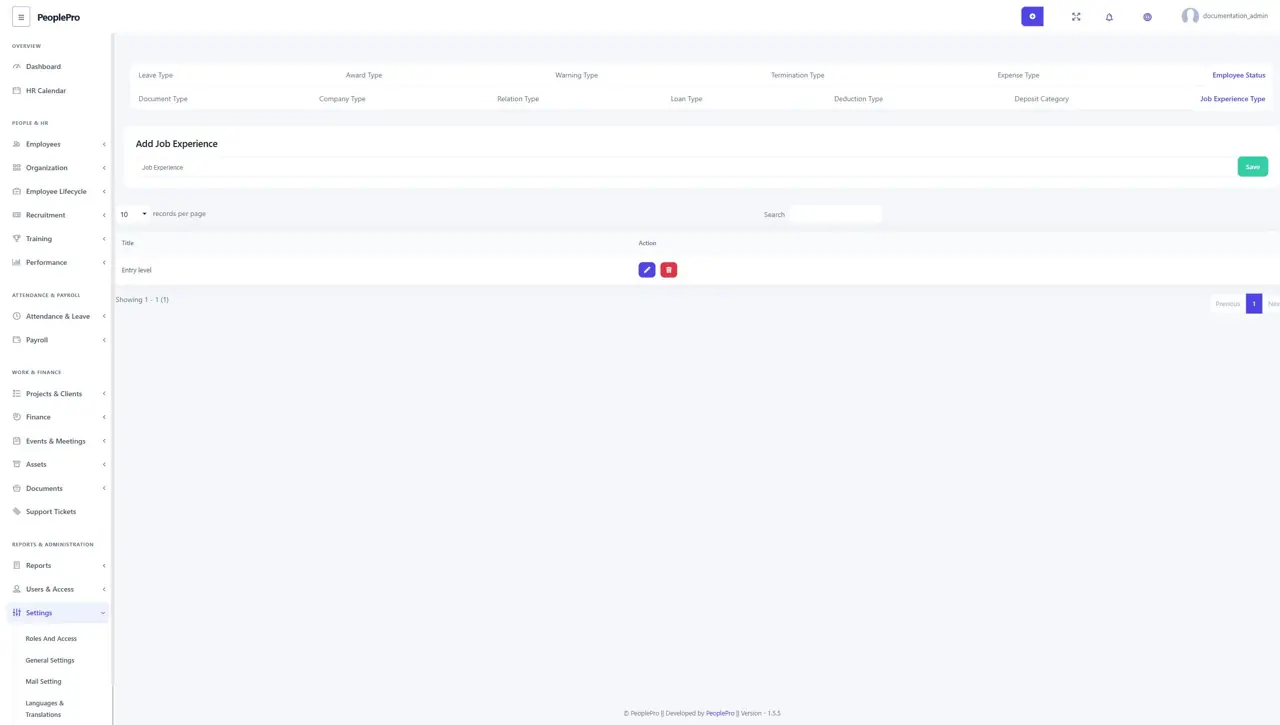
Variable Type: Job Experience Type
Open Settings > Variable Type > Job Experience Type. Add experience labels such as Entry Level or Experienced. Choose the relevant experience level in a job post. Keep this list focused on the level expected for a vacancy; a specific candidate's employment history belongs in their own records. Use the list's Edit action to update an existing entry; review whether records already use a value before removing it.
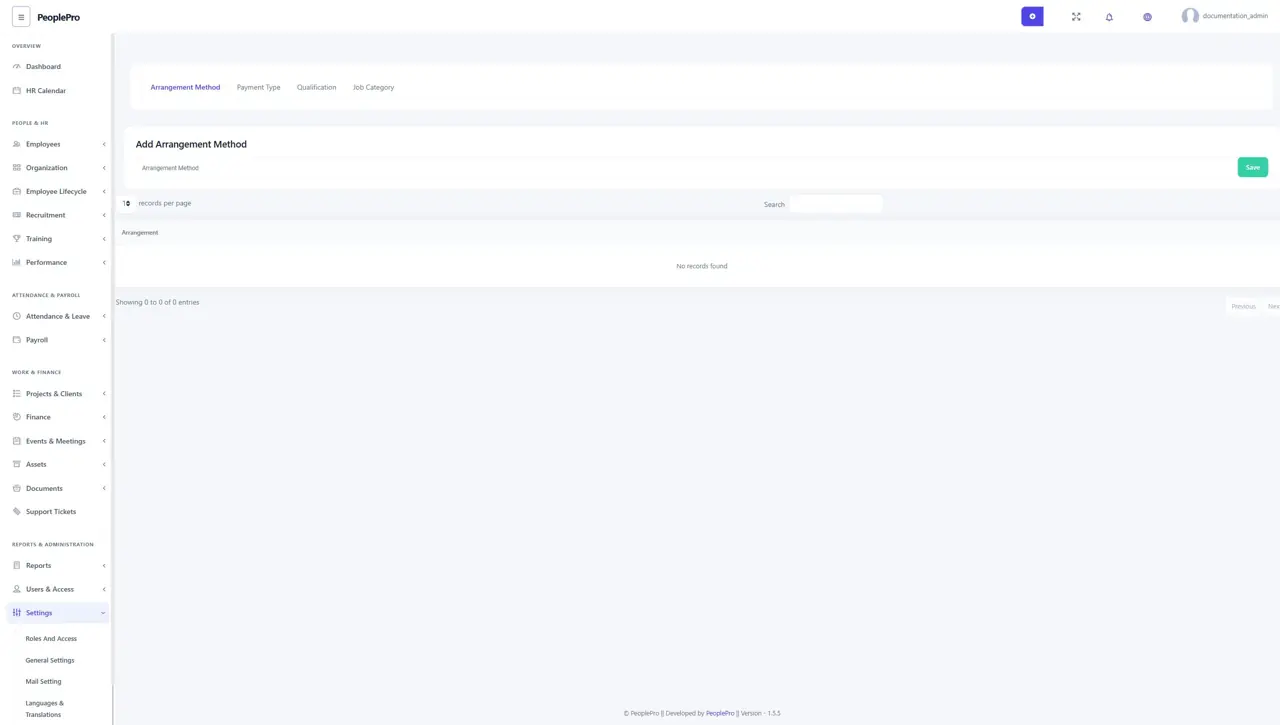
Variable Method: Arrangement Method
Open Settings > Variable Method > Arrangement Method. Define the travel arrangement options used by your organization, such as an arrangement handled by the company or employee. Enter the method name and save. Select the appropriate arrangement when completing a travel record.
Variable Method: Payment Type
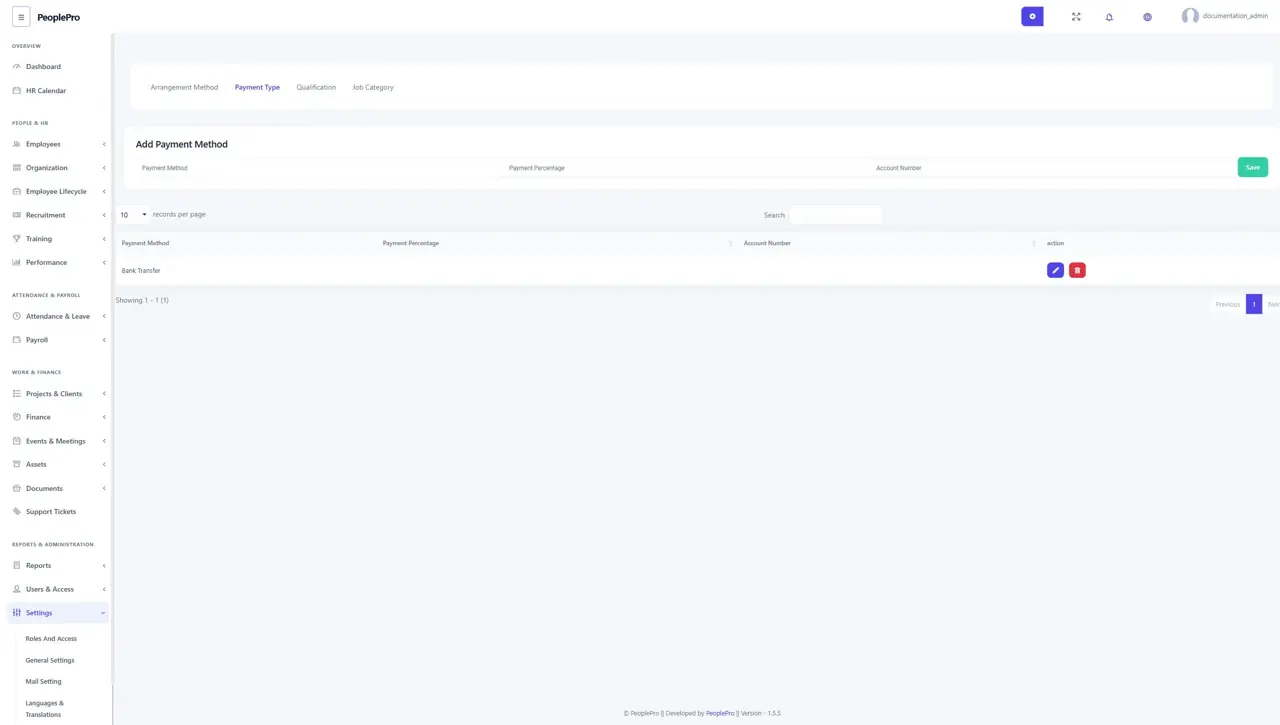
Open Settings > Variable Method > Payment Type. Enter the payment method name and the Payment Percentage and Account Number fields offered, then save. Use this list to maintain the choices offered by payment-related forms. Confirm the meaning and intended value with the person managing your finance setup before entering a percentage. This form does not configure a SaaS payment gateway.
Variable Method: Qualification
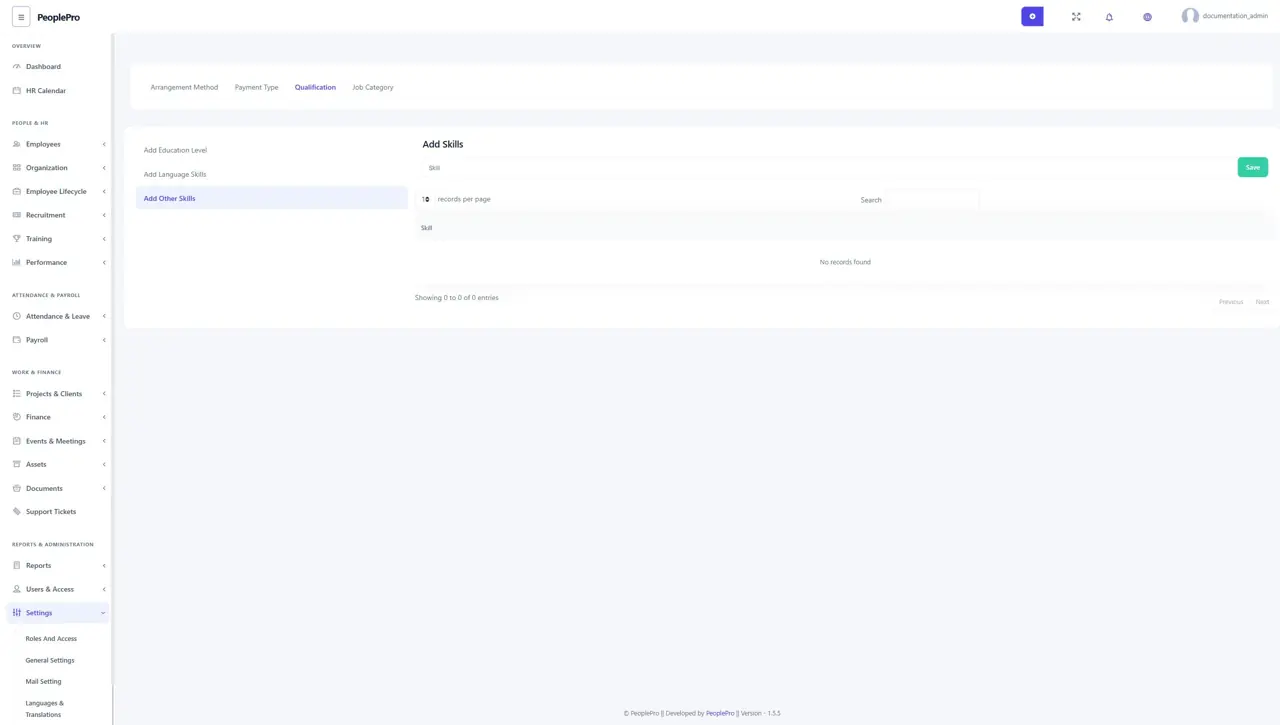
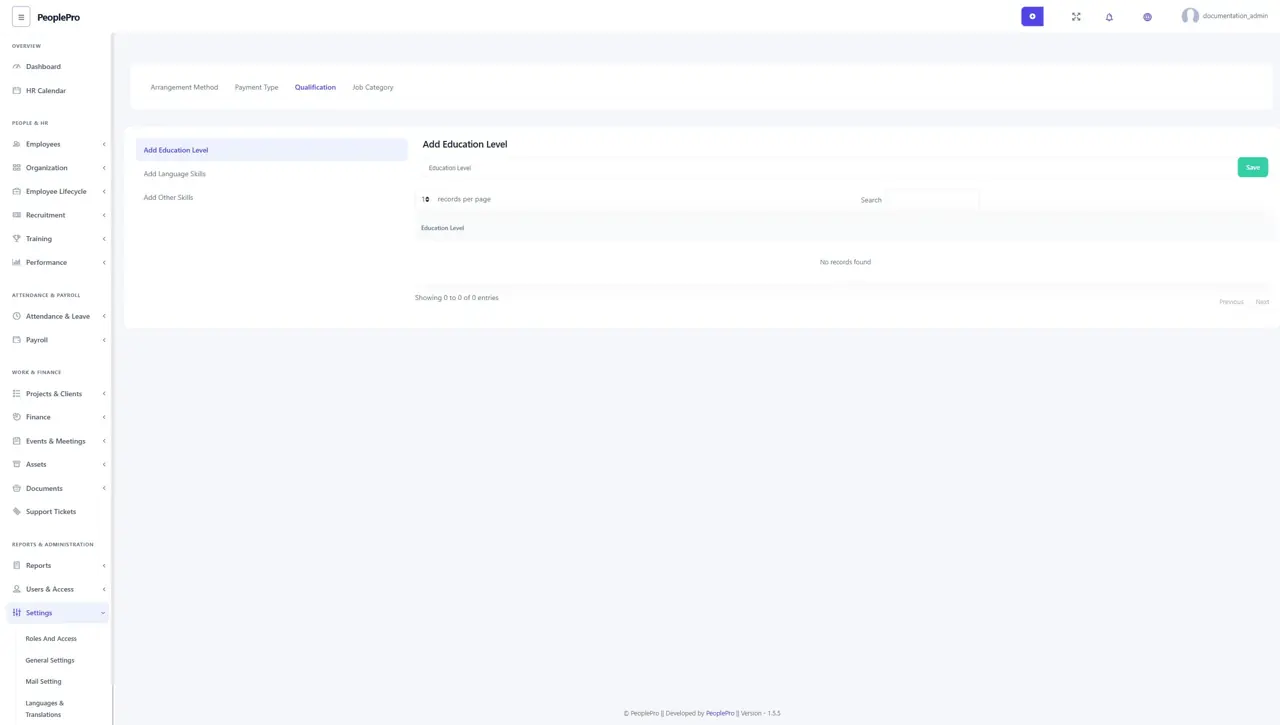
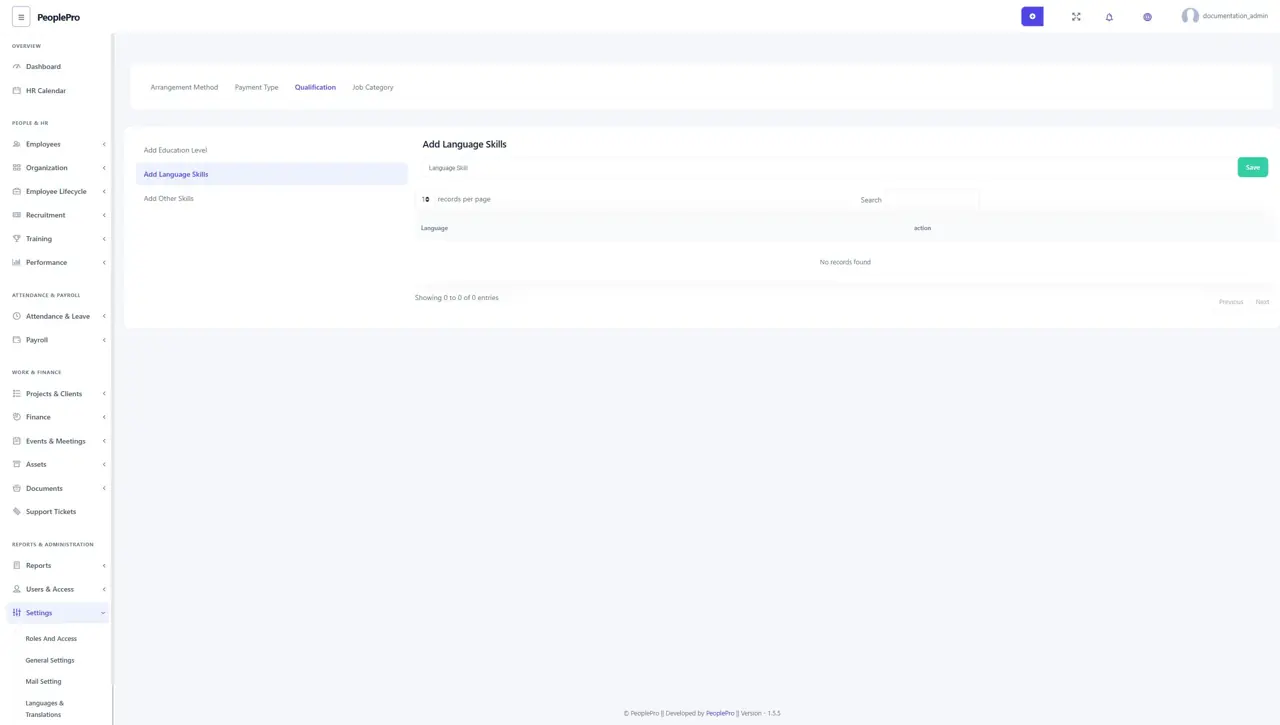
Open Settings > Variable Method > Qualification. This tab contains Education Level, Language Skills and Other Skills. Set up those reusable choices before maintaining employee qualifications. Choose the relevant inner tab to add or edit one category; uploading an employee's certificate remains part of that employee's record.
Variable Method: Job Category
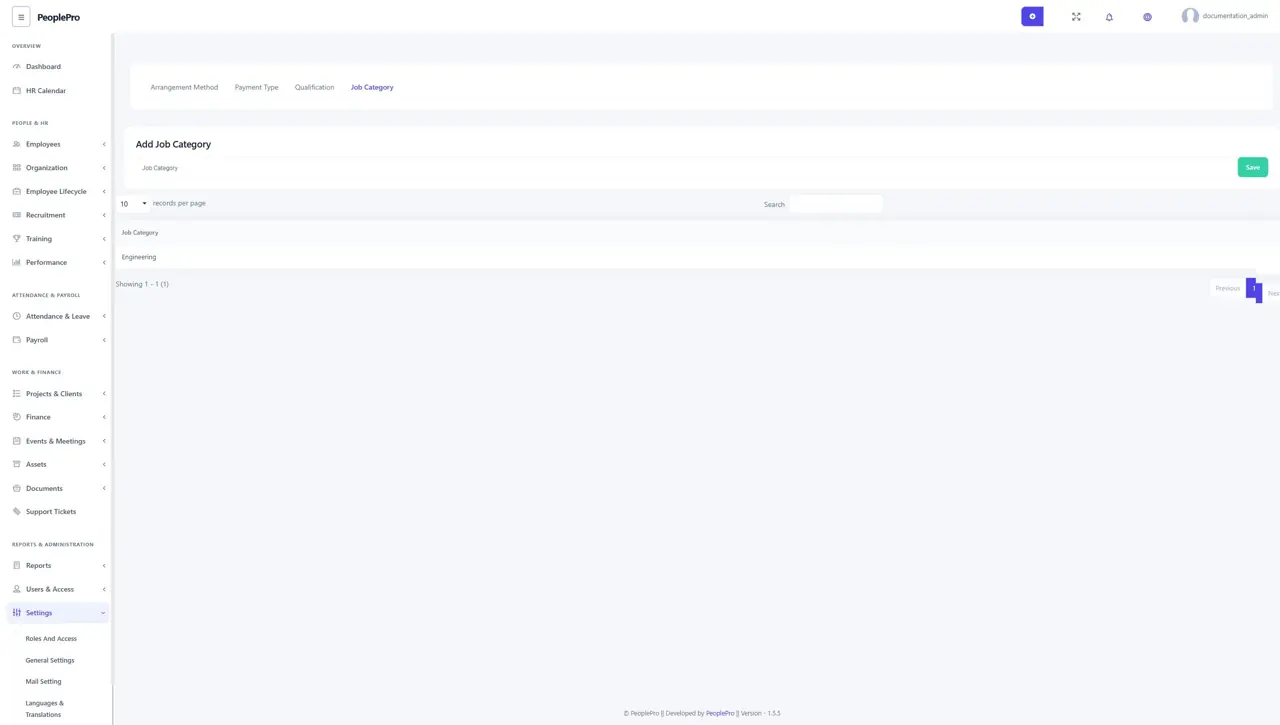
Open Settings > Variable Method > Job Category. Add job categories such as Engineering or Operations and save. Choose the category when creating a job post. Categories also help visitors narrow public job listings, so use names applicants can recognize easily.
Qualification settings: Education Level
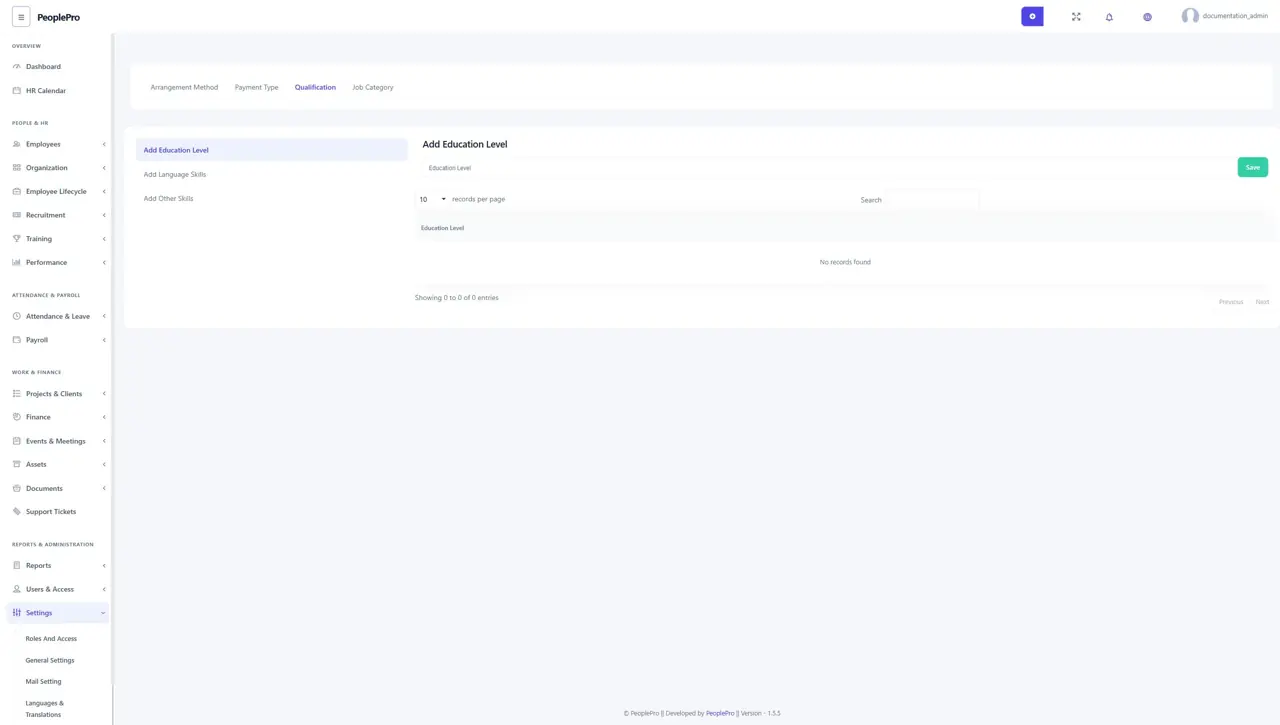
Open Settings > Variable Method > Qualification > Education Level. Add education levels such as Bachelor's Degree or Master's Degree. These are reusable choices when entering an employee's qualifications. Enter the level name, save, and use the list actions to maintain it.
Qualification settings: Language Skills
Open Settings > Variable Method > Qualification > Language Skills. Add the language skill choices used in employee qualification records. Enter a clear language or skill name and save. This list describes an employee's qualifications; it is separate from installing interface languages in Languages & Translations.
Qualification settings: Other Skills
Open Settings > Variable Method > Qualification > Other Skills. Add professional or general skill choices relevant to your employee records. Use recognizable labels and save each distinct skill separately. Maintain the employee's individual qualification information from their employee profile.