Platform Settings, Languages and Website Content
Open General settings to review Site Title, Email, Phone Number, Free Trial Limit, Currency Code, Date Format, Time Zone, Developed By, Footer, Footer Link and Site Logo.
Last updated: 16 November 2026 · Product version: not specified in the supplied guide
General settings
Open General settings to review Site Title, Email, Phone Number, Free Trial Limit, Currency Code, Date Format, Time Zone, Developed By, Footer, Footer Link and Site Logo. Use your actual platform contact details. Currency Code controls the currency used when preparing new checkouts; changing it does not convert historical payments. Free Trial Limit is the number of trial days shown to new customers. Review date and time settings before relying on expiry dates or reports.
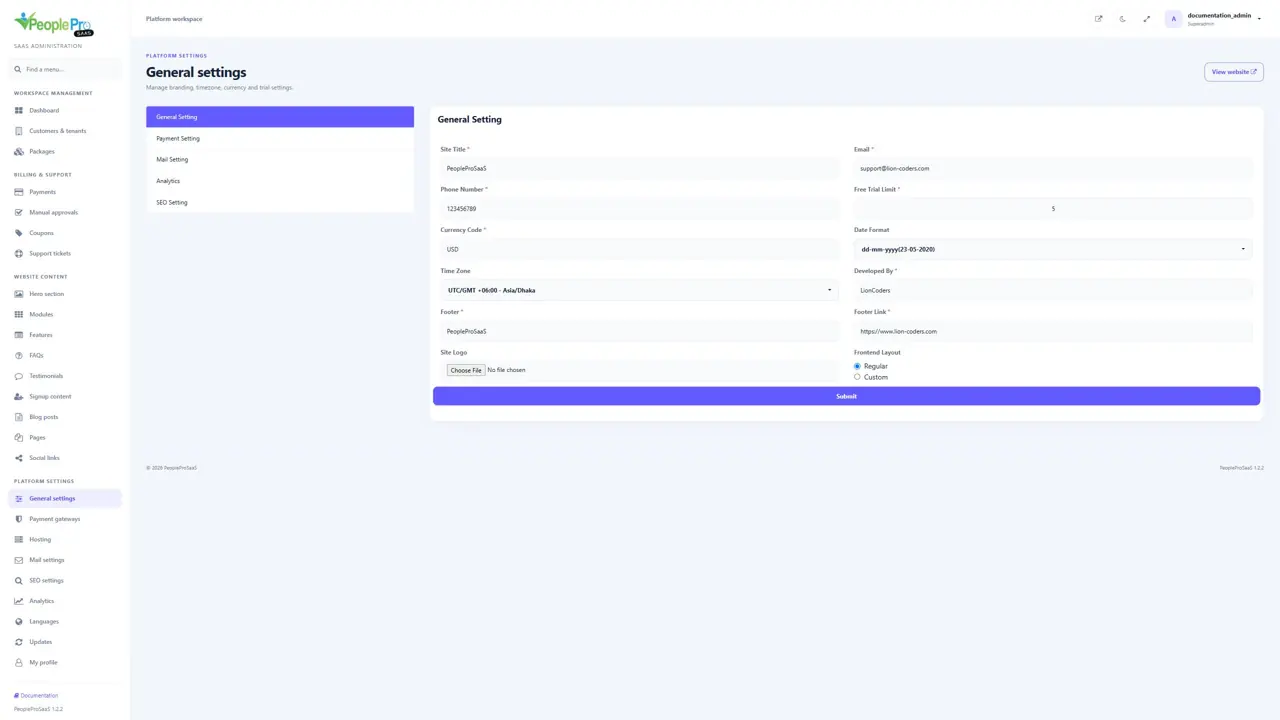
Platform logo, contact details and footer
Site Title names the platform. Email and Phone Number provide its contact details. Choose a Site Logo image when replacing the saved brand; leaving the file input empty keeps the saved image. The superadmin sidebar reads that saved logo and falls back to the supplied PeopleProSaaS logo. Developed By, Footer and Footer Link hold the credit text and its website address. Submit the form and check the panel. The installer uses the supplied SaaS logo independently of these saved settings.
Trial days, currency, dates and website layout
Free Trial Limit is the number of days used for packages with Free Trial enabled. Currency Code identifies the currency for new checkouts; it does not convert past payments. Date Format changes date presentation, and Time Zone should match the platform operating location. Frontend Layout offers Regular and Custom for earlier website layouts. The current curated product homepage is not replaced by that older layout choice. Review the public page after changes.
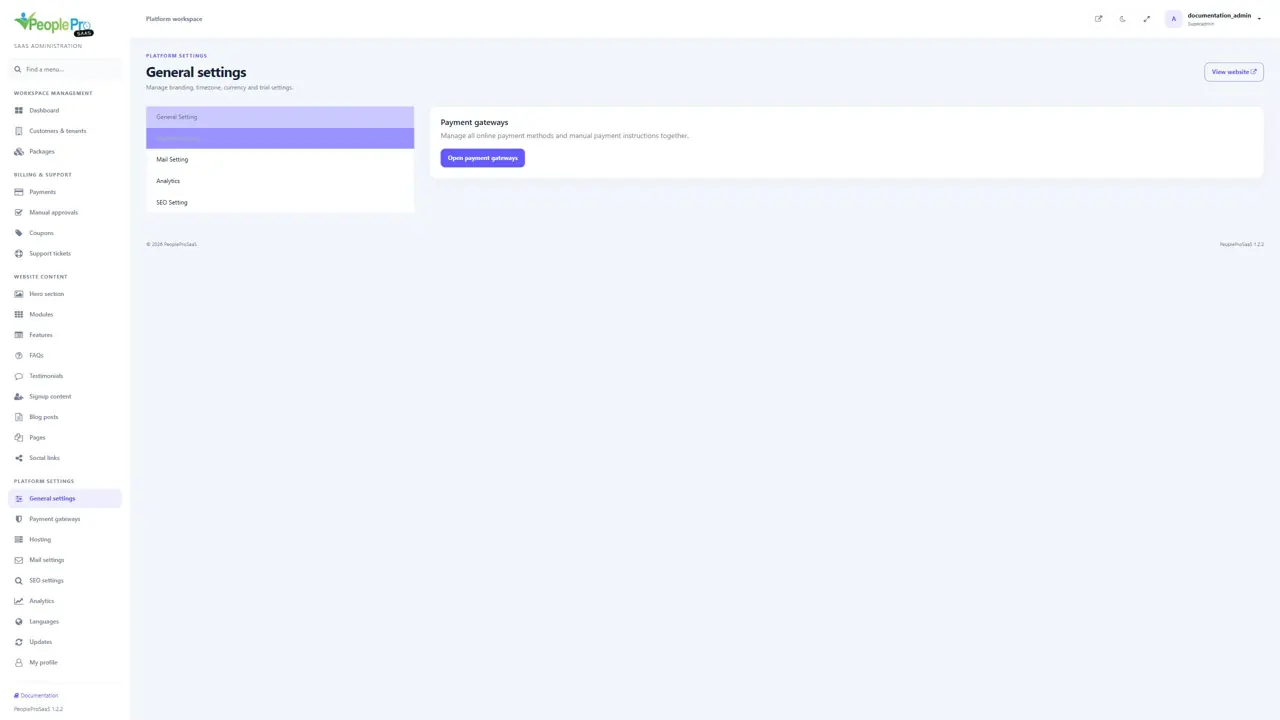
Payment Setting tab
The Payment Setting tab inside Settings is a shortcut rather than a second payment-credential form. Choose Open payment gateways to manage enabled online methods and manual payment instructions in one place. Use Payments for transaction history and Manual approvals for transfer proofs. These three pages have different purposes.
Platform branding and the current website theme
The public homepage uses the curated PeoplePro product theme. The older Frontend Layout choice and some CMS image or button fields remain available for earlier website content. Changing them does not replace the current product explorer. Platform settings and tenant company settings are separate. Review the page you intend to publish after changing branding or content.
Configure platform outgoing mail
Open Mail settings. Enter the mail driver, host, port, sender address and sender name. Complete the username and password required by your mail service and choose the matching TLS or SSL encryption. Set the active option as intended and submit. Confirm delivery using an appropriate test message or password-reset workflow after configuration. Tenant workspace mail settings are separate from the platform configuration.
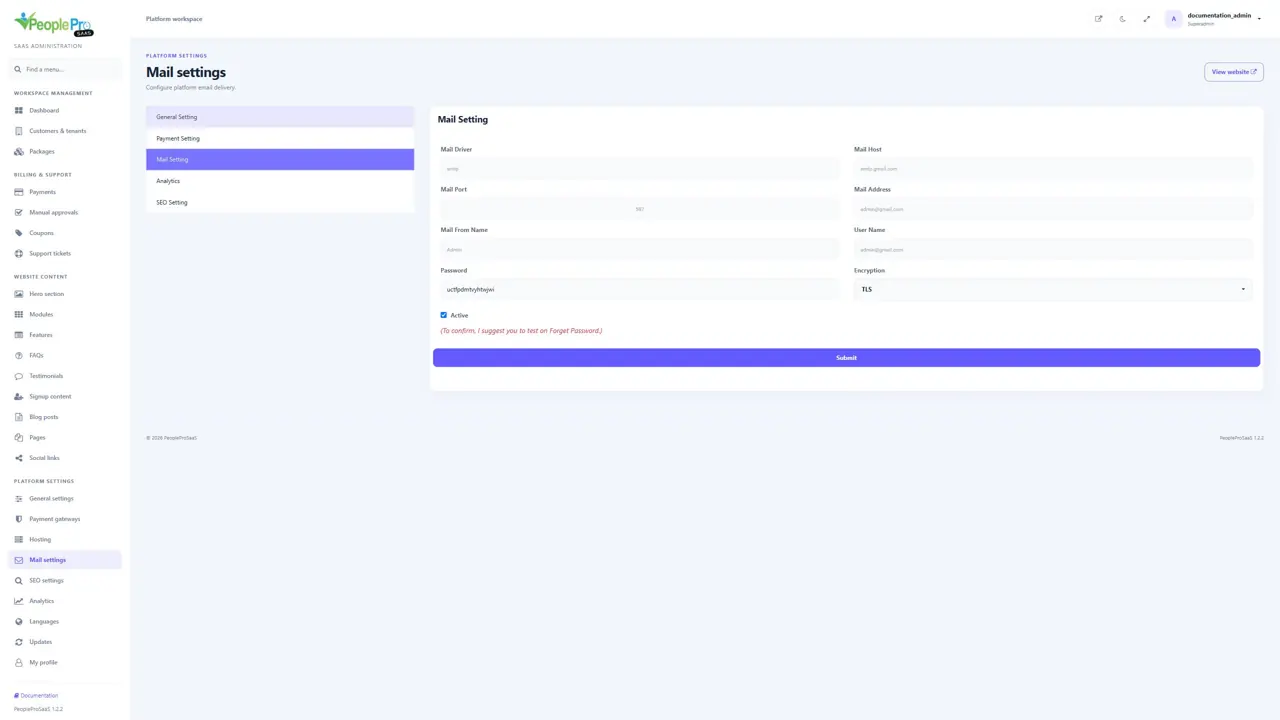
Complete the mail configuration fields
Mail Driver selects the sending transport. Mail Host and Mail Port identify the outgoing service; use the values supplied by your mail provider. Mail Address and Mail From Name control the sender recipients see. User Name and Password authenticate the sending account. Encryption must match the service TLS or SSL configuration. Active controls the enabled setting. Complete the required fields and submit once, then check an ordinary test or password-reset email. Tenant mail configuration is separate.
SEO settings and public page wording
SEO settings contains Meta Title, Meta Description, Open Graph title and description, and an OG image for the earlier public content layouts. The current homepage uses the translated product title and description in its theme. To change those current phrases, use platform Languages > English > translations and search the displayed text. Preview the intended public page and its source metadata after changes rather than assuming that every theme uses the older SEO fields.
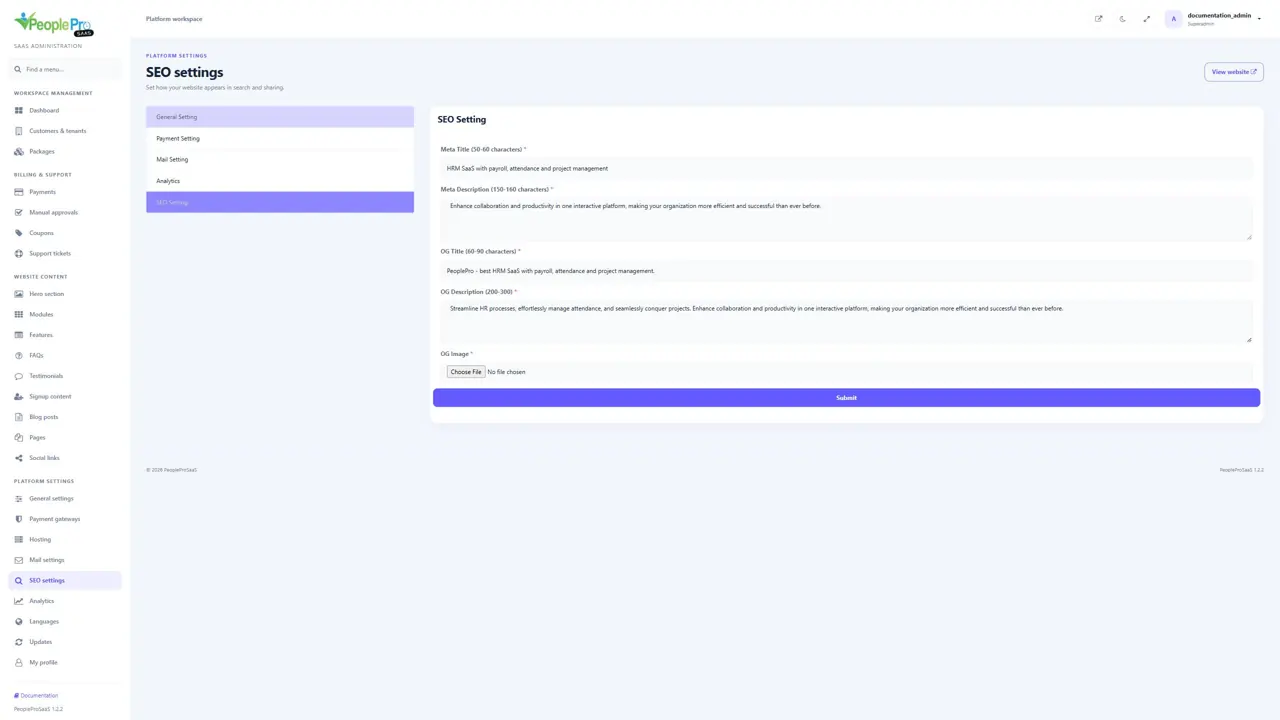
Meta and sharing-image fields
Meta Title and Meta Description describe the page for the earlier SEO-enabled layout. The form suggests 50–60 characters for the title and 150–160 for the description. OG Title, OG Description and OG Image supply social-sharing information; the form suggests 60–90 characters for the OG title and 200–300 for its description. Choose an appropriate image before submitting when required by the form. The current curated homepage uses its theme metadata, so check the intended page before assuming these legacy fields are published there.
Analytics settings
Google Analytics Script stores the analytics snippet, Facebook Pixel Script stores the Meta tracking snippet, and Chat Script stores a website chat integration snippet for the earlier public layout. The current curated homepage does not automatically insert these legacy script fields. If tracking or chat is needed there, have your maintainer add the intended integration and verify it on the published page. Saving these fields alone does not confirm that a tracking service is active.
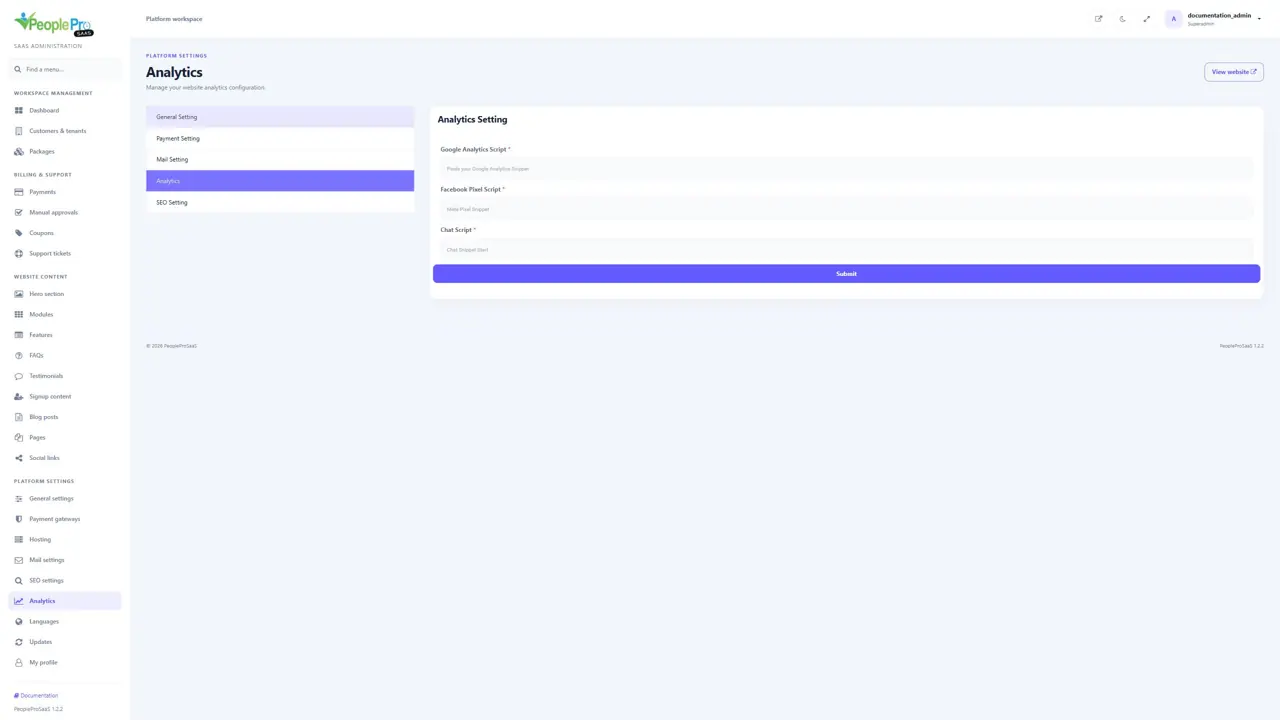
Add a provided platform language
Open Languages and choose Add Language. Select one of the supplied language packs; arbitrary new language codes are not offered. The language entries are added to the platform translation database, where you can review and edit their values. A fresh workspace starts with English. Platform languages and each tenant language catalogue are separate, so enabling a language centrally does not automatically change every tenant preference.
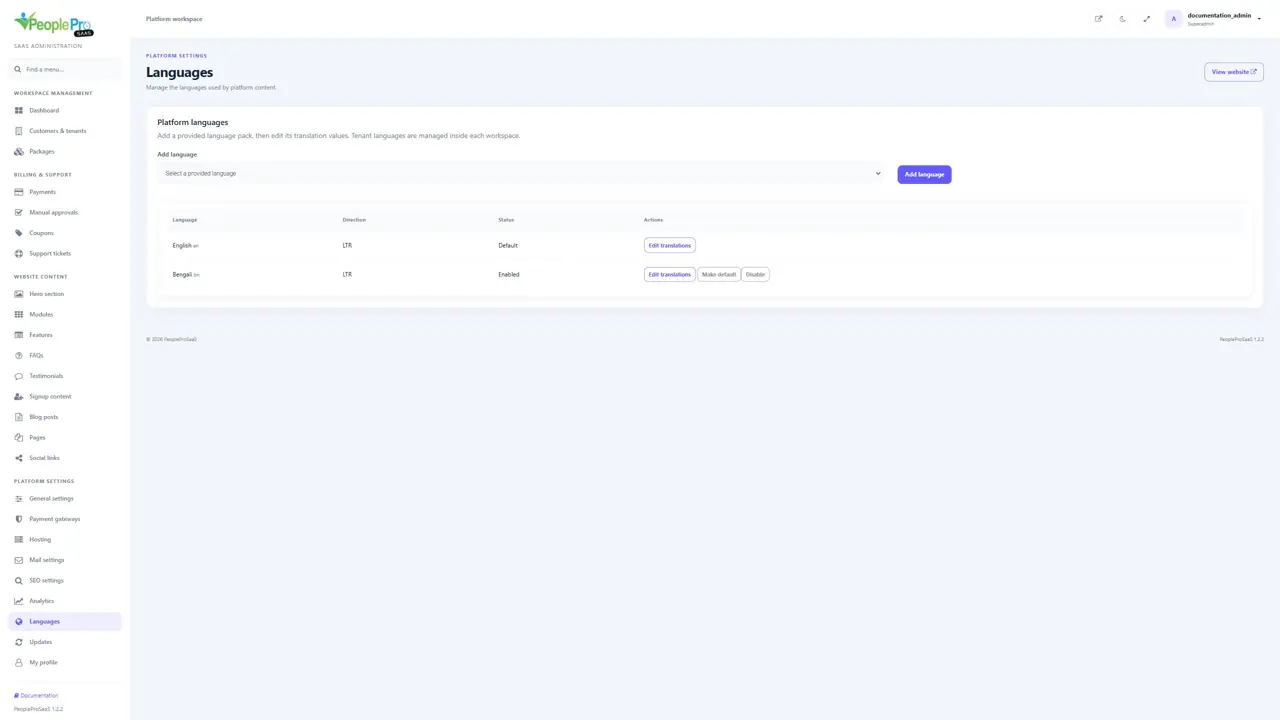
Use the supplied language dropdown
Choose a language from Add language and select the Add language button once. The dropdown contains the provided packs that are not already installed; it does not accept an arbitrary language name or code. After installation, the table shows its direction, status and translation action. The illustration shows a selected example without submitting an installation.
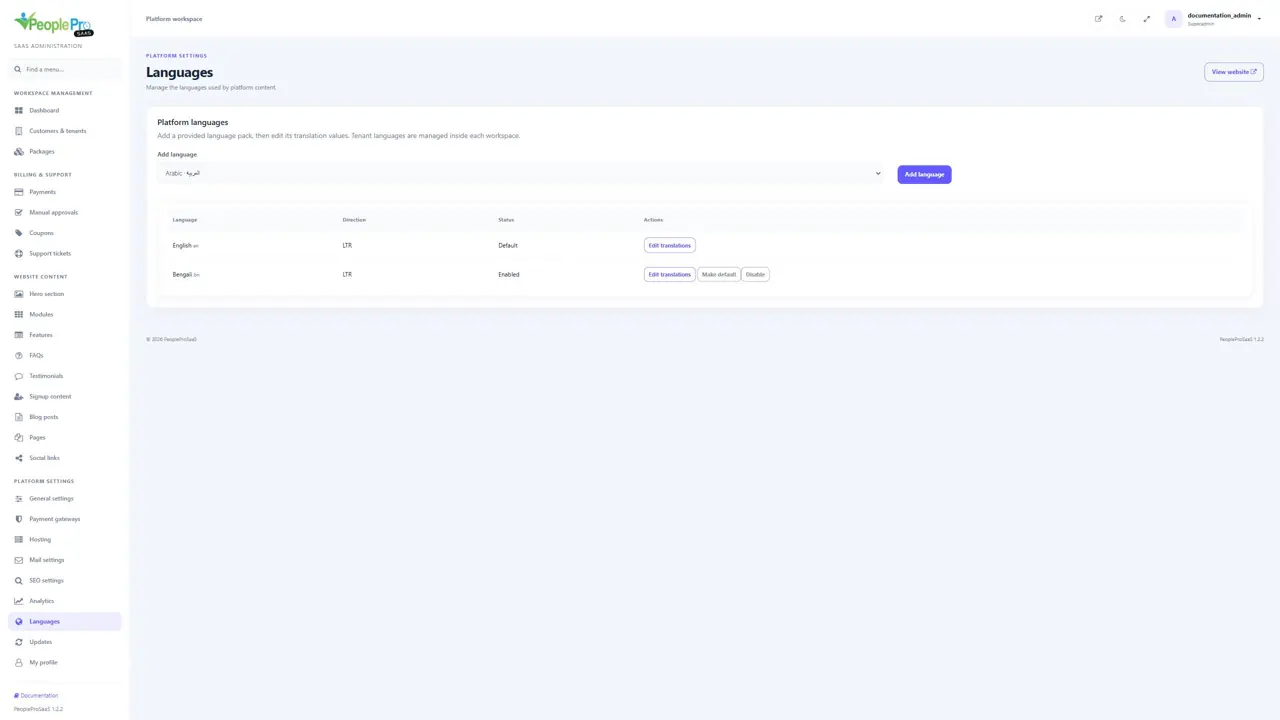
Set a default language or enable and disable it
Use the language actions to choose the platform default or enable an installed language. Enabled languages can be selected from the relevant public or administrator language control. A personal or session selection is different from changing the platform default. Review the public homepage and administrator pages after changing language settings. A language with right-to-left direction also changes the supported layout direction.
Edit translation values and current homepage copy
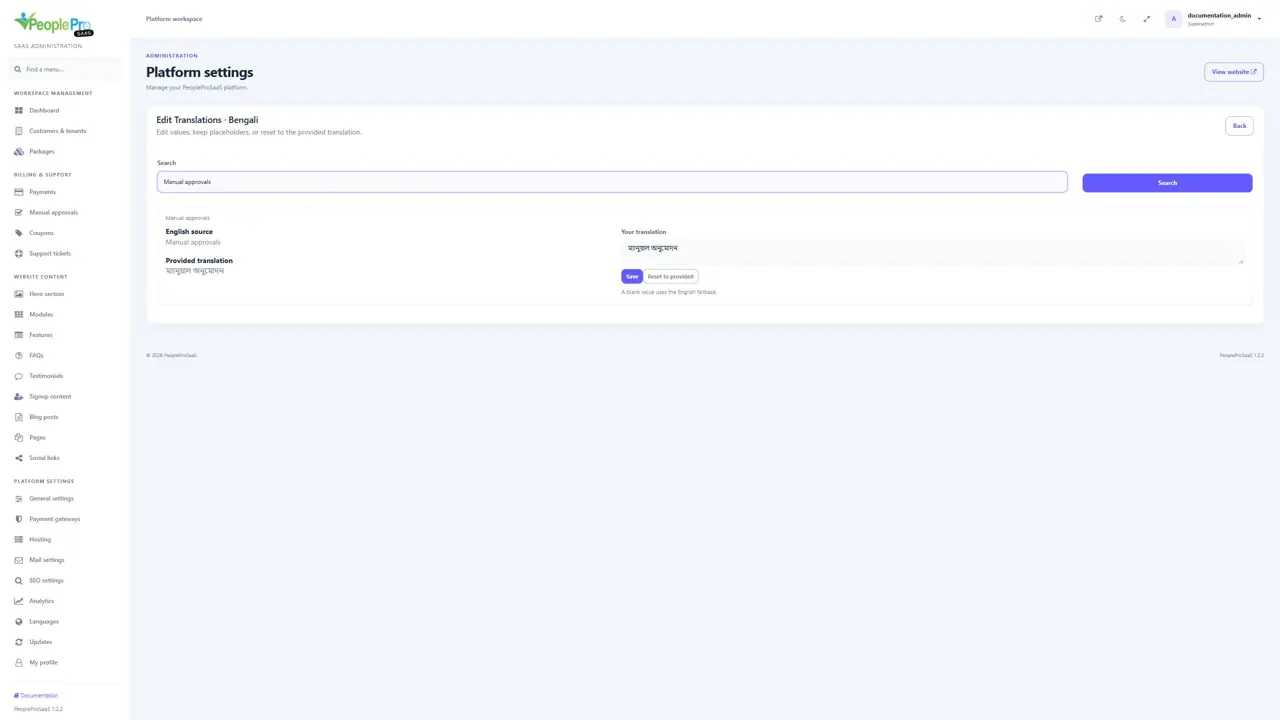
Open translations beside the intended installed language. Type the word or phrase in search; matching entries update as you type. Edit the value and save the entry. For the current homepage, the module headings, explanations and other provided wording are editable this way, including the English values. Keep any placeholders such as :days or :count intact. Provided-pack updates retain your custom values.
Provided values, custom edits and reset
Each result shows English source, Provided translation and Your translation. Save applies your edited value for that entry. Reset to provided restores the supplied value for that entry. A blank custom value uses the English fallback. Customized marks an edited entry; Needs review identifies an entry that should be checked after a supplied-pack change. Keep placeholders such as :days and :count exactly as written. Search narrows results as you type, and pagination shows further matches.
Hero headline and introduction
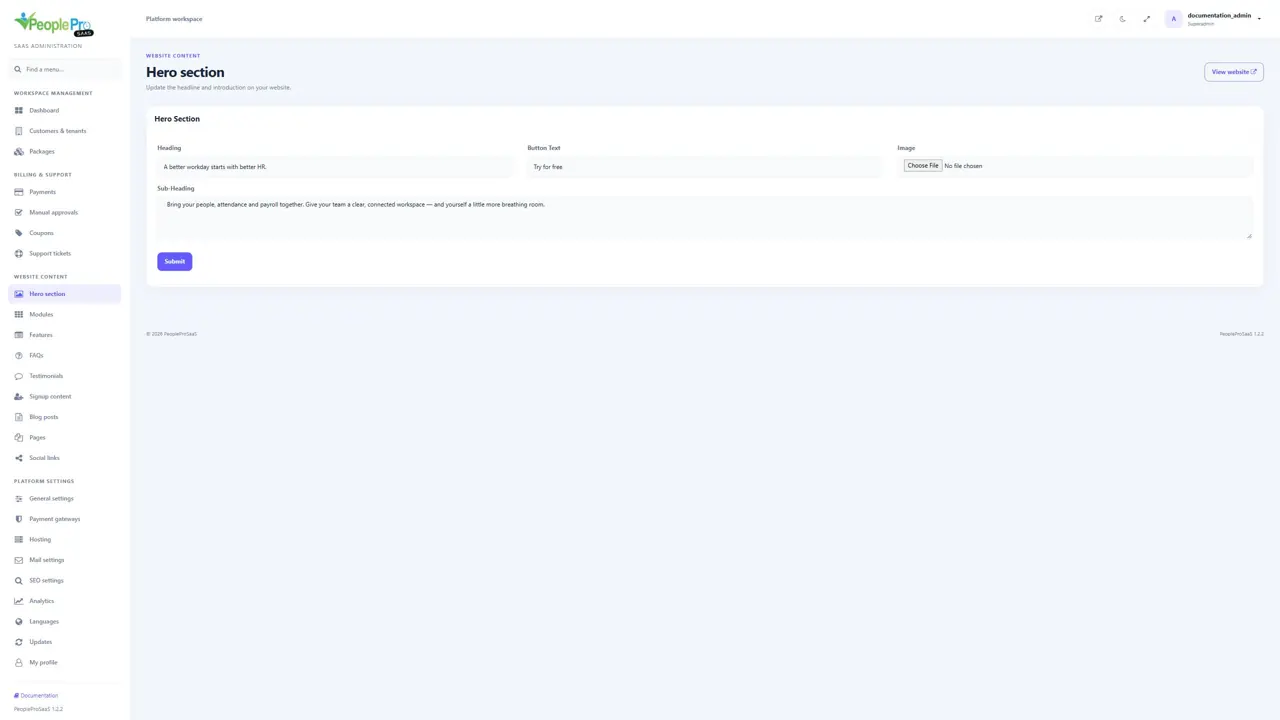
Open Hero section and choose the language context offered by the panel. Change Heading and Sub-Heading, then submit and preview the homepage. Custom text is retained. Recognized older default headings use the new theme headline. The new homepage product previews and plan-aware call-to-action labels are supplied by the theme; the legacy Image and Button Text fields do not replace them.
Modules content editor
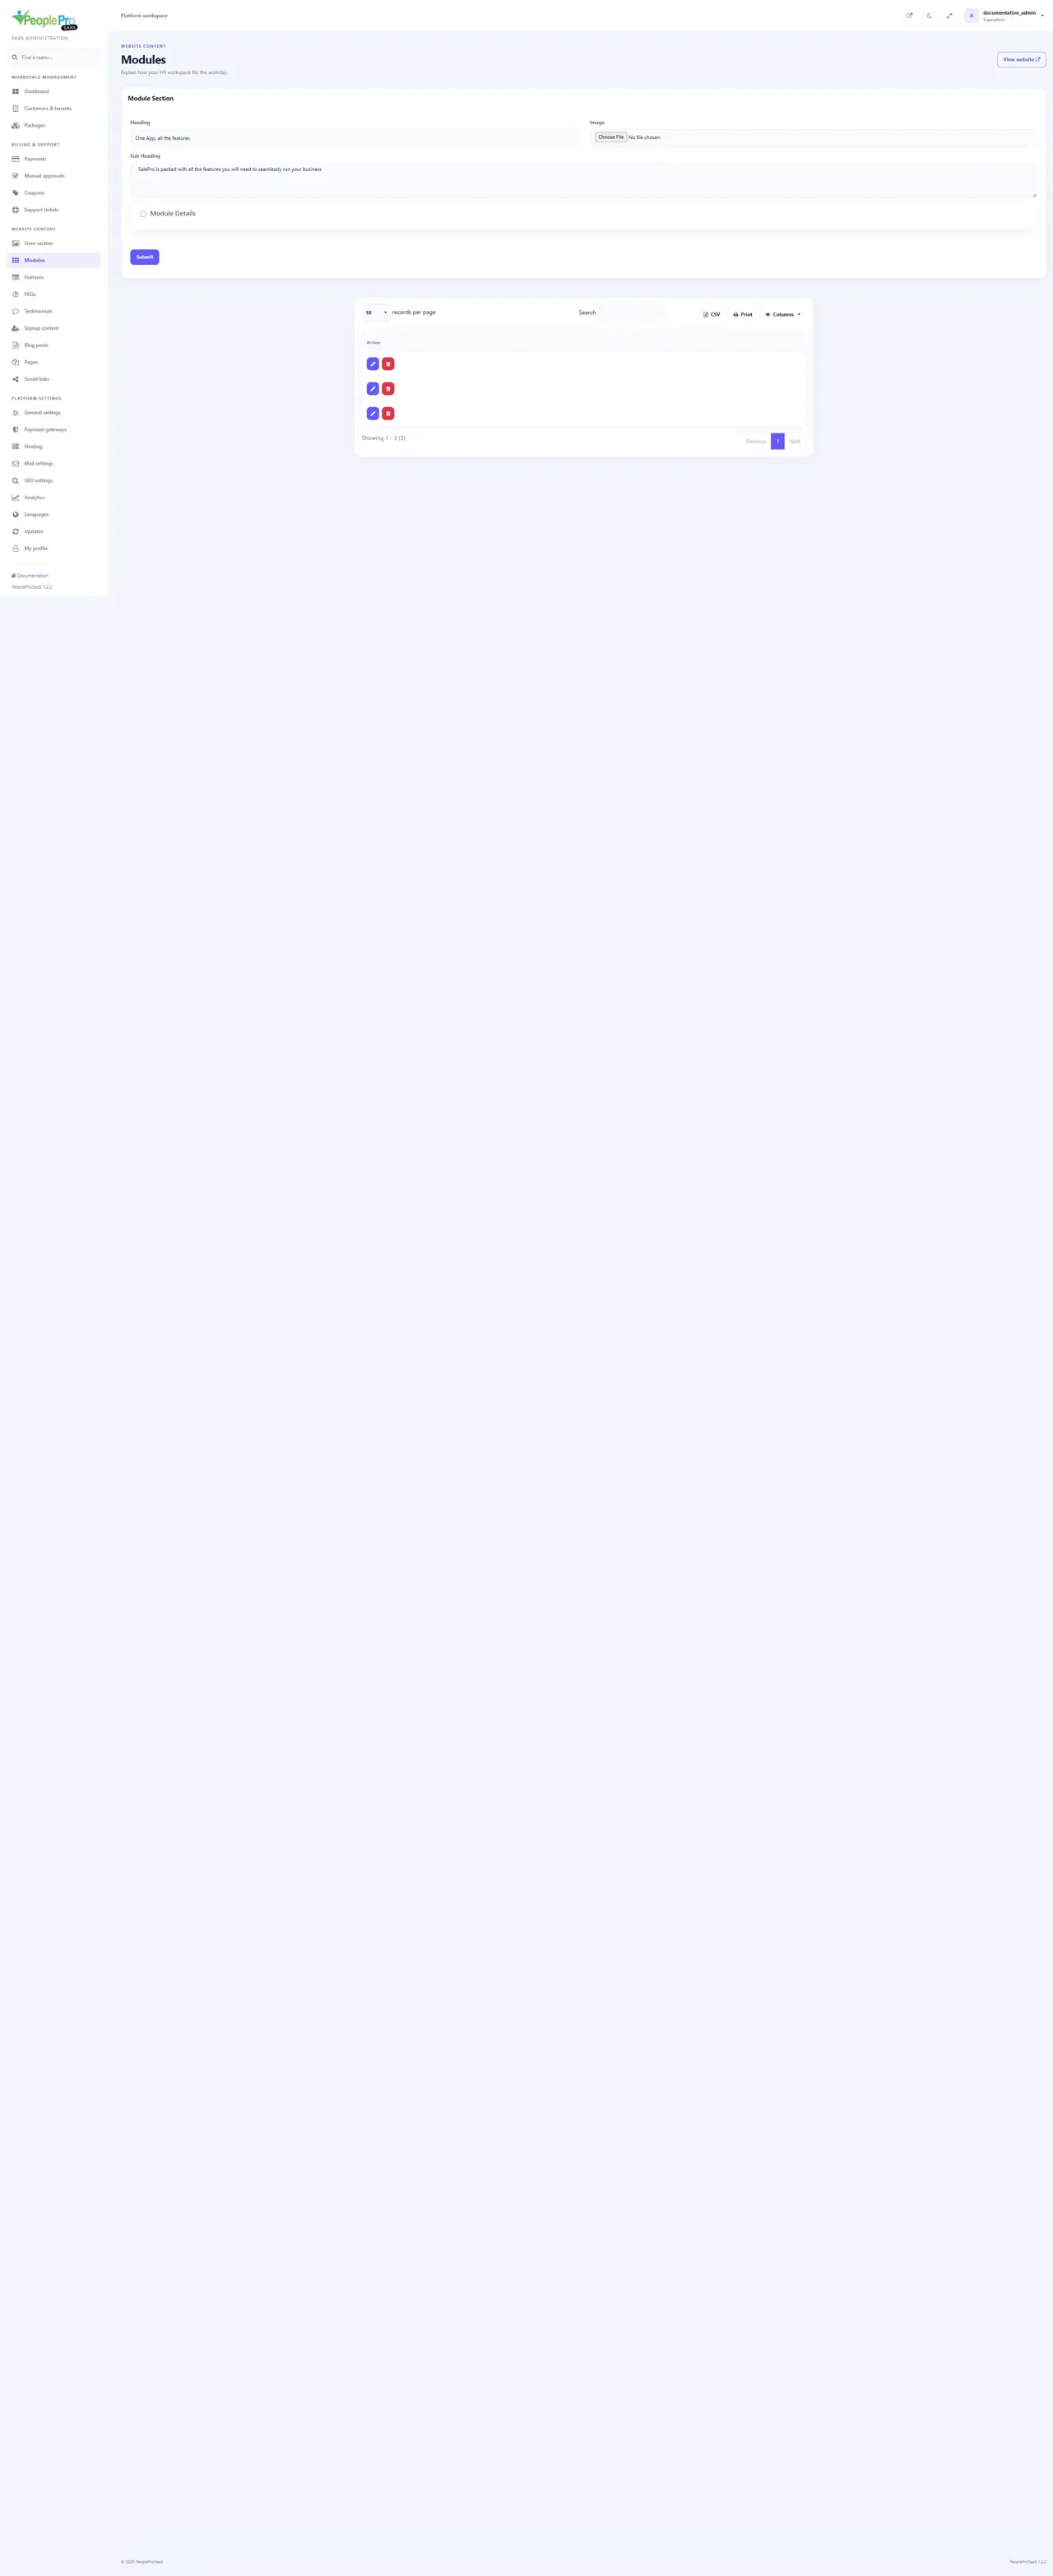
Modules retains the section heading, image, subheading and module-detail records for the older website content. Its detail list offers icons, names and editing actions. The current homepage uses the reviewed eight-module product explorer instead of automatically publishing this legacy list. To adjust the new explorer wording, edit the corresponding platform translation values. Review and replace any old demonstration content before using a legacy content layout.
Add module details
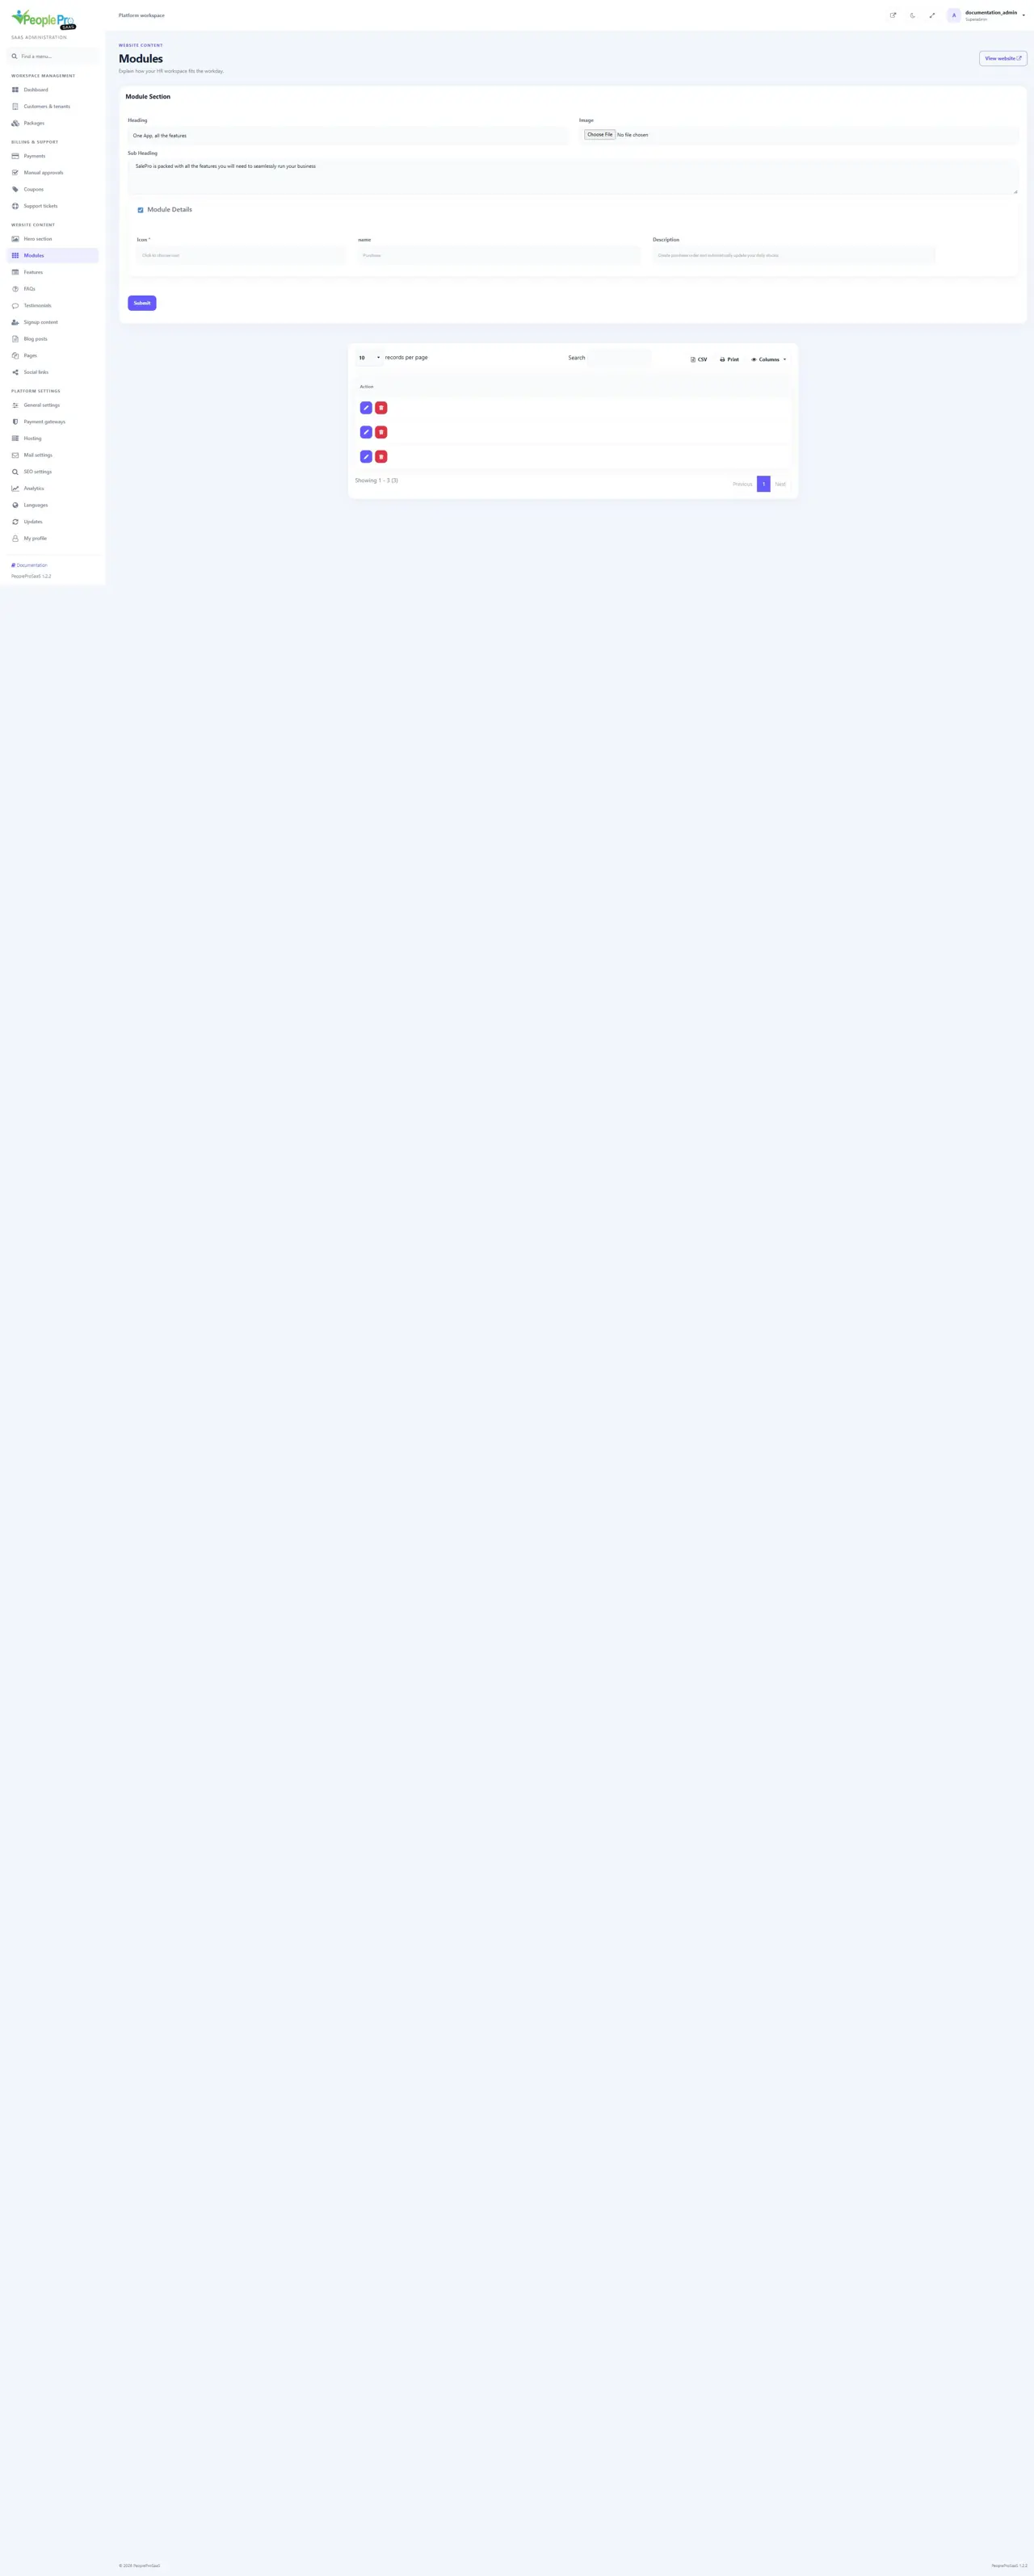
Maintain the section Heading, Image and Sub Heading. Enable Module Details to reveal Icon, name and Description for a detail entry. Choose a meaningful icon, enter a concise HR feature name and explanation, then submit after checking the section and detail fields. These legacy website descriptions do not grant package permissions or change the current curated explorer.
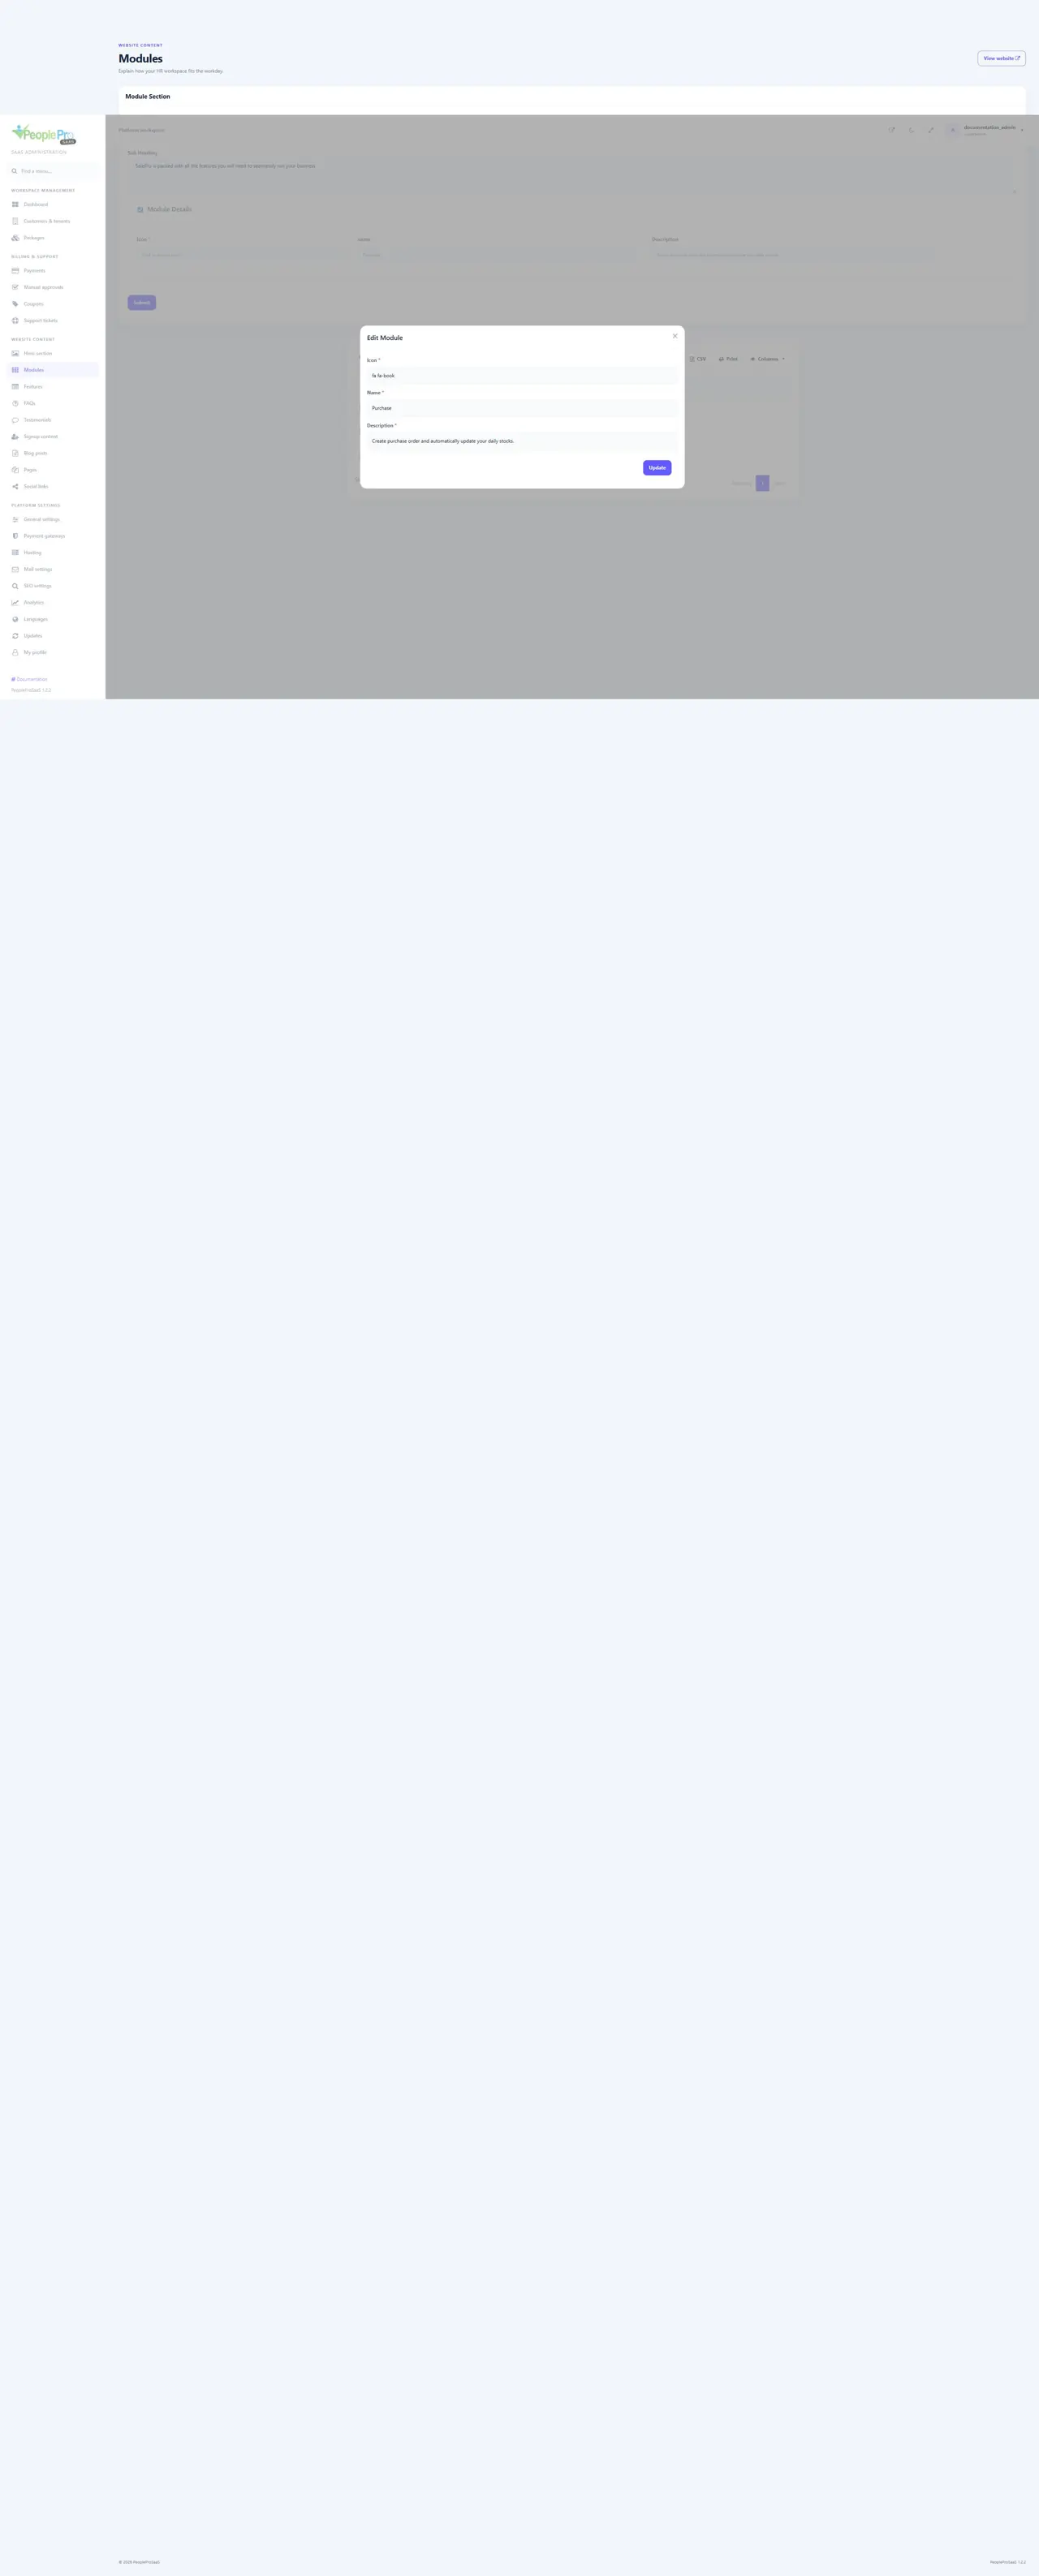
Edit a module detail
Use the row edit button to open the selected module detail. Review Icon, Name and Description, then choose Update. Confirm the selected row before deleting a detail. Its section heading and image are maintained in the main form above the table. Editing a marketing detail does not change an employee record or a subscription feature.
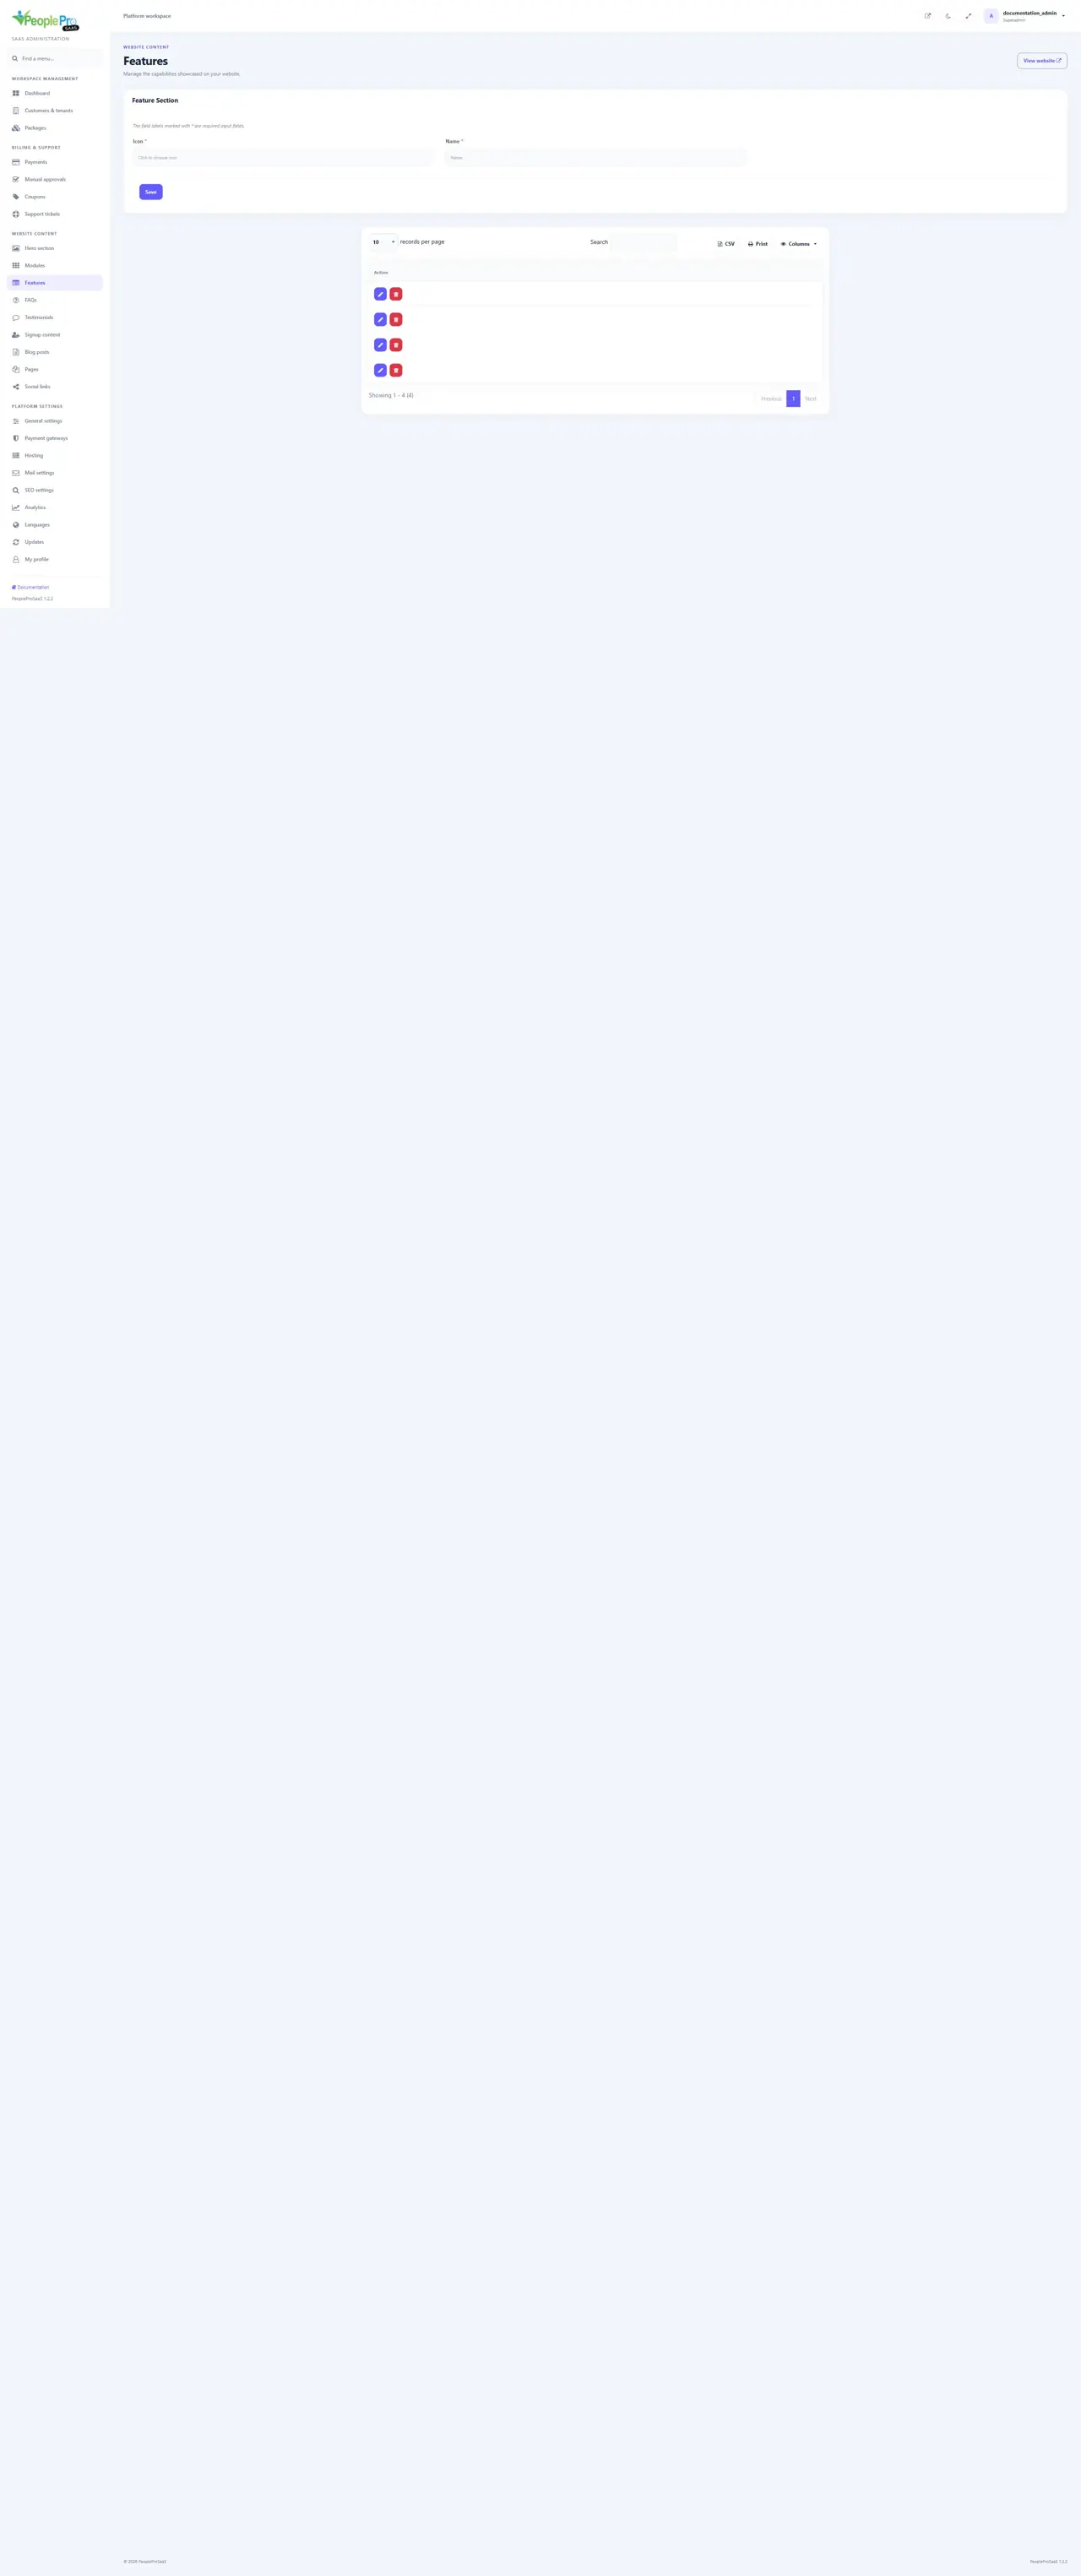
Features content editor
Features maintains icon and name records for earlier feature-list content. Add a clear feature name and choose the offered icon before saving, or use the list actions to edit an existing record. These records do not control package entitlements. The current homepage capability text is provided by the theme and can be customized through platform translations.
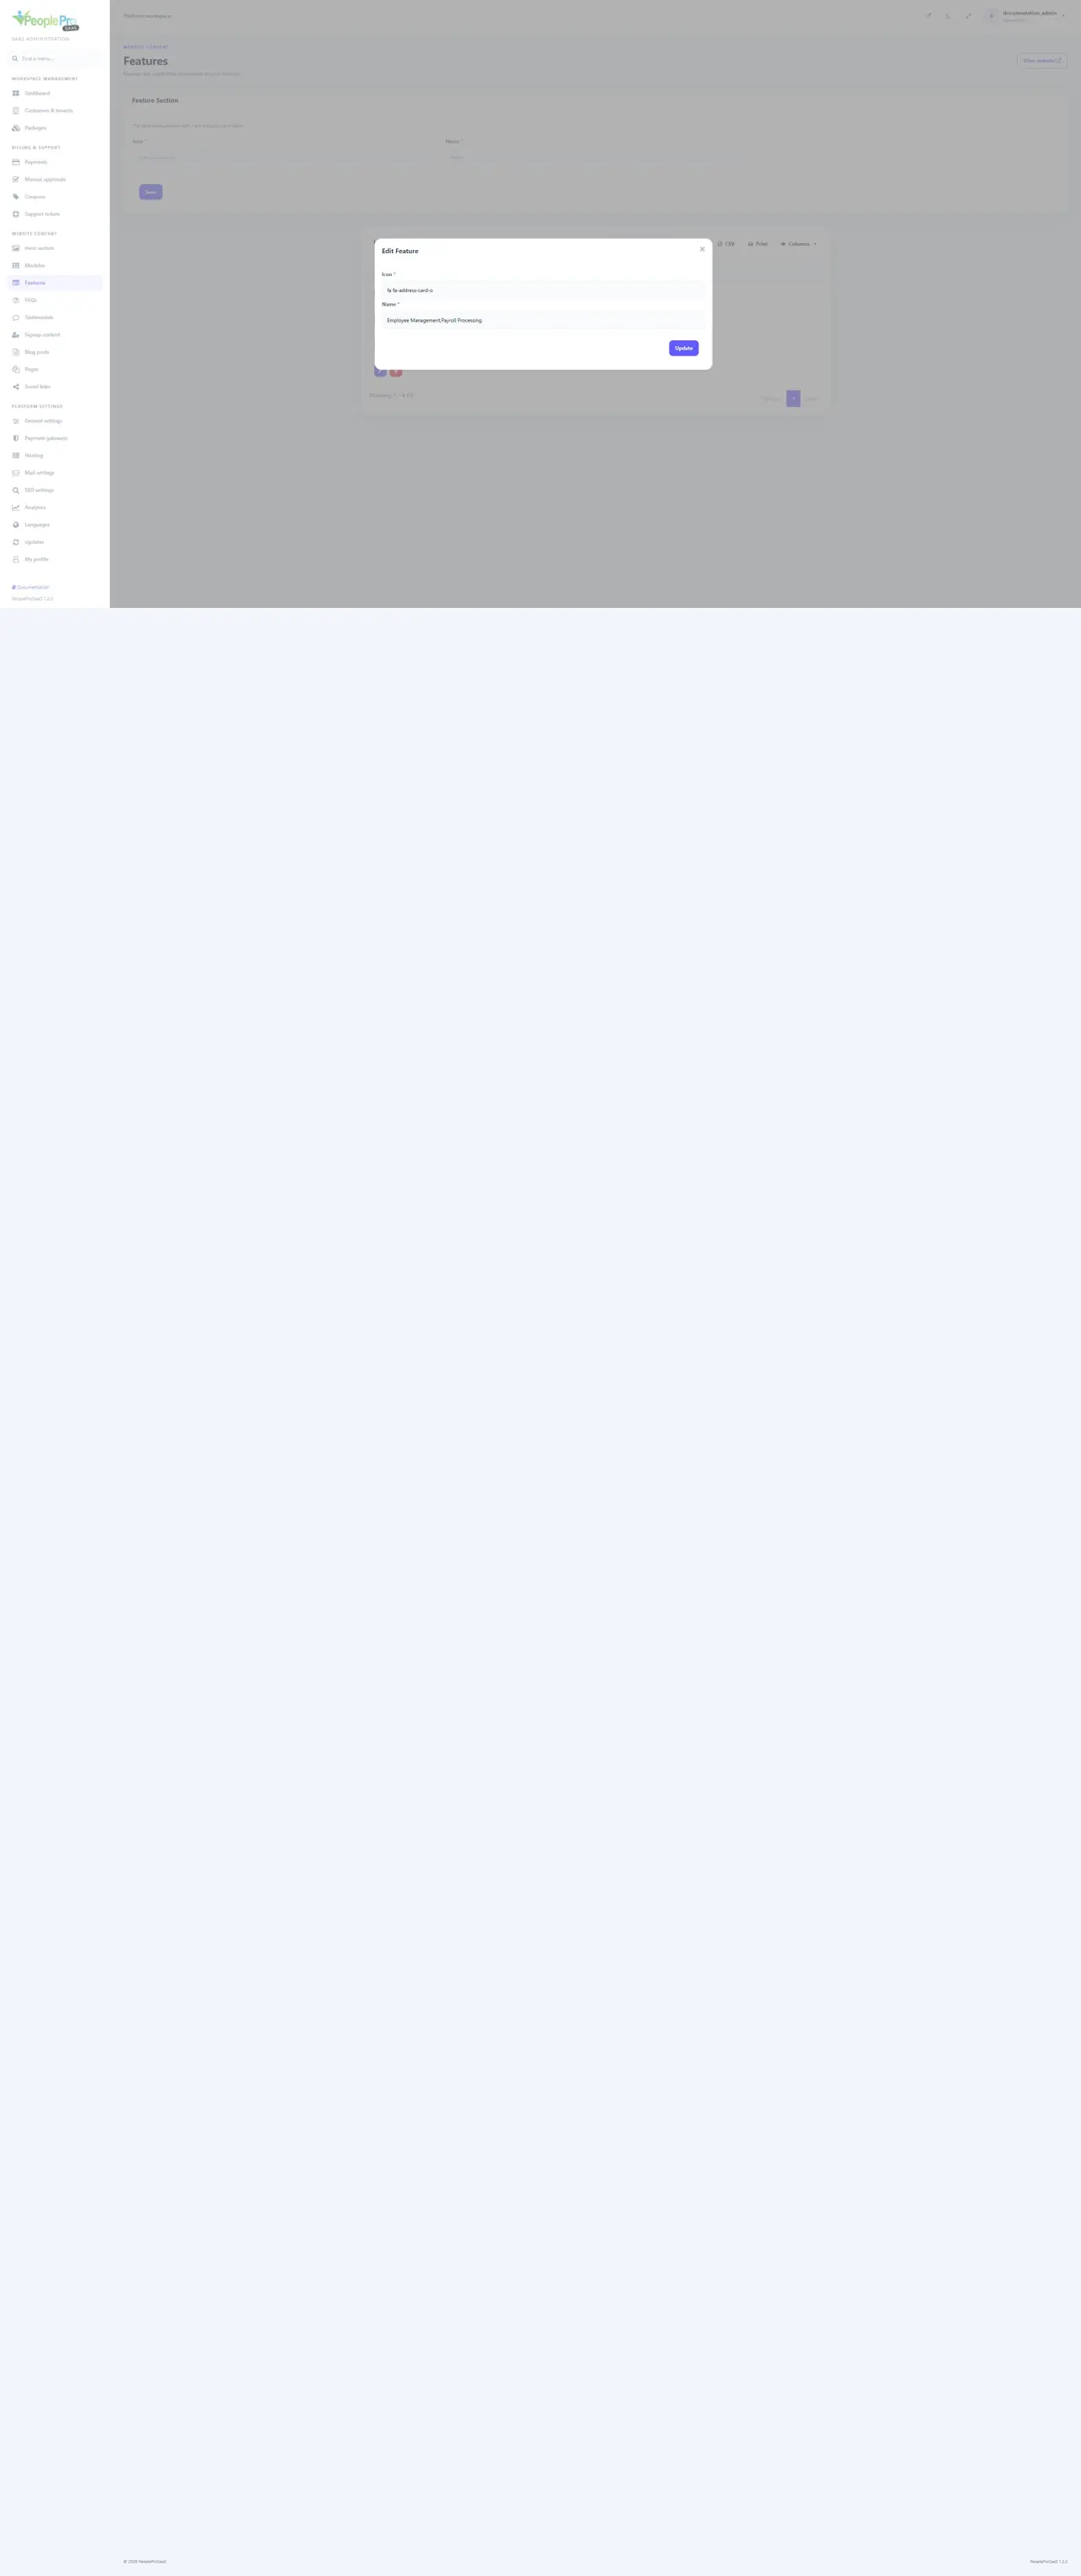
Edit a feature name and icon
The Features page has Icon and Name fields for adding an item and a table for existing items. Select an icon through the offered picker. Use a row edit action to change its icon or name and choose Update. Use the delete control only for the intended marketing item. Feature-list content is separate from the Select Features tree in the package editor.
FAQs shown on the homepage
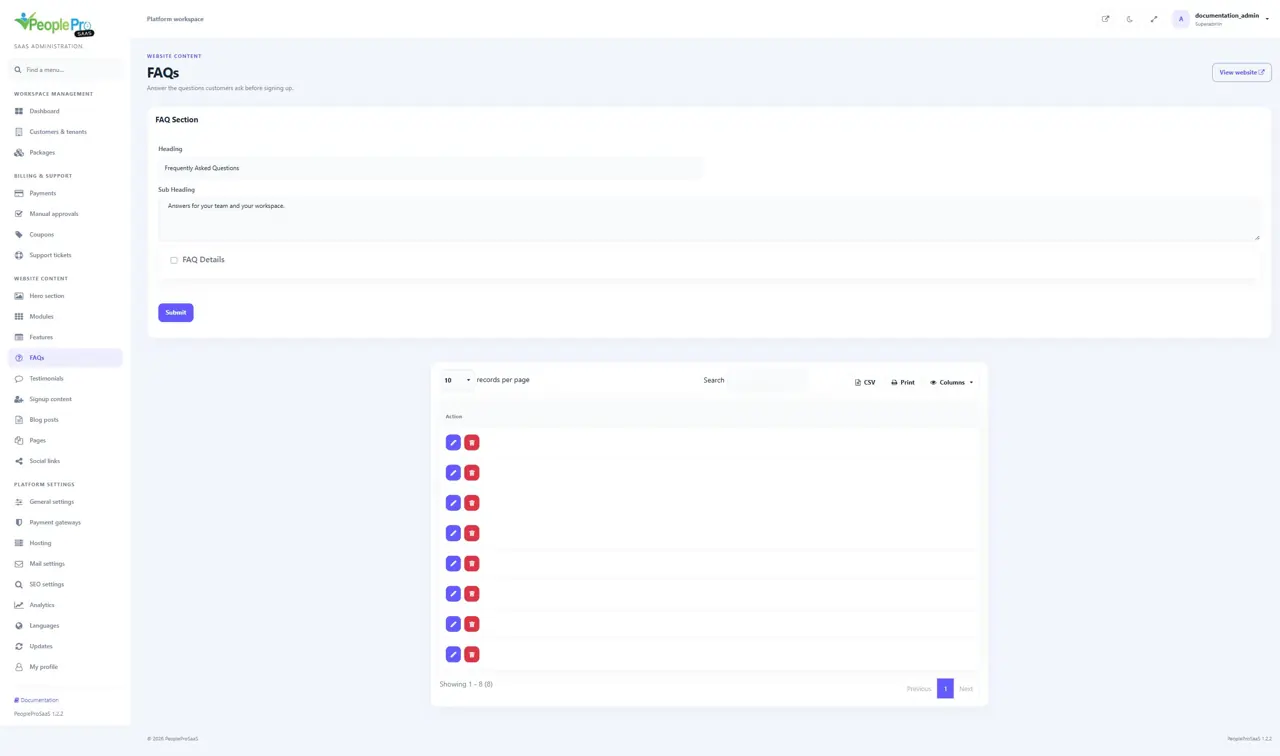
Open FAQs to maintain the section and its question-and-answer details. Edit a question or answer, save and check the public FAQ section in the intended language. Write for customers subscribing to HR workspaces: explain trial duration, included modules, night shifts, languages, renewal and support. Existing customized FAQs are retained when supplied defaults are updated.
Add a question and answer
Maintain the FAQ section Heading and Sub Heading. Enable FAQ Details to reveal Question and Answer. Write one clear customer question and a practical answer, then submit. Useful topics include trial access, plan limits, customer workspaces, renewal and support. Check the published FAQ in the intended content language.
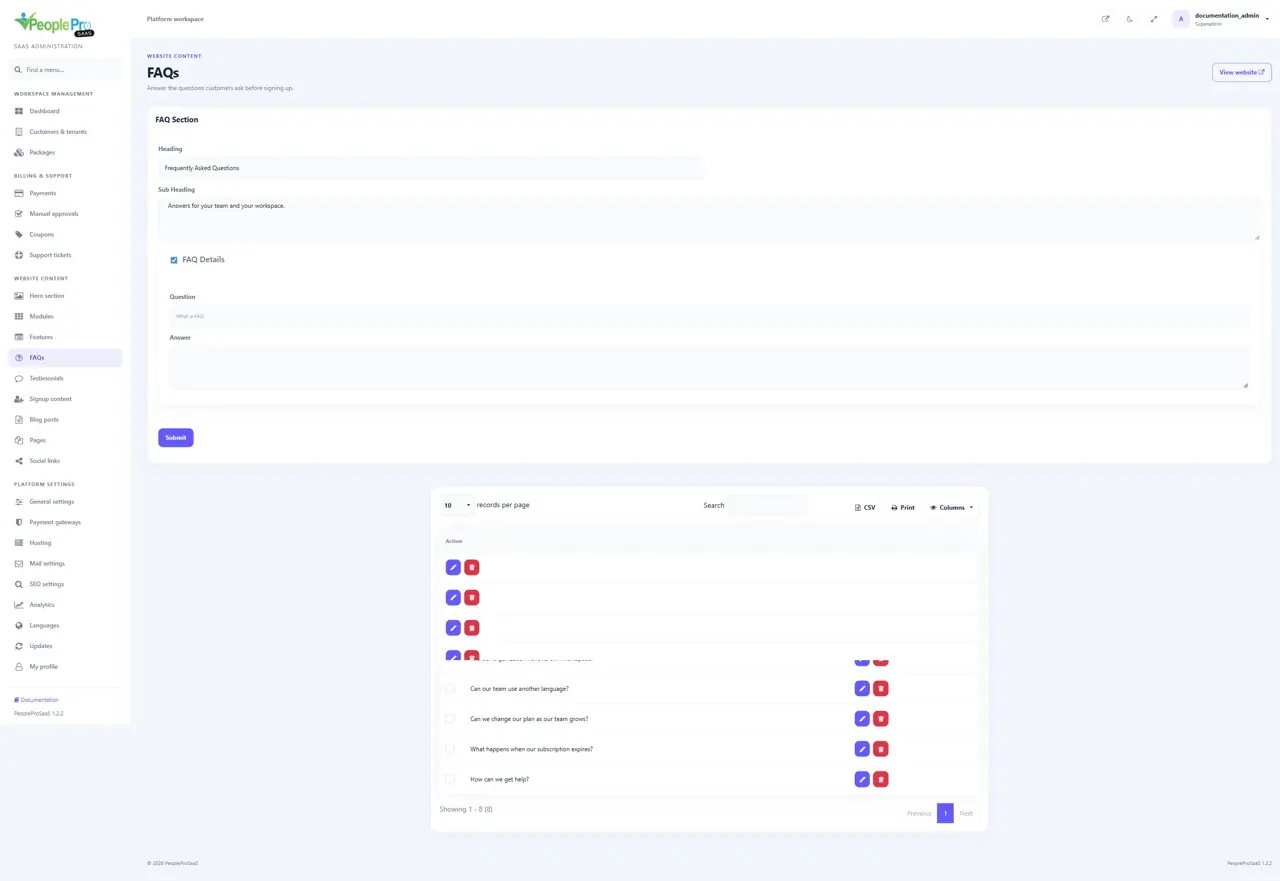
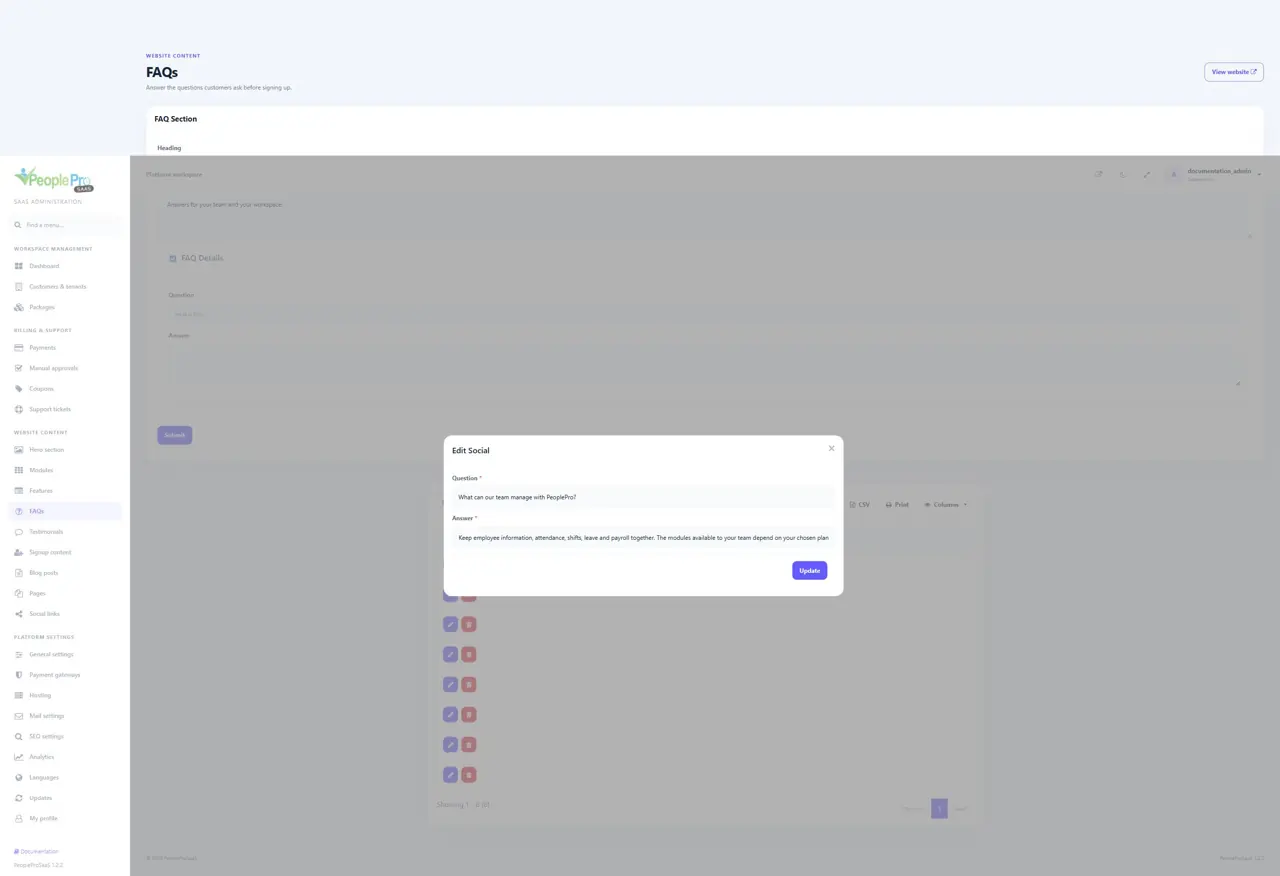
Edit or remove a FAQ entry
Select the row edit control, revise Question or Answer and choose Update. Use the delete action when that individual FAQ should be removed, after confirming the row. Changing the section heading is handled by the main form above the list. A FAQ explanation does not itself change billing, trial duration or package limits.
Testimonials
Testimonials contains Name, Business Name, Image and Description. The form above the list adds a customer story; the row edit button changes an existing one. Use feedback you are authorized to publish. The current curated homepage does not automatically display this legacy collection. There is no display-order field in the current form.
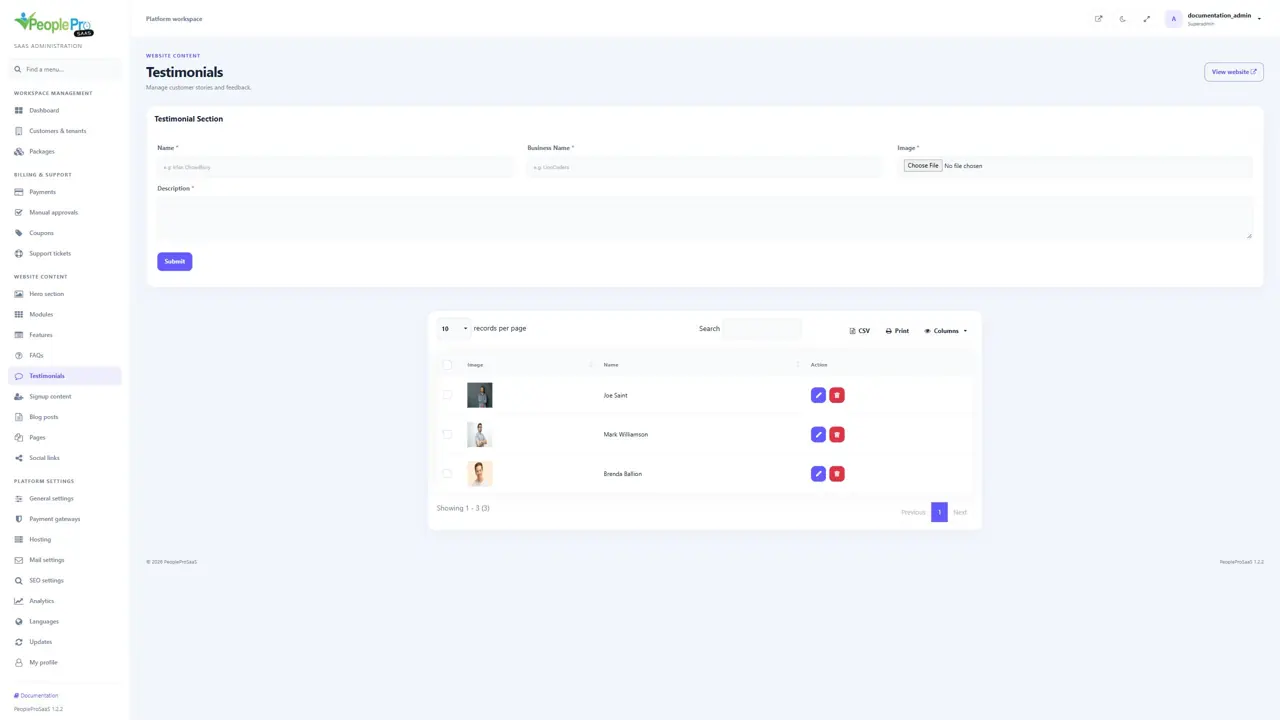
Maintain a customer testimonial
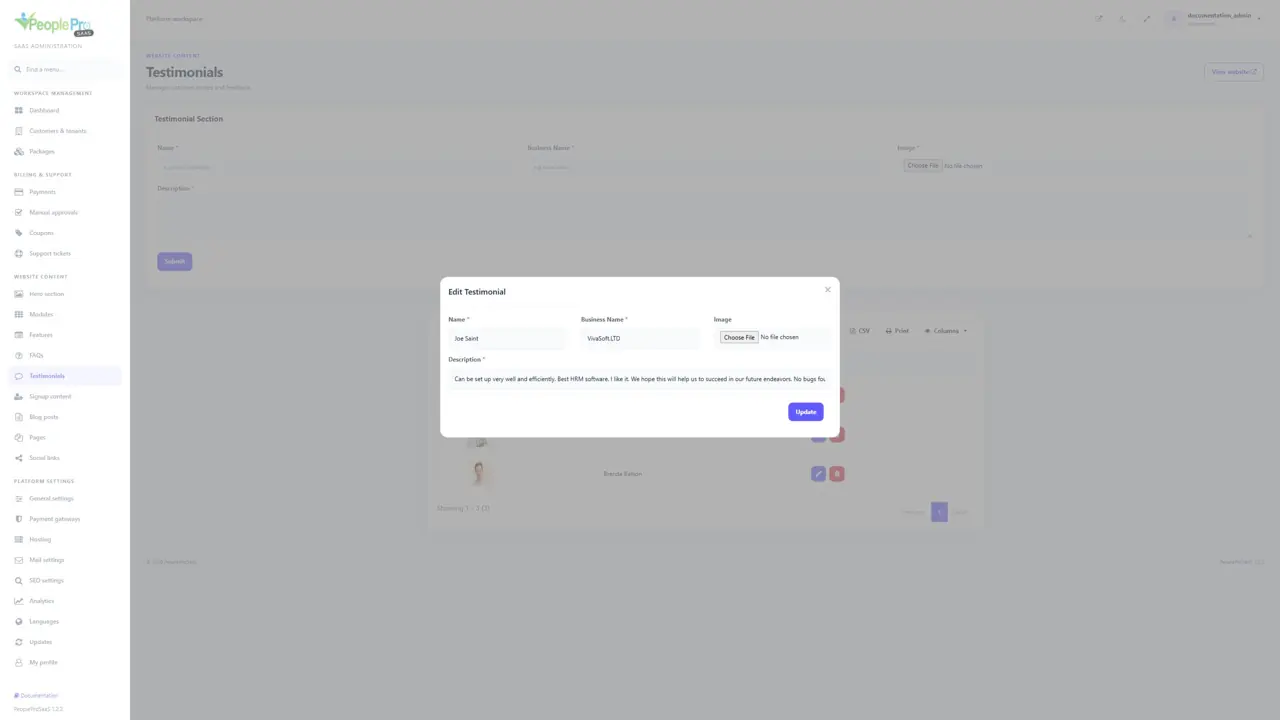
The main form adds Name, Business Name, Image and Description. The row edit dialog updates those same details. Review the selected person and business, write the approved feedback and save the intended record. Upload a replacement image when needed; the edit form can retain the existing image. Use the row delete action only when that story should be removed. This remains a legacy website-content collection.
Signup content
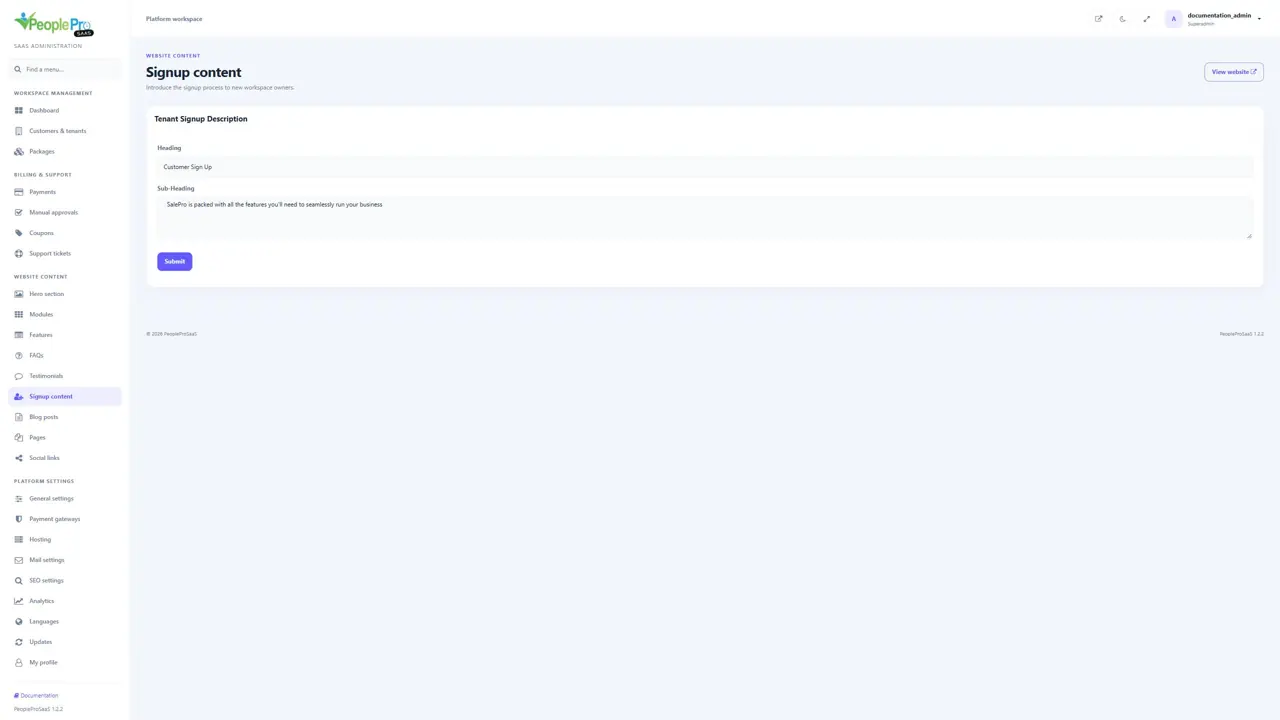
Signup content keeps the heading and subheading used by earlier signup content. The current signup page uses its provided translated introduction and form labels. Use the platform translation editor to change that current wording. Editing a description does not change the actual signup requirements, package limits or payment verification.
Blog posts
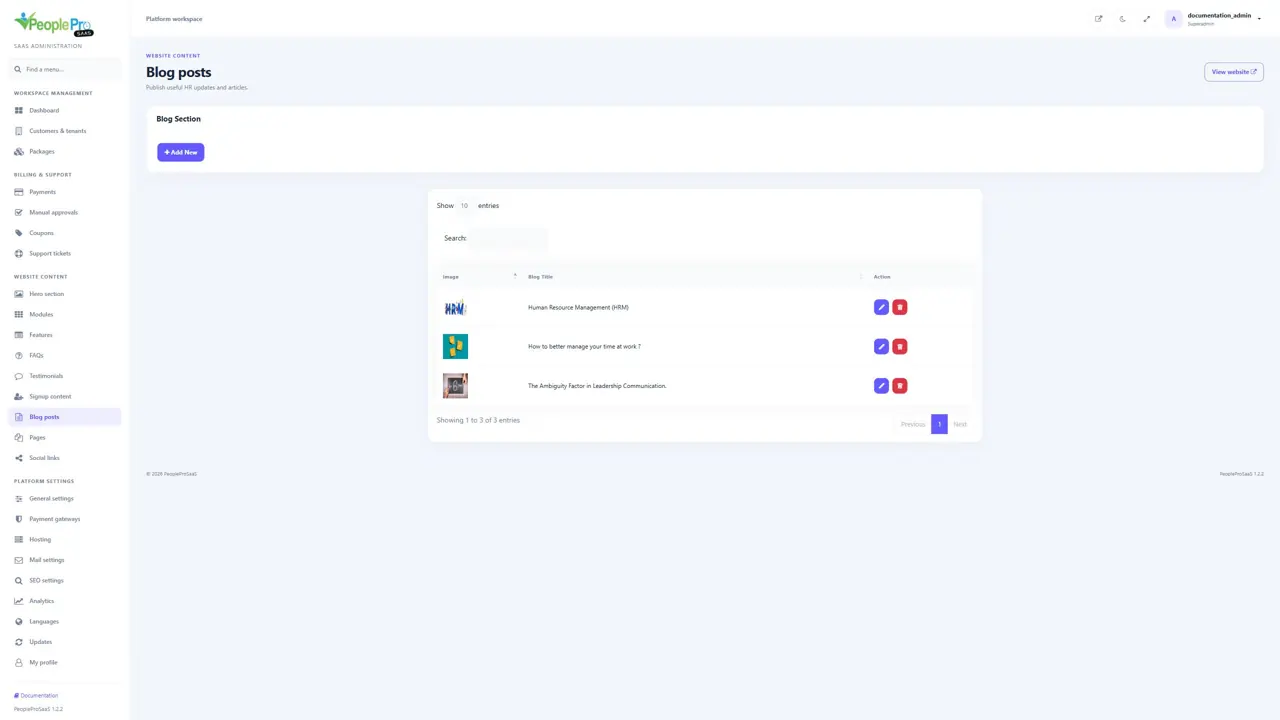
Open Blog posts to maintain public articles. Add New opens the title, image, description and optional metadata fields. The application generates the public address from the title; there is no separate slug input. Review the public article after saving. Changing a title can change its address, so check links you have already shared.
Add a blog article and its metadata
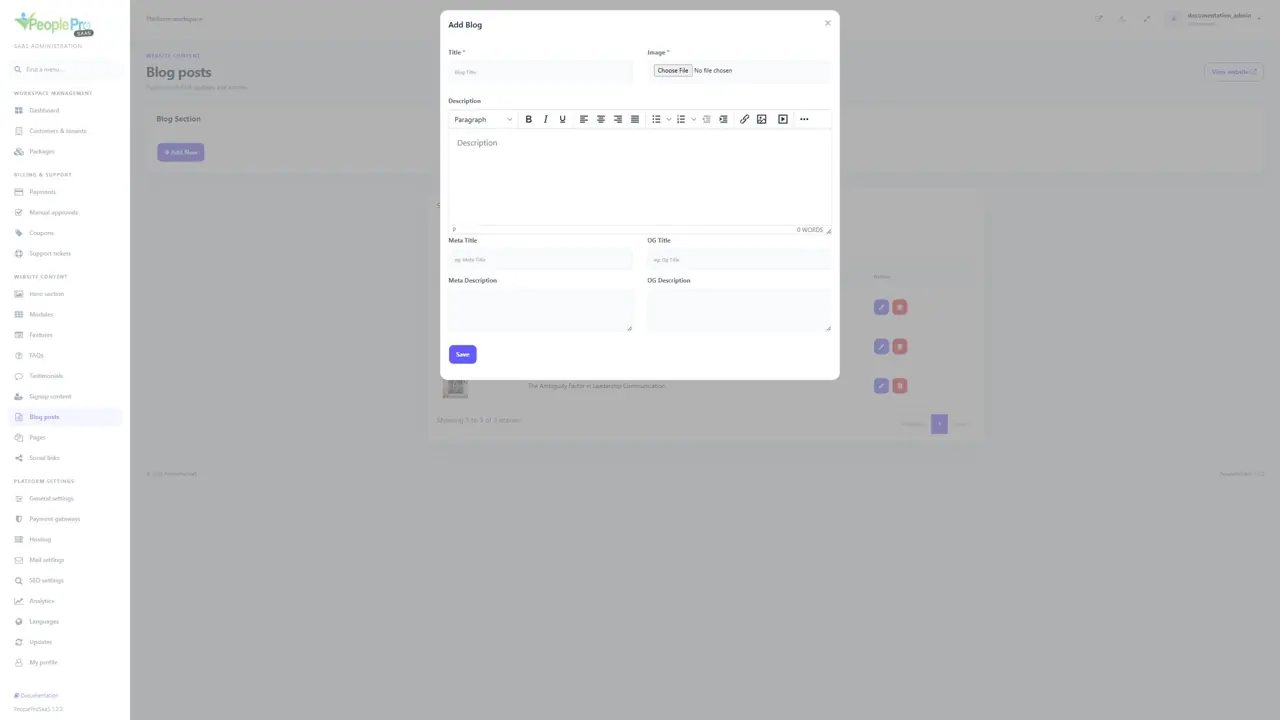
Choose Add New. Enter Title, upload Image and write the article in Description. Meta Title, OG Title, Meta Description and OG Description are optional metadata fields in this form. Select Save after reviewing the article. The public address is generated from Title; no manual slug input is provided. These articles are managed centrally by the superadmin.
Edit or delete a blog article
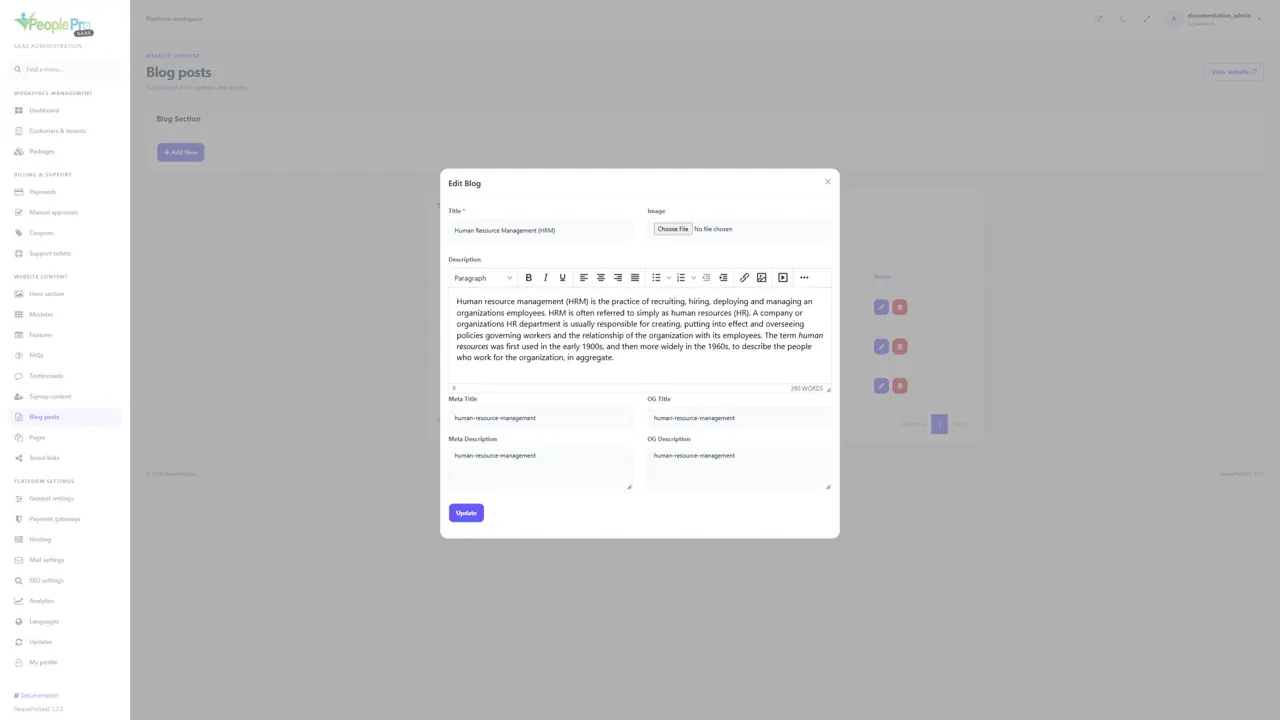
Use the row edit button to review the title, current image, description and metadata, then choose Update. Choose a new image only when replacing the existing one. Review the public article address after changing its title. The delete action removes the selected article and its associated images; use it only for content you intend to withdraw. No delete action was performed for the guide.
Supporting pages
Use Pages to maintain supporting content such as company information or customer policies. Add New opens Title, Description, Meta Title and Meta Description. The application generates the public address from the title; no slug field is shown. Review the public page after saving. Creating a page does not automatically add it to the current homepage navigation.
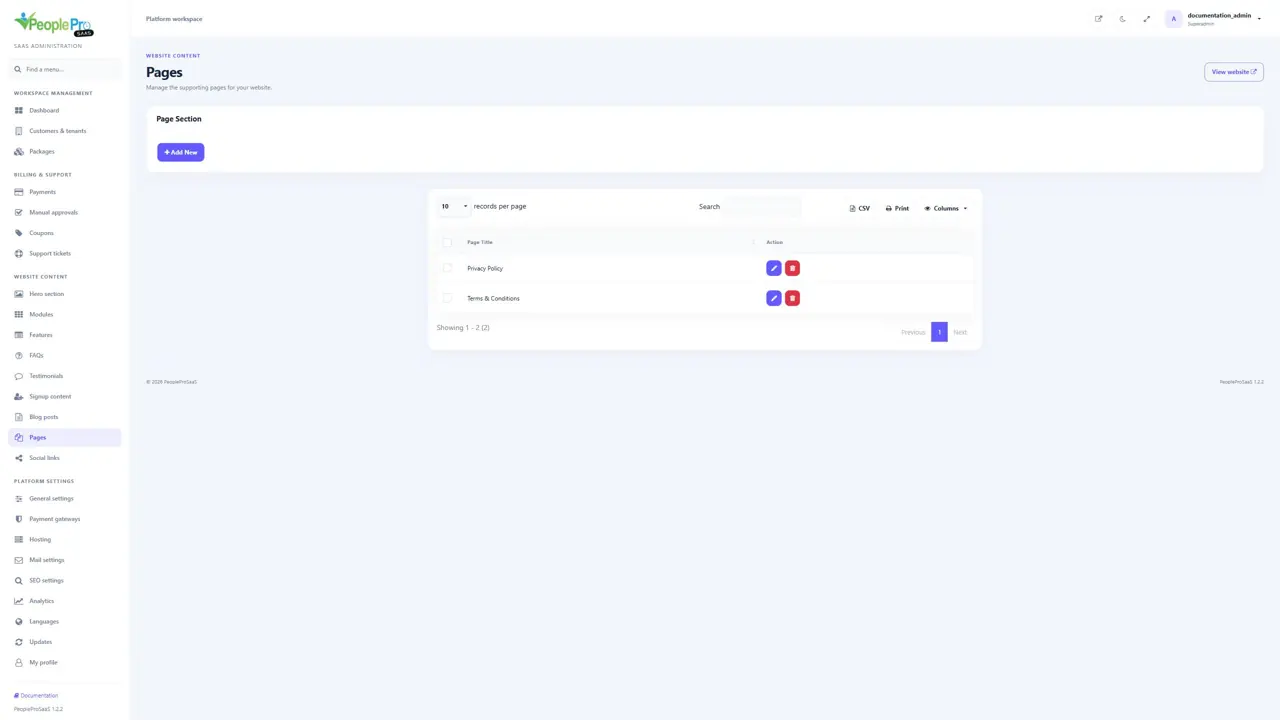
Add a supporting page
Select Add New in Pages. Enter Title and the required Description, then add Meta Title and Meta Description when needed. Use Save to create the central website page. Its address is generated from the title. Review the resulting page content and decide how visitors will reach it, because the current homepage does not automatically add every page to its navigation.
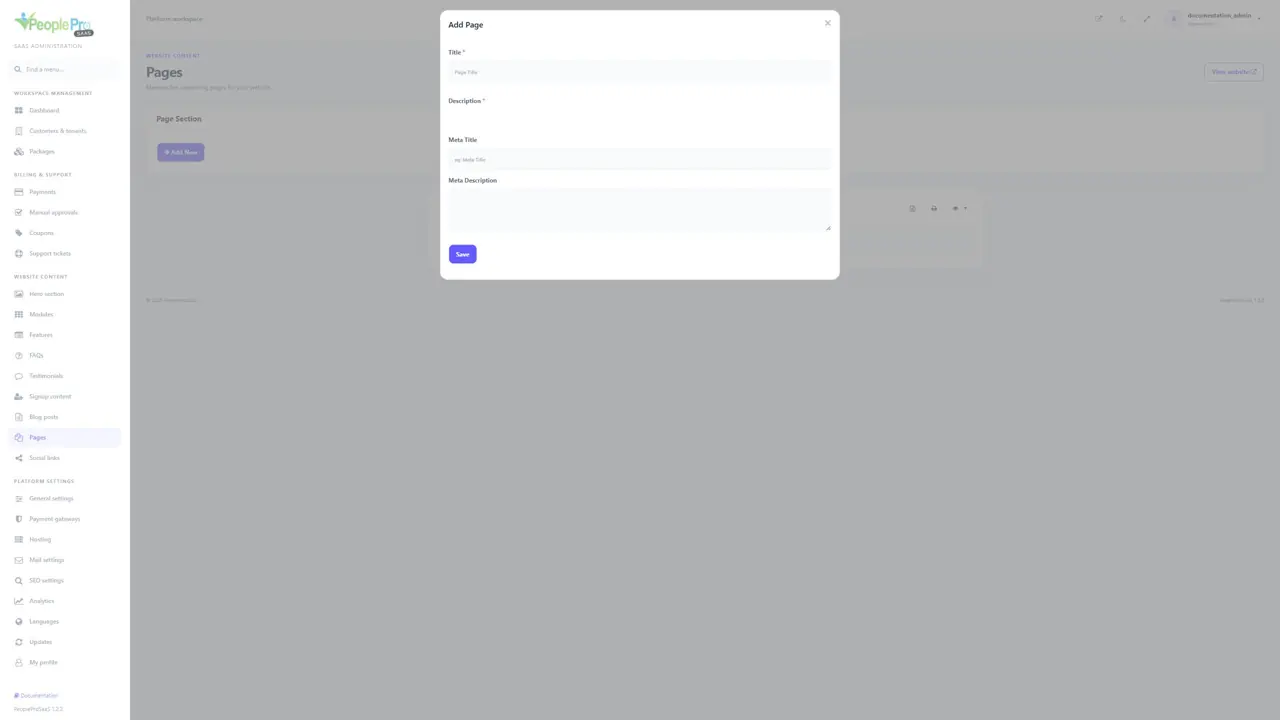
Edit or remove a supporting page
Choose the row edit action to change the title, page content or metadata, then select Update. Recheck links after a title change. Delete applies to the selected supporting page, so confirm the intended row first. Use this area for platform website content; it does not edit a tenant company policy or HR document.
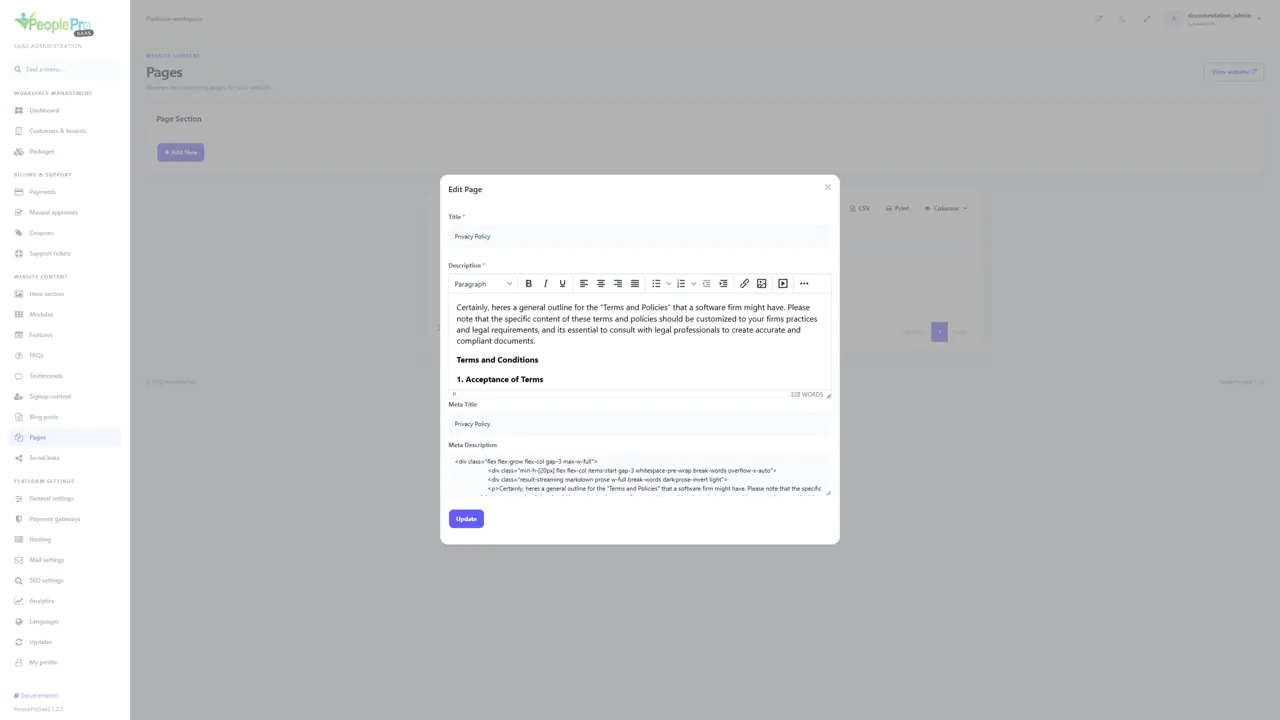
Social links
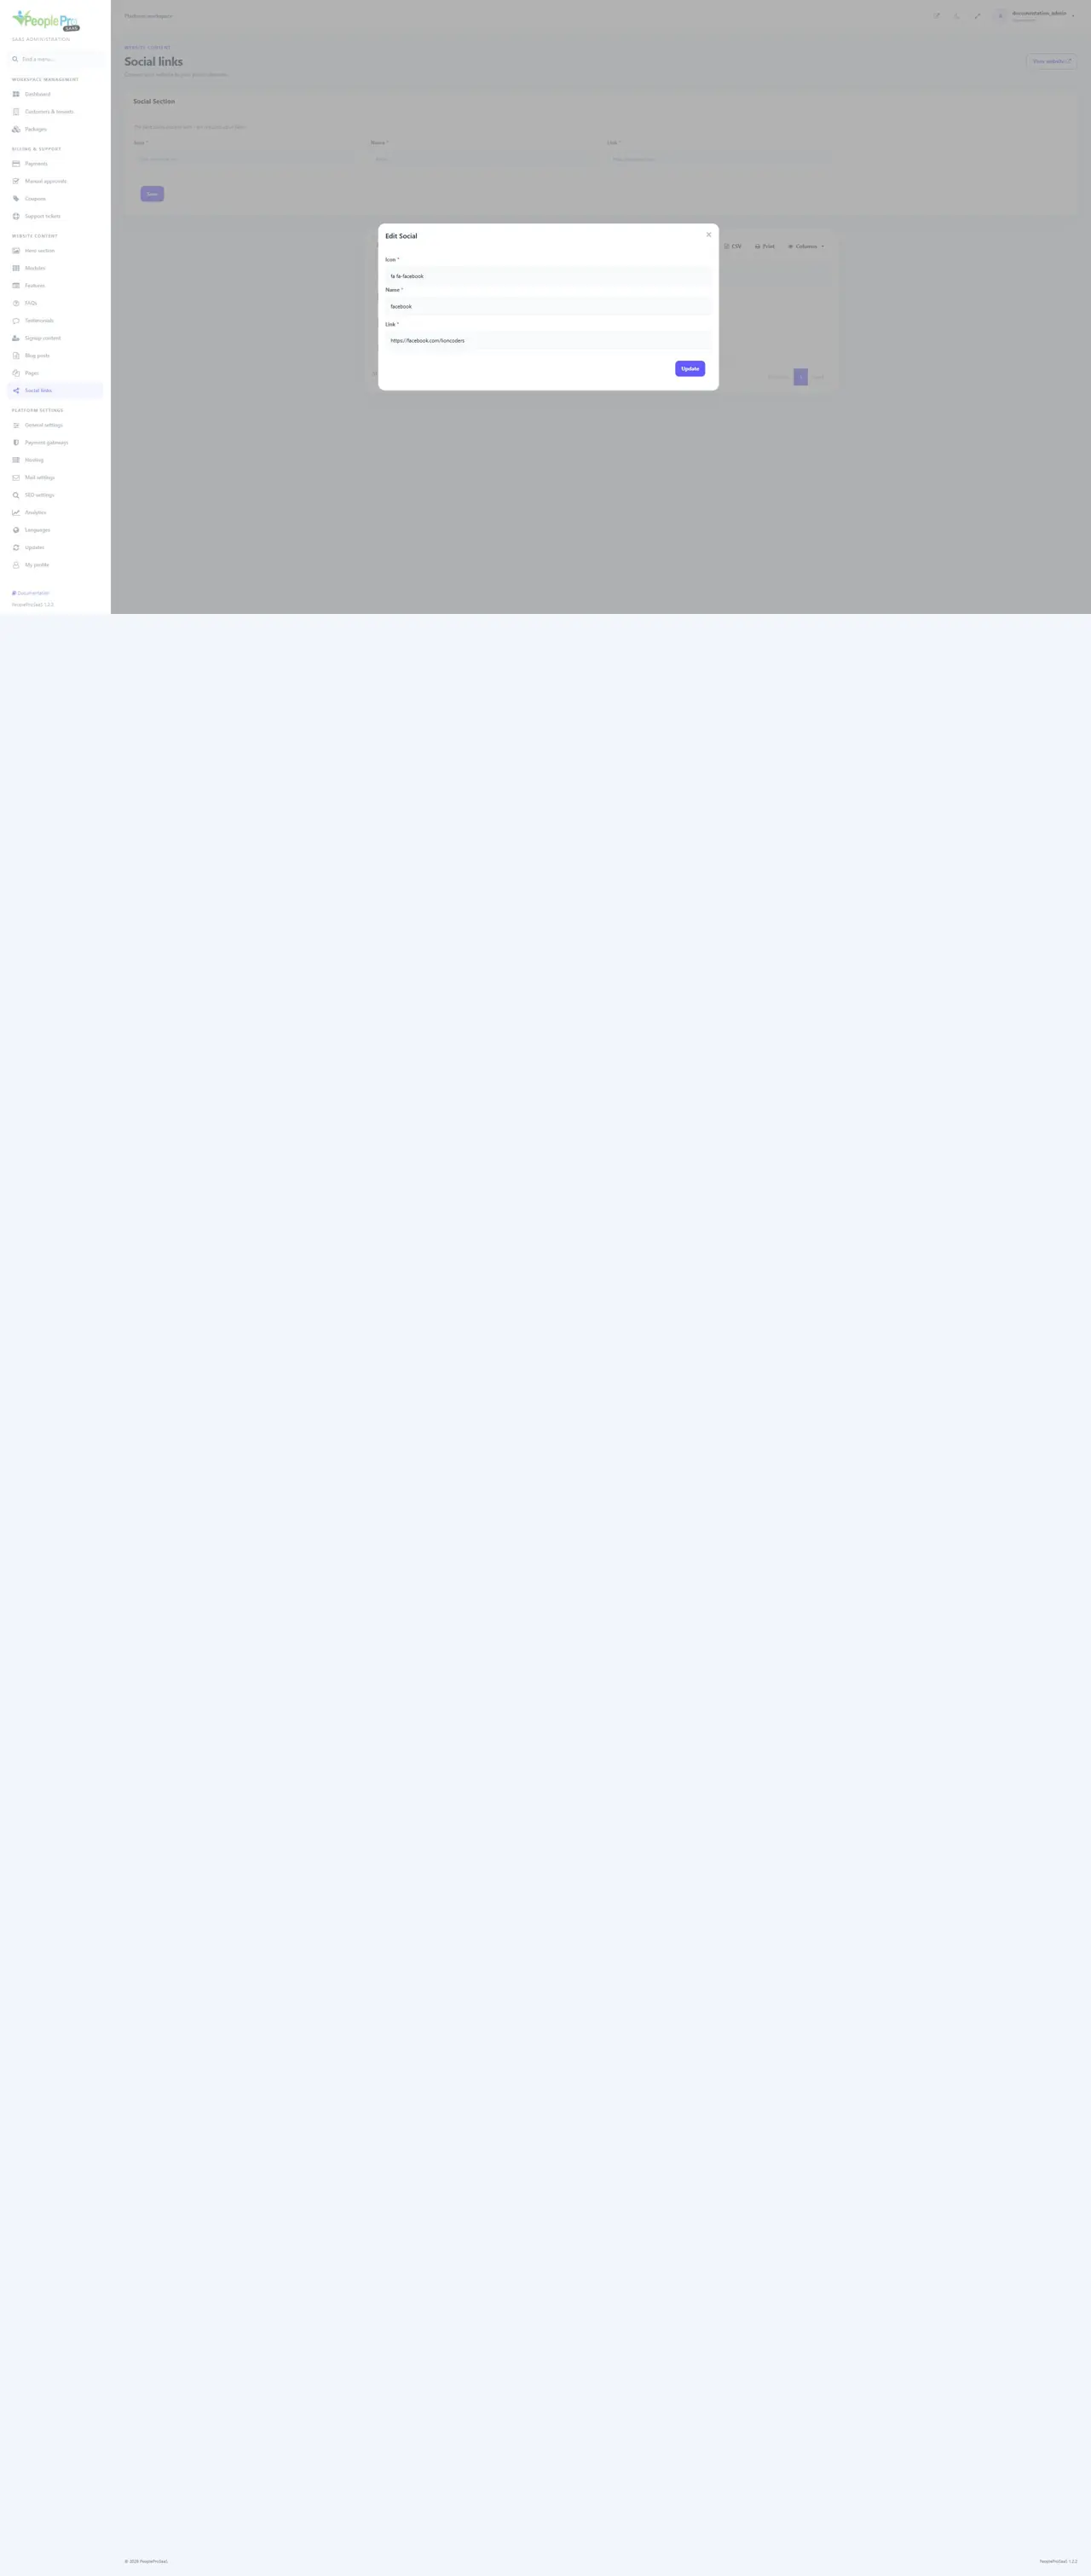
Use Social links to maintain Name, Icon and Link. Fill the form above the table to add a channel, or use its row action to edit it. Enter the public profile URL. The current form has no display-order input. These records belong to the earlier public content layout; the current compact homepage footer does not automatically publish them.
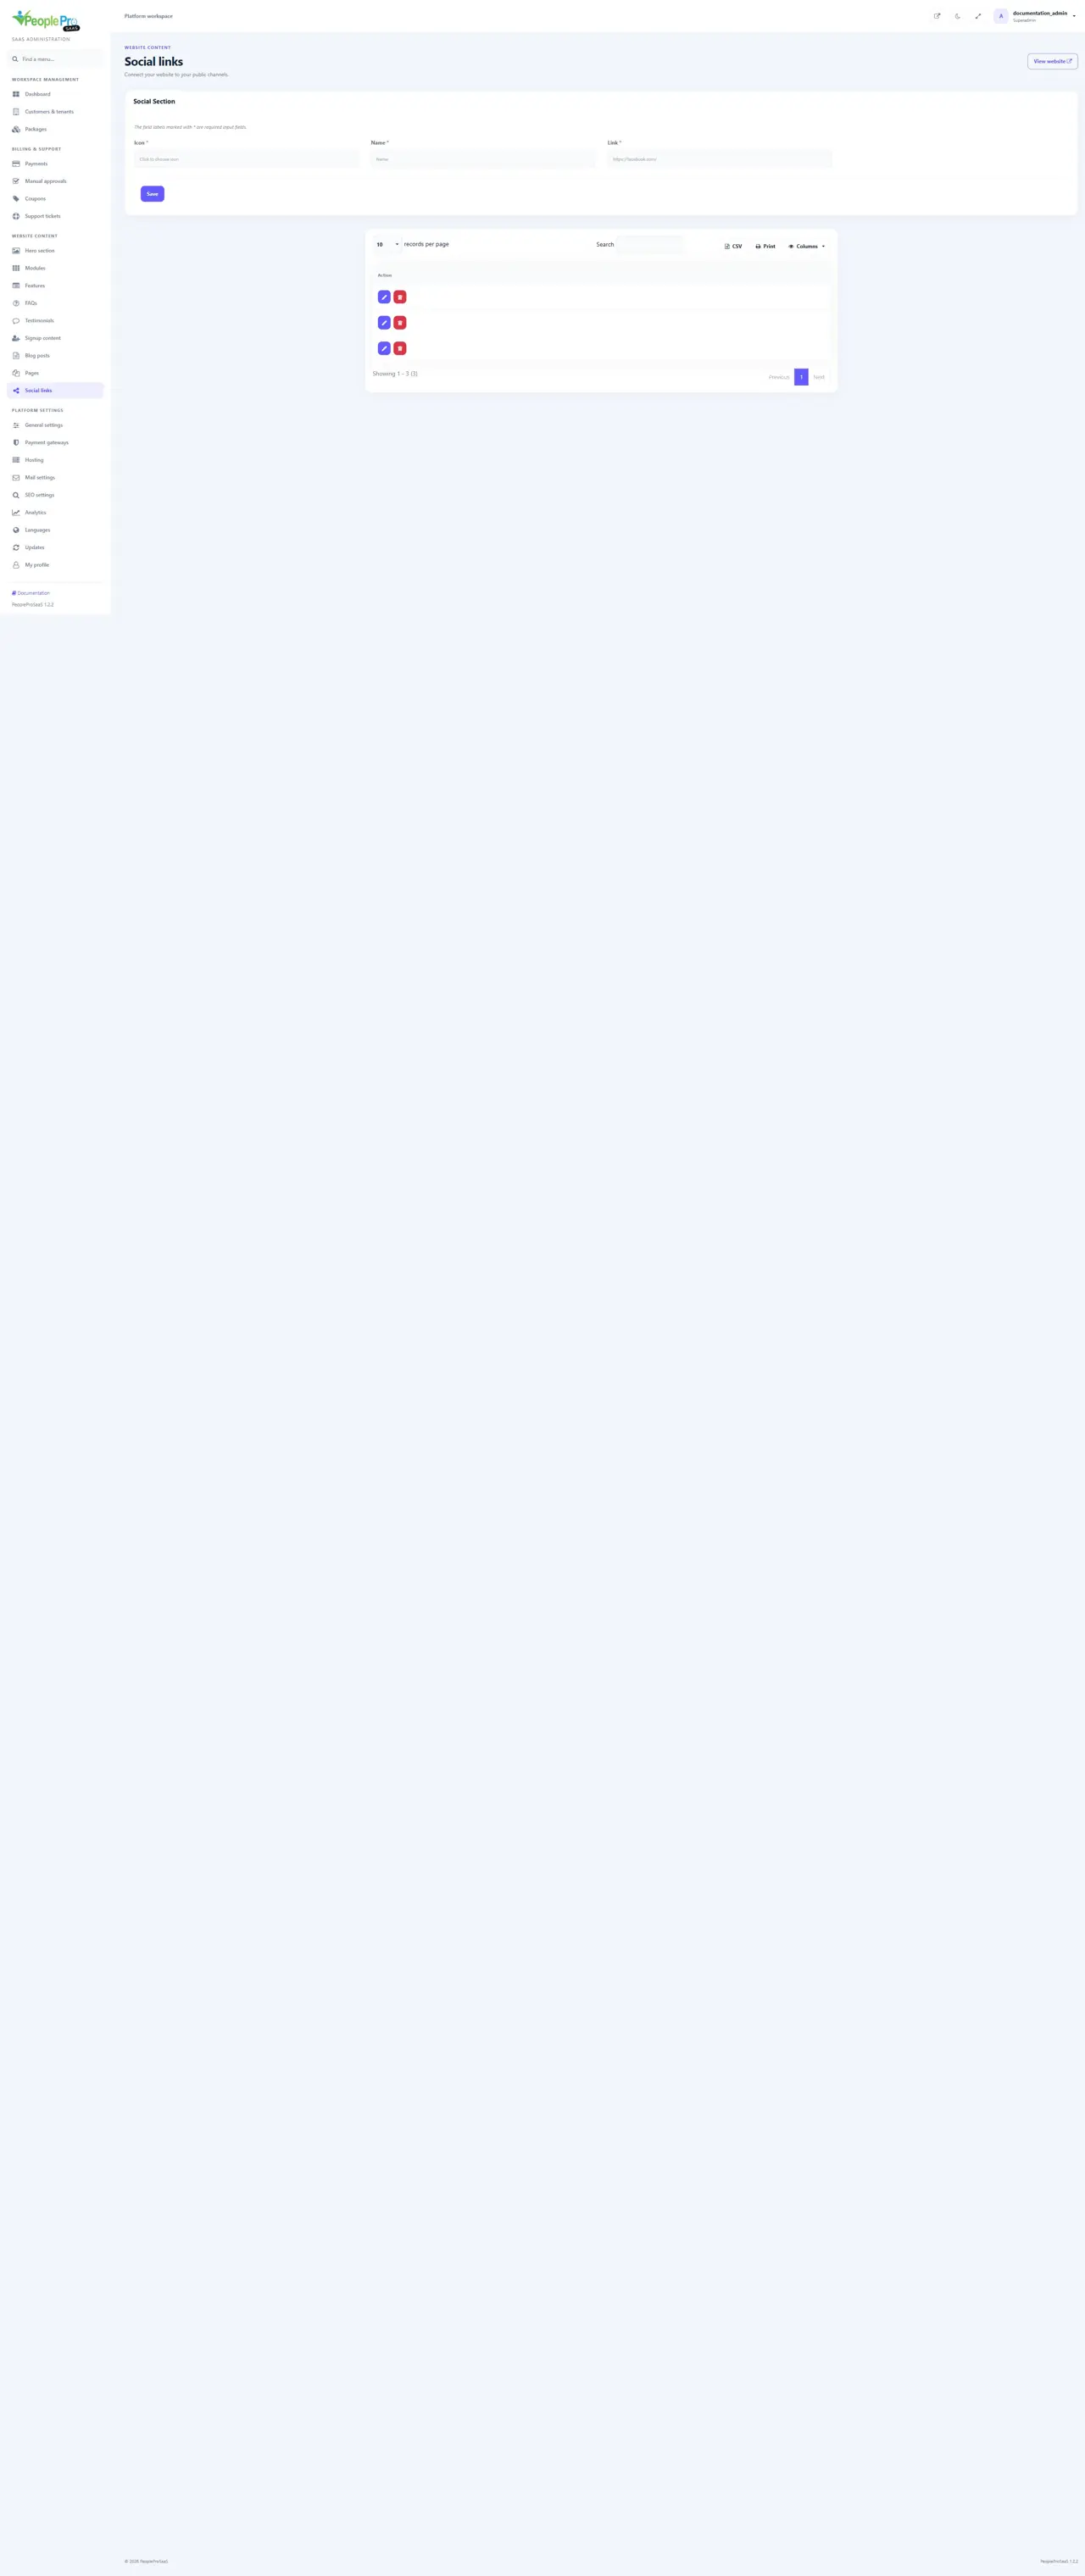
Edit a social channel
Use the row edit action to change Icon, Name or Link and choose Update. Link should be the full public address of the intended channel. The form above the list adds a new entry, and the row delete control removes an unwanted entry. This form has no separate display-order field. Preview the website layout that actually uses this legacy social collection.