A practical, publication-ready guide for Ubuntu 24.04 LTS, SSH, firewall ports, first login, security, and troubleshooting.
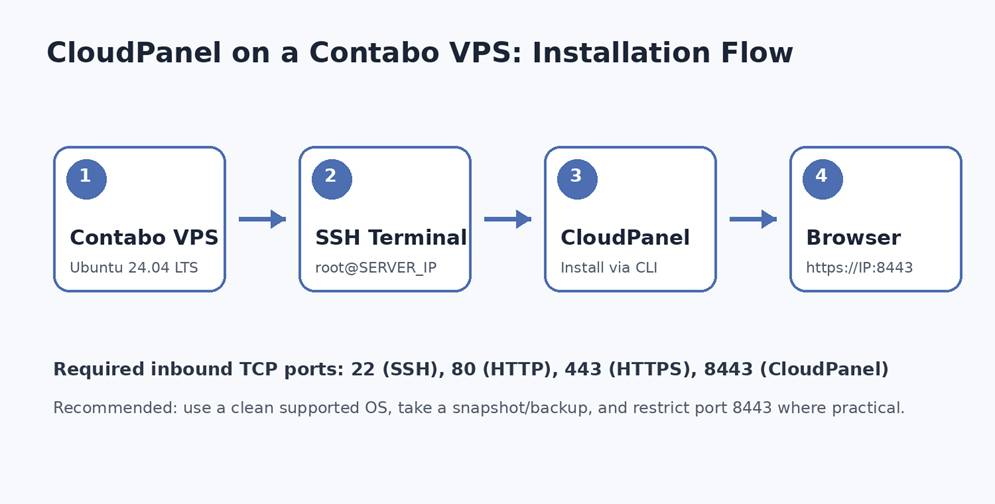
Figure 1. The complete installation path from a fresh Contabo VPS to the CloudPanel web interface.
| Updated guidance: This article is written for current CloudPanel CE requirements as checked in August 2026. Commands and supported operating systems can change, so verify the official documentation before using the guide on a production server. |
Introduction#
CloudPanel is a free server control panel designed to make website and application hosting easier without the overhead of a traditional hosting stack. It provides a browser-based interface for managing websites, databases, SSL certificates, users, cron jobs, logs, and server resources while using a lightweight stack built around technologies such as NGINX and PHP-FPM.
Contabo VPS instances are a good fit for a manual CloudPanel installation because you receive root-level Linux access and can install the panel directly from the terminal. This tutorial walks through the process from a clean VPS to the first CloudPanel login, with extra attention to firewall access and post-install security.
What You Need Before Starting#
| Requirement | Recommended / Required |
| Operating system | Ubuntu 24.04 LTS is used in this guide. CloudPanel also lists Ubuntu 22.04 LTS and Debian 12/11 as supported. |
| CPU | Minimum 1 CPU core; 2+ cores are more comfortable for production workloads. |
| Memory | Minimum 2 GB RAM; 4 GB or more is preferable for multiple or busier sites. |
| Disk | At least 10 GB free space; production servers should have substantially more for sites, logs, databases, and backups. |
| Access | Root SSH access to the Contabo VPS. |
| Network | A public IP address. TCP ports 22, 80, 443, and 8443 must be reachable as needed. |
| Important: Use a fresh server image when possible. Installing CloudPanel on a server that already has Apache, NGINX, MySQL/MariaDB, or another hosting control panel can cause port and package conflicts. |
Step 1: Deploy or Reinstall a Clean Ubuntu VPS on Contabo#
If the VPS is new, select a supported standard Linux image during provisioning. If the server already contains another web stack or control panel, the safest approach is usually to back up anything important and reinstall the VPS with a clean supported operating system.
For this guide, choose Ubuntu 24.04 LTS. During provisioning or reinstallation, securely store the root password or configure an SSH public key. A reinstall destroys existing server data, so never do it without a verified backup.
Contabo’s current support documentation explains that server IP/login information is available through the account/service information and that Linux servers are accessed over SSH.
Step 2: Connect to the VPS with SSH#
On Windows Terminal, PowerShell, macOS Terminal, or a Linux terminal, run:
| ssh root@YOUR_SERVER_IP |
Example:
| ssh root@203.0.113.10 |
The first connection may ask you to confirm the server’s host fingerprint. Confirm only after making sure you are connecting to the correct server IP. Then enter the root password if you are using password authentication.
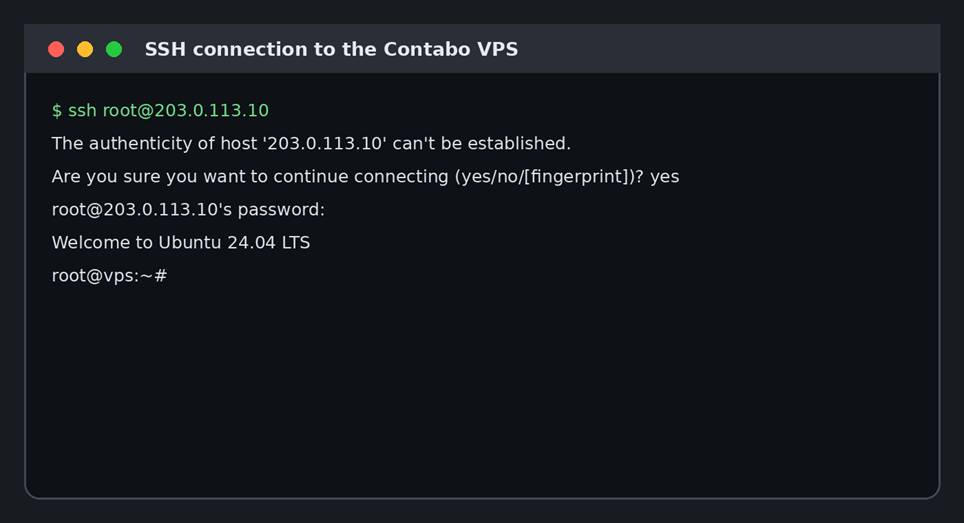
Figure 2. Illustration of the first SSH connection. Replace the example IP with your actual Contabo VPS address.
Step 3: Confirm the Operating System and Basic Resources#
Before installing anything, confirm that the server is running the expected OS and has enough disk and memory:
| cat /etc/os-release free -h df -h nproc |
Check that the OS reports Ubuntu 24.04 LTS (or another currently supported CloudPanel OS), memory is at least 2 GB, and the root filesystem has sufficient free space.
Step 4: Update Ubuntu#
Refresh package information and install available upgrades:
| apt update && apt -y upgrade |
Then install a few common command-line utilities used during setup:
| apt -y install curl wget sudo |
| Reboot note: If Ubuntu reports that a reboot is required after major package or kernel upgrades, run `reboot`, wait for the VPS to return online, and reconnect with SSH before continuing. |
Step 5: Check for Services Already Using Web Ports#
CloudPanel needs to configure the web stack. On a clean VPS, ports 80 and 443 should normally not be occupied by an existing Apache or NGINX installation. You can inspect listening ports with:
| ss -tulpn | grep -E ‘:80|:443|:8443’ |
If an unexpected web server or control panel is already listening on these ports, do not blindly continue. Identify why it is installed. For a new CloudPanel server, reinstalling a clean OS is often safer than trying to merge two hosting stacks.
Step 6: Make Sure the Required Firewall Ports Are Reachable#
CloudPanel’s installation guidance identifies TCP 22 for SSH, 80 for HTTP, 443 for HTTPS, and 8443 for the CloudPanel interface. If you use Contabo’s firewall feature, allow these ports as appropriate. Also check any operating-system firewall you have configured.
| TCP Port | Purpose | Exposure |
| 22 | SSH administration | Preferably restrict to trusted IPs when practical |
| 80 | HTTP websites | Public |
| 443 | HTTPS websites | Public |
| 8443 | CloudPanel admin interface | Restrict to trusted IPs when practical |
If UFW is already enabled, an example rule set is:
| ufw allow 22/tcp ufw allow 80/tcp ufw allow 443/tcp ufw allow 8443/tcp ufw status |
| Avoid lockout: Do not enable or change firewall rules remotely until SSH access is explicitly allowed. A bad firewall rule can disconnect you from the VPS. |
Step 7: Run the CloudPanel Installer#
CloudPanel publishes a Community Edition installer. From the root SSH session, run the official installer command:
| curl -sSL https://installer.cloudpanel.io/ce/v2/install.sh | sudo bash |
The script installs and configures the components CloudPanel needs. Let it finish completely. Installation time depends on the VPS resources and network speed. Do not close the terminal while package installation and configuration are still running.
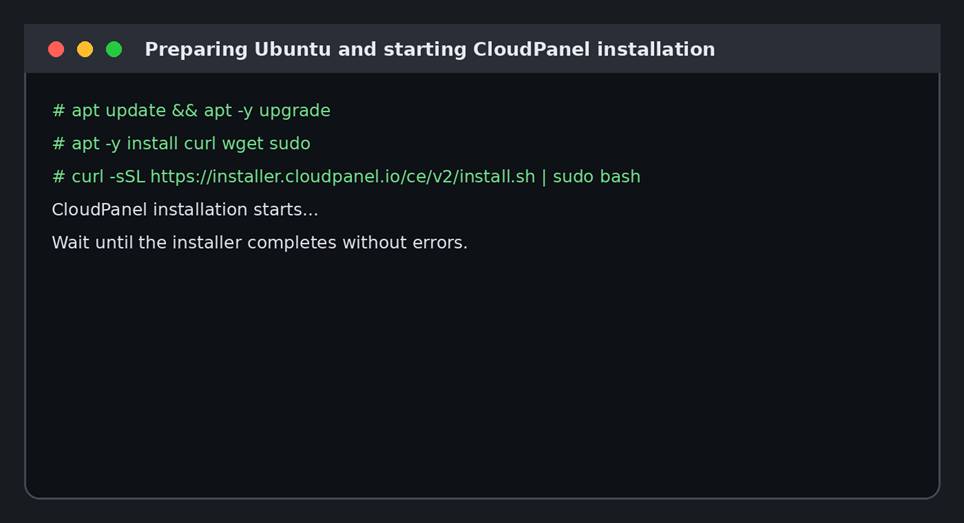
Figure 3. Illustration of the Ubuntu preparation and CloudPanel installer commands.
| Security-minded option: For production environments, consider downloading the installer first and verifying its published checksum or reviewing the current official installation instructions rather than piping a remote script directly into a shell. |
Step 8: Open CloudPanel in Your Browser#
After the installation finishes, open the following address in a browser:
| https://YOUR_SERVER_IP:8443 |
For example, if the VPS IP were 203.0.113.10, the address would be `https://203.0.113.10:8443`. The first visit by IP may show a browser warning because the panel can initially present a self-signed certificate. Verify that the IP is your server before proceeding.
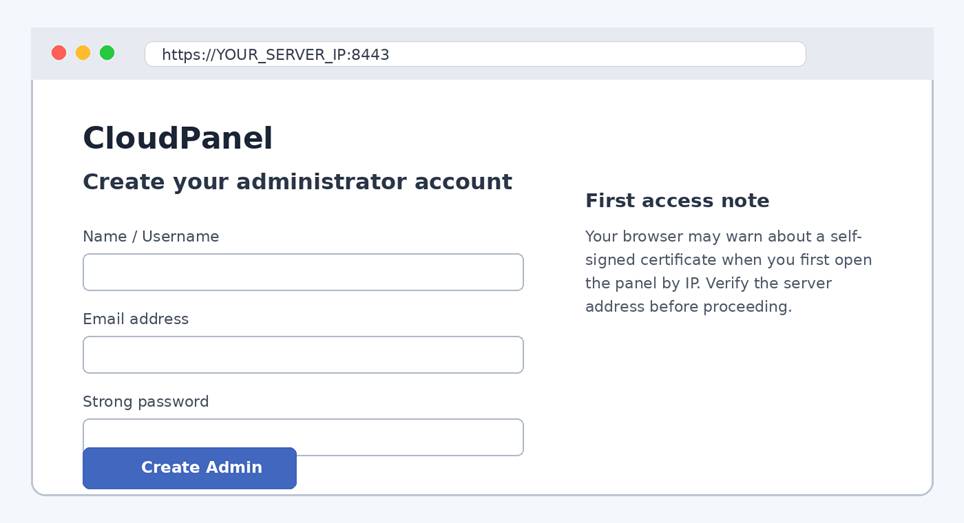
Figure 4. Simplified illustration of the first CloudPanel browser visit and administrator creation screen.
Step 9: Create the First CloudPanel Administrator#
On the first setup screen, create the administrator account. Use a unique username, an email address you control, and a long unique password. Do not reuse the VPS root password. Store the credential in a password manager.
After signing in, the dashboard should show server information and resource monitoring such as CPU, memory, disk usage, and load average. You can then create websites and manage the hosting environment from the panel.
Step 10: Recommended Security Tasks After Installation#
- Restrict SSH access: use SSH keys and consider disabling password-based root login only after confirming key-based login works.
- Restrict CloudPanel port 8443 to trusted administrator IP addresses when your workflow allows it.
- Keep Ubuntu and CloudPanel updated and review release notes before major upgrades.
- Use strong, unique administrator credentials and enable additional account security features available in your CloudPanel version.
- Point domains to the VPS and use trusted TLS certificates such as Let’s Encrypt for hosted websites.
- Maintain off-server backups. A backup stored only on the same VPS is not sufficient protection against disk failure, compromise, or accidental deletion.
- Before risky server changes, create a provider snapshot or another tested recovery point when available.
Useful Verification Commands#
Check whether CloudPanel’s web interface is listening:
| ss -tulpn | grep 8443 |
Check the server’s IP addresses:
| ip addr |
Check disk usage:
| df -h |
Check memory:
| free -h |
Check UFW status if you use UFW:
| ufw status verbose |
Troubleshooting Common Problems#
1. SSH connection times out#
Confirm the VPS is running, verify the IP address, and make sure TCP port 22 is allowed. Contabo also documents VNC as a recovery path when normal network access is unavailable, which can help you inspect firewall or network settings.
2. “REMOTE HOST IDENTIFICATION HAS CHANGED” after reinstalling#
If you intentionally reinstalled the same VPS and verified the new server identity, remove the old local host-key entry:
| ssh-keygen -R YOUR_SERVER_IP |
Then reconnect and verify the new fingerprint before accepting it.
3. CloudPanel does not open on port 8443#
First verify that the service is listening with `ss -tulpn | grep 8443`. Then check the Contabo firewall and the server firewall. If the port is listening locally but unreachable externally, a firewall rule is the most likely place to investigate.
4. Port 80 or 443 is already in use#
This often means Apache, NGINX, another control panel, or a previous application stack is already installed. On a server intended solely for CloudPanel, a clean OS reinstall is usually the least error-prone solution.
5. Installation fails after package errors#
Refresh packages and inspect the failed package state:
| apt update apt –fix-broken install dpkg –configure -a |
Do not repeatedly rerun an installer without reading the error. If the VPS was not clean or the OS is unsupported, fix that root cause first.
What You Can Do Next in CloudPanel#
Once the panel is working, the next logical step is to point a domain’s DNS A/AAAA records to the VPS, add the site in CloudPanel, deploy the application, create its database if required, and issue a Let’s Encrypt certificate. CloudPanel’s site wizard supports common workloads including WordPress, PHP applications, Node.js, Python, and static sites.
Quick Installation Checklist#
☐ Use a clean CloudPanel-supported Ubuntu or Debian installation.
☐ Confirm at least 1 CPU core, 2 GB RAM, and 10 GB free disk space.
☐ Connect as root over SSH.
☐ Update the operating system.
☐ Install curl, wget, and sudo.
☐ Verify that conflicting web services are not already using ports 80/443.
☐ Allow TCP 22, 80, 443, and 8443 as required.
☐ Run the current official CloudPanel CE installer.
☐ Open https://SERVER_IP:8443 and create the administrator.
☐ Apply post-install SSH, firewall, update, TLS, and backup hardening.
Conclusion#
Installing CloudPanel on a Contabo VPS is straightforward when you begin with a clean supported operating system and prepare network access correctly. The essential workflow is: provision Ubuntu, connect with SSH, update the server, allow the required ports, run the official CloudPanel installer, and complete the first browser-based administrator setup. For a production server, the installation itself is only the beginning—SSH hardening, restricted administrative access, regular updates, SSL, monitoring, and reliable off-server backups are equally important.
Need a hand?
Our support team can help you continue.#
Tell us which step you are on and include a screenshot when possible.
Need a hand?
Our support team can help you continue.
Tell us which step you are on and include a screenshot when possible.